
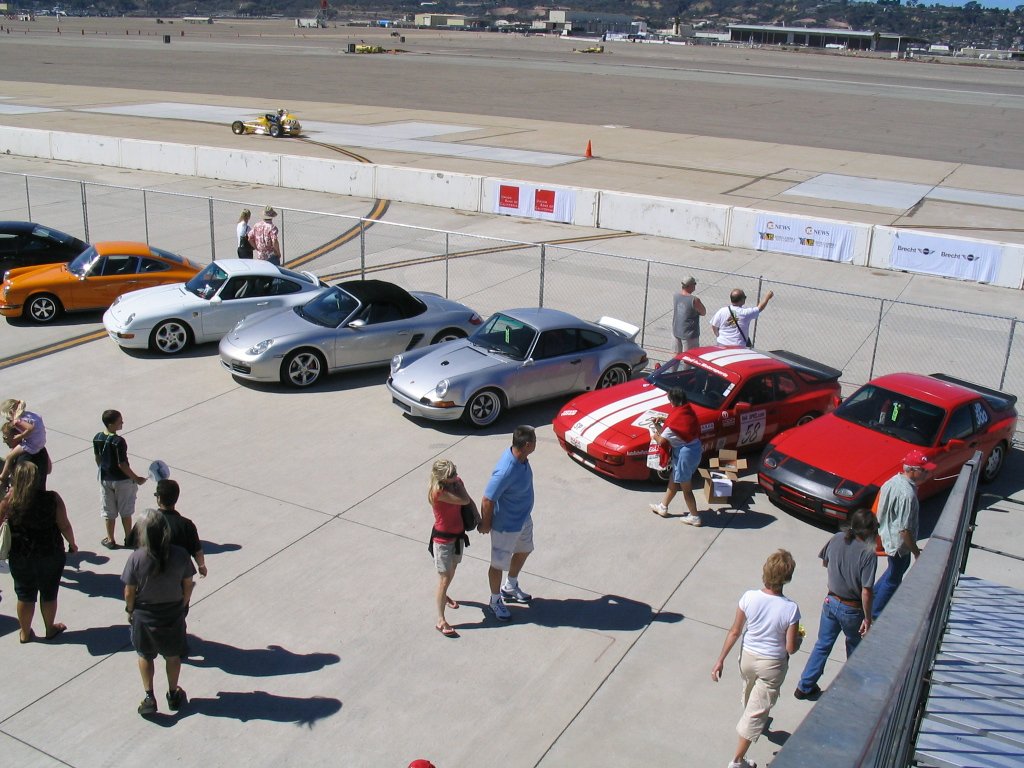
My friend Alonso works for the telephone company and as you can imagine, travels the city streets daily. One day, he drove by a house on the outskirts of San Diego and the silhouette of an early Porsche 911 caught his eye. As a car guy, he couldn't help to stop and inquire about the car. Keep in mind, there was no "for sale" sign or anything particularly inviting and yet he ventured into this person's long gated driveway to knock on the door.
He is a down right friendly guy and before you knew it, the owner agreed to sell him the car. Since the owner was not actively pursuing a sale, he had time to come up with the money. Time went by, one thing led to another and the car took a back seat to more pressing issues. One day, he asked if I would be interested in purchasing the car for myself. No strings attached, just one friend passing on an opportunity to another. He figured if he couldn't buy it he wanted it to go to a good home.
I had some experience working on cars including 914s, a few 911s, one 993 and a Ferrari 308. Little did I know, my previous projects would pale in comparison to what I was about to undertake.
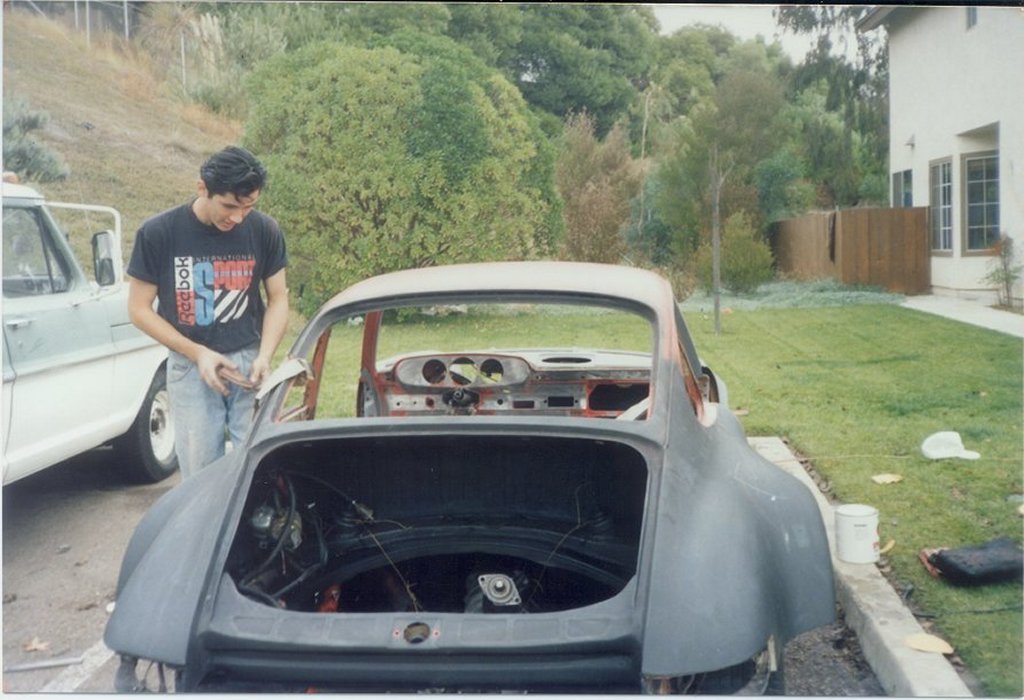
This is my friend Alonso helping out on what was probably my first Porsche project, picture is circa 1992.
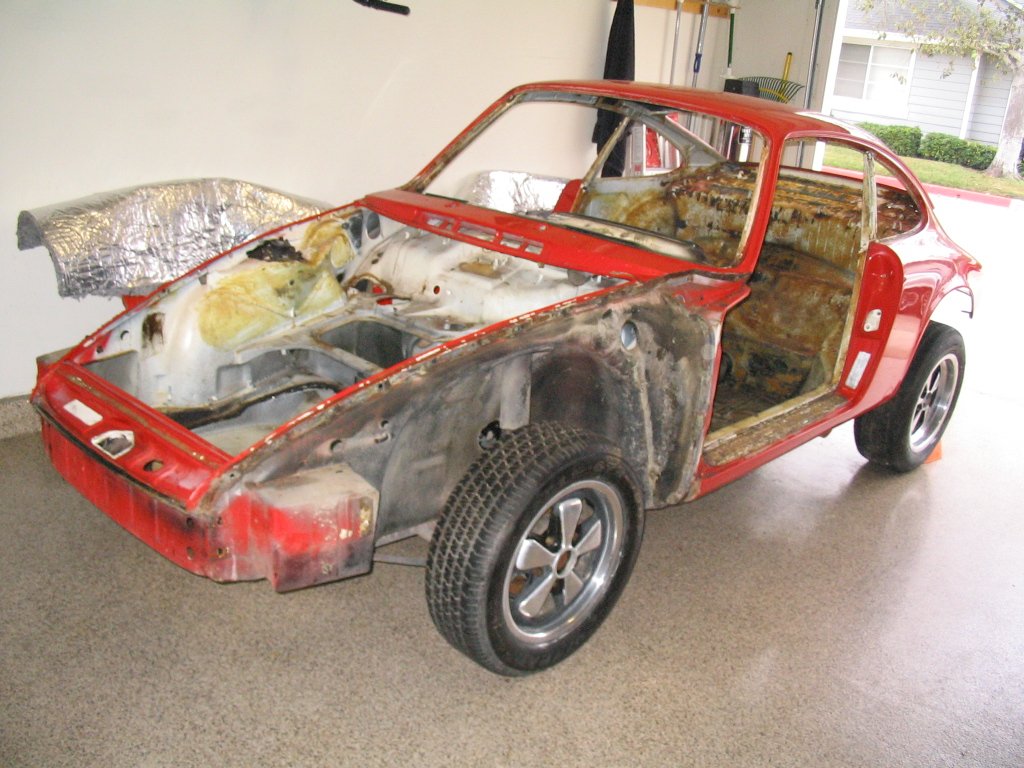
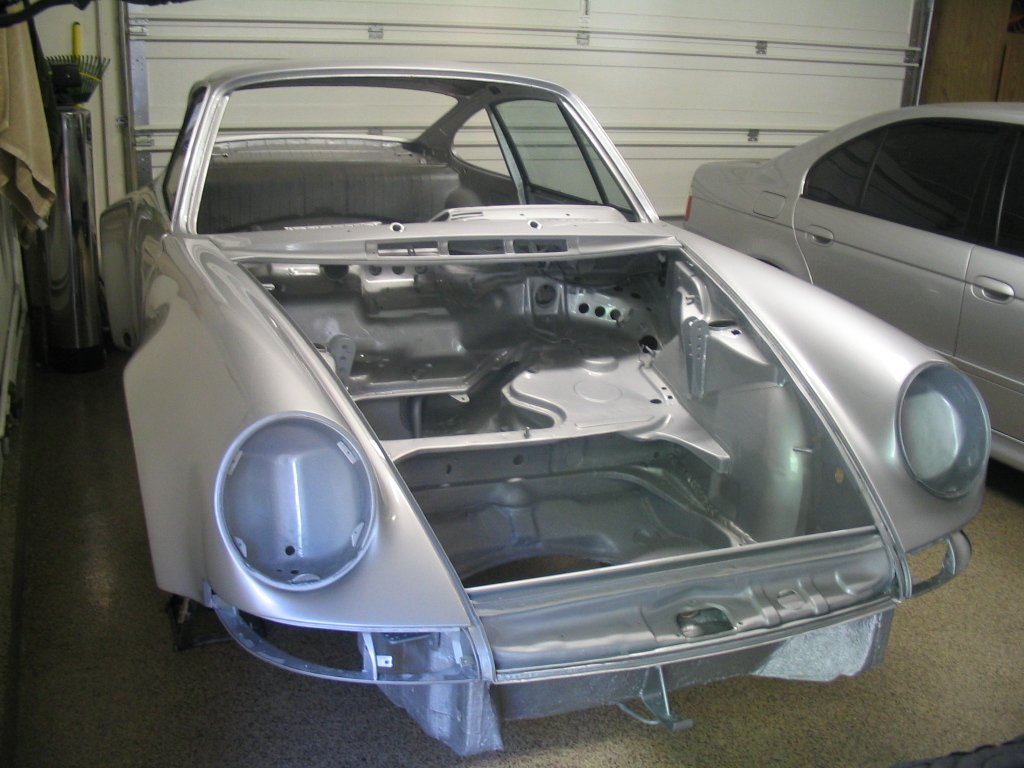
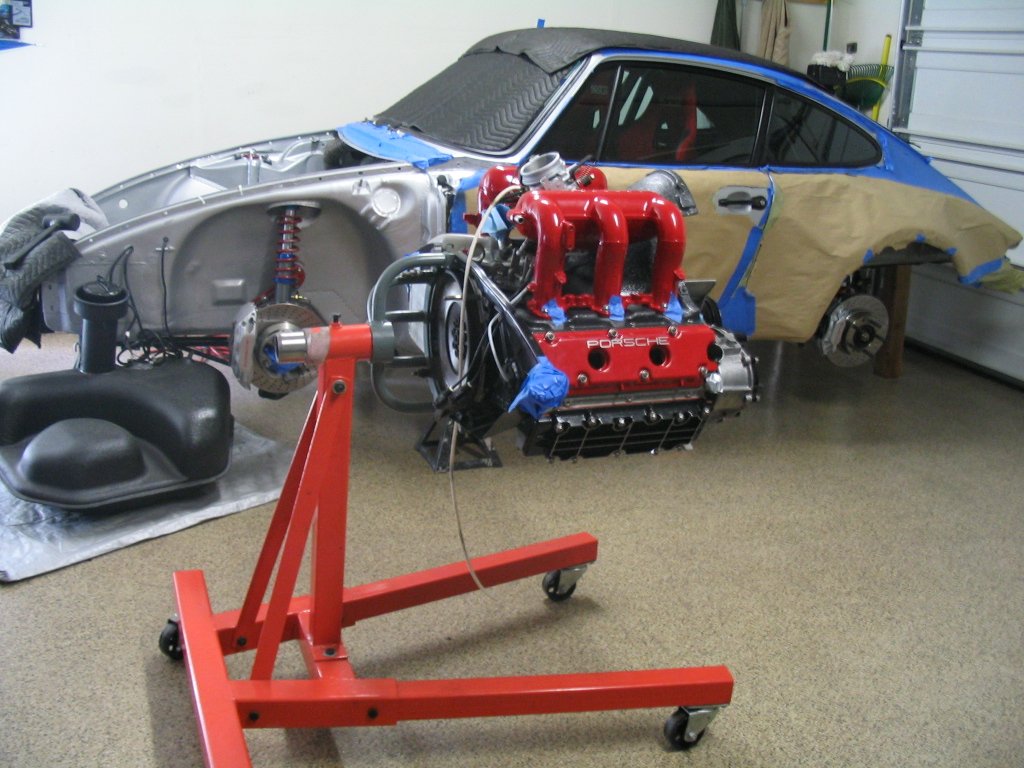
The 1970 Porsche 911 T was a good purchase but needed a lot of work. It sat in the open for years and the engine had seized due to rain sipping past the carburetors. The body was in good condition and there was no major rust.
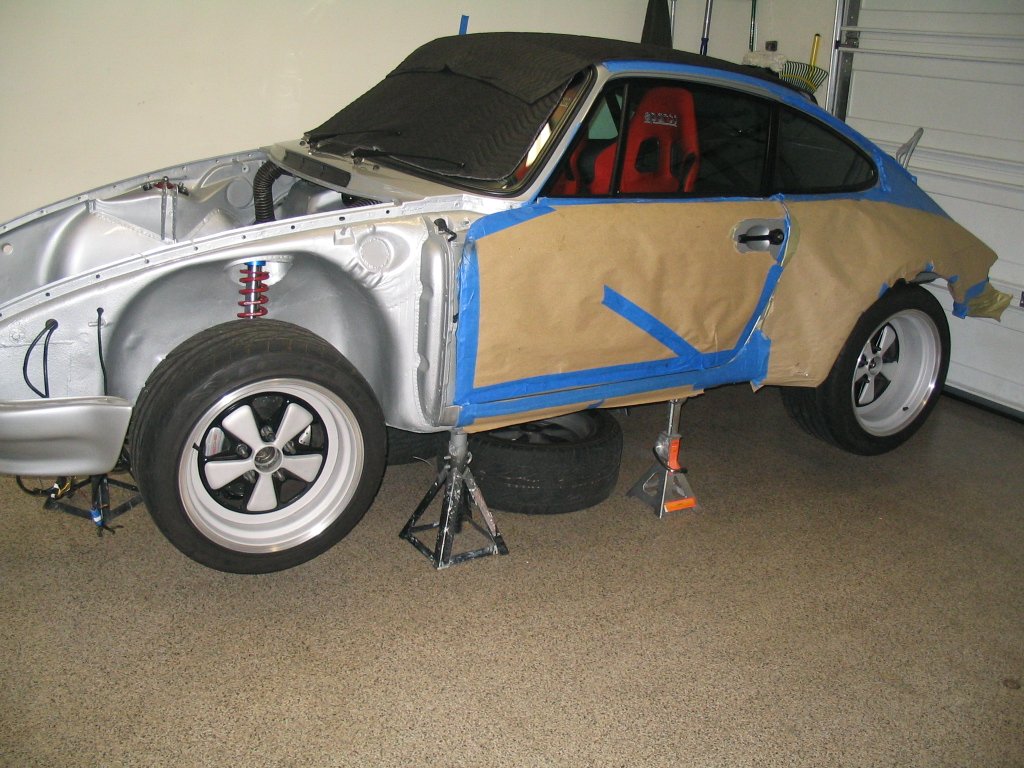
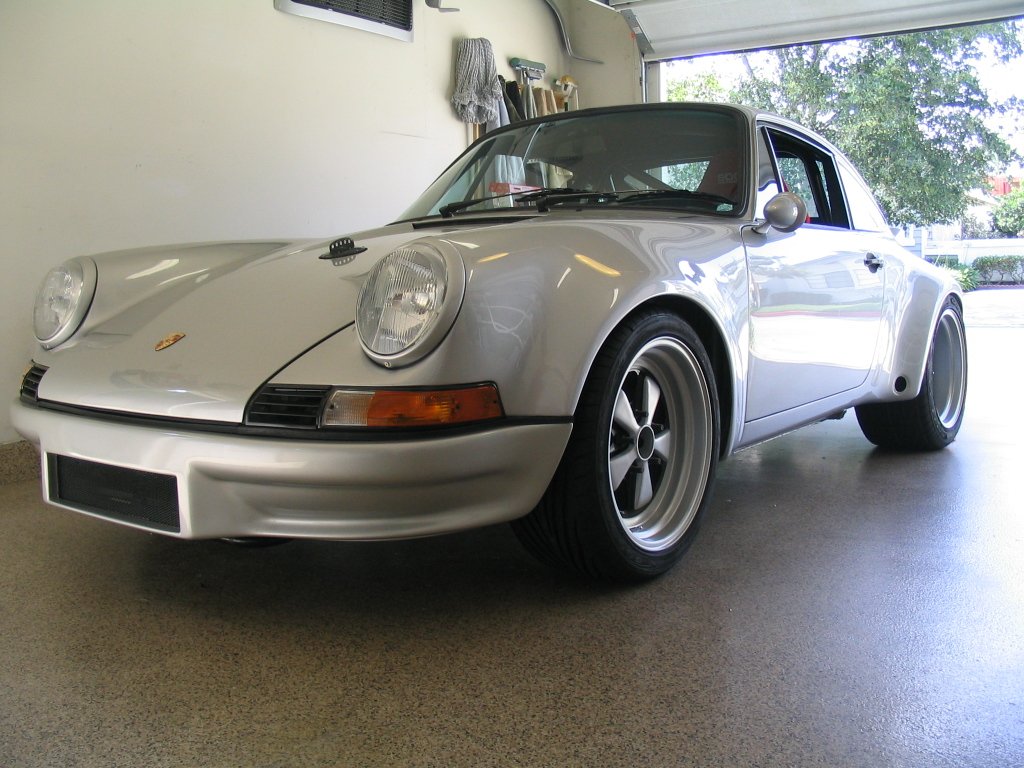
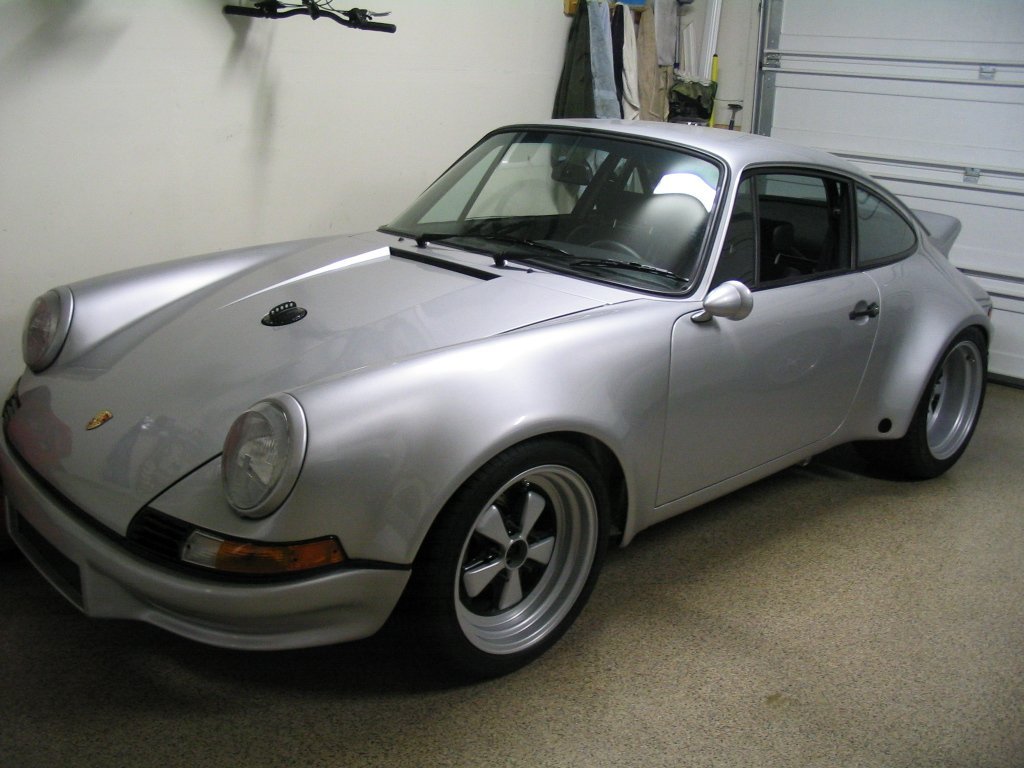
So what to do with a long-hood 911? It didn't hold any sentimental value nor was it a limited production model to warrant a restoration to stock condition. As they say, it was a blank canvas to do as I pleased.
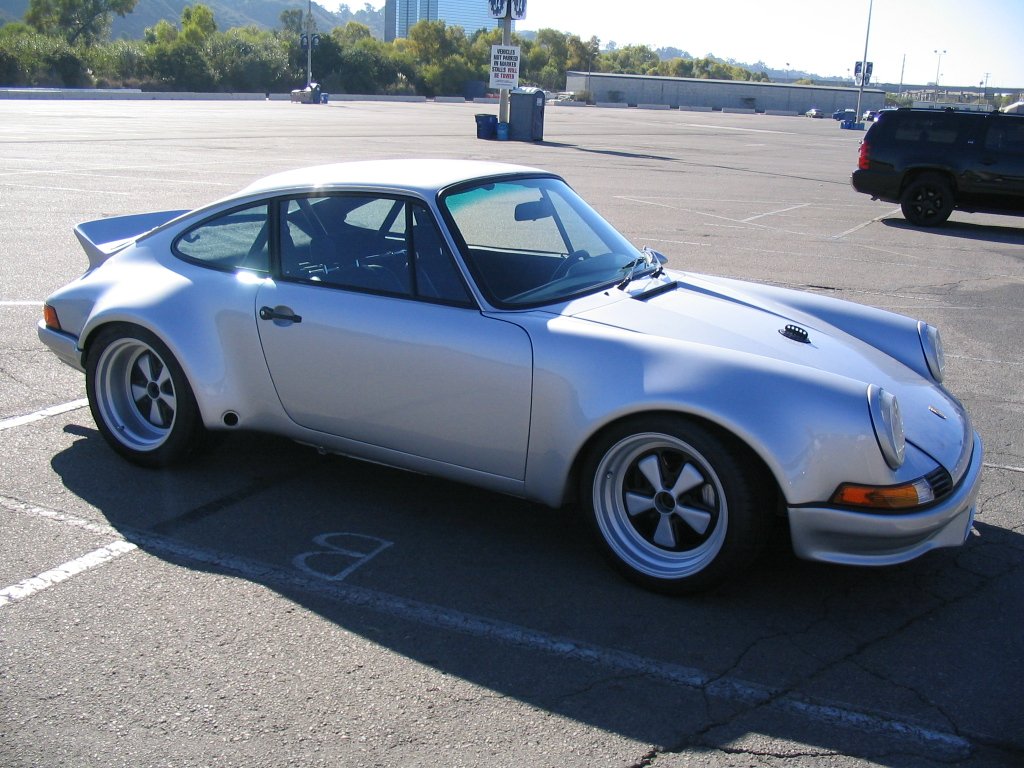
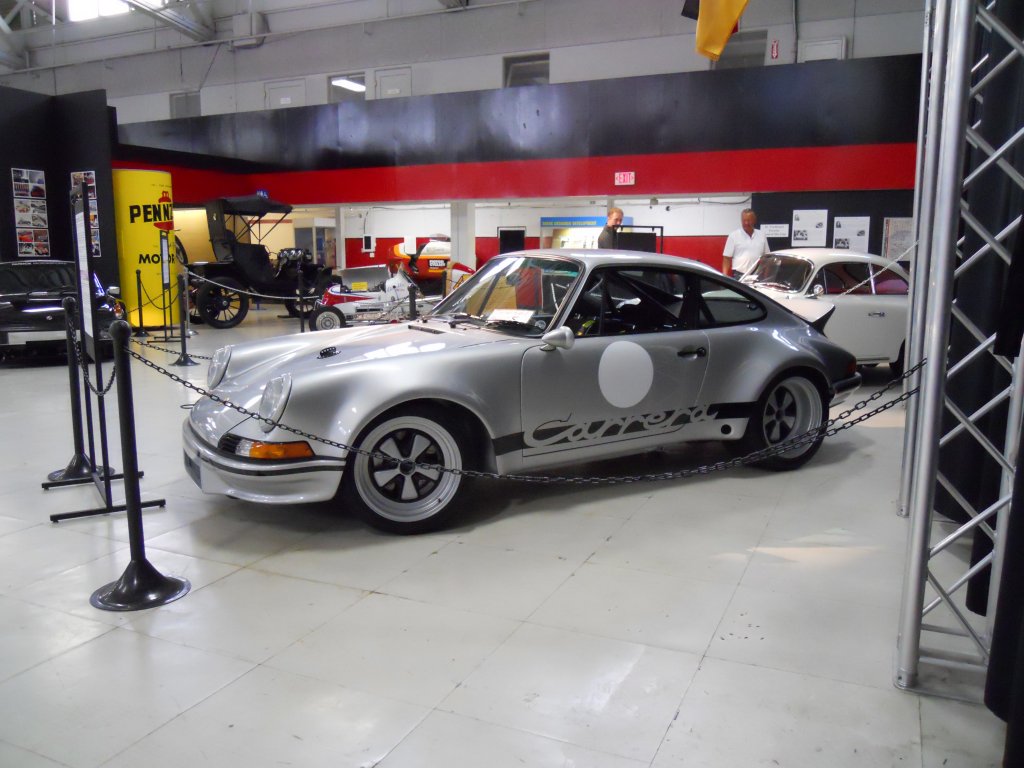
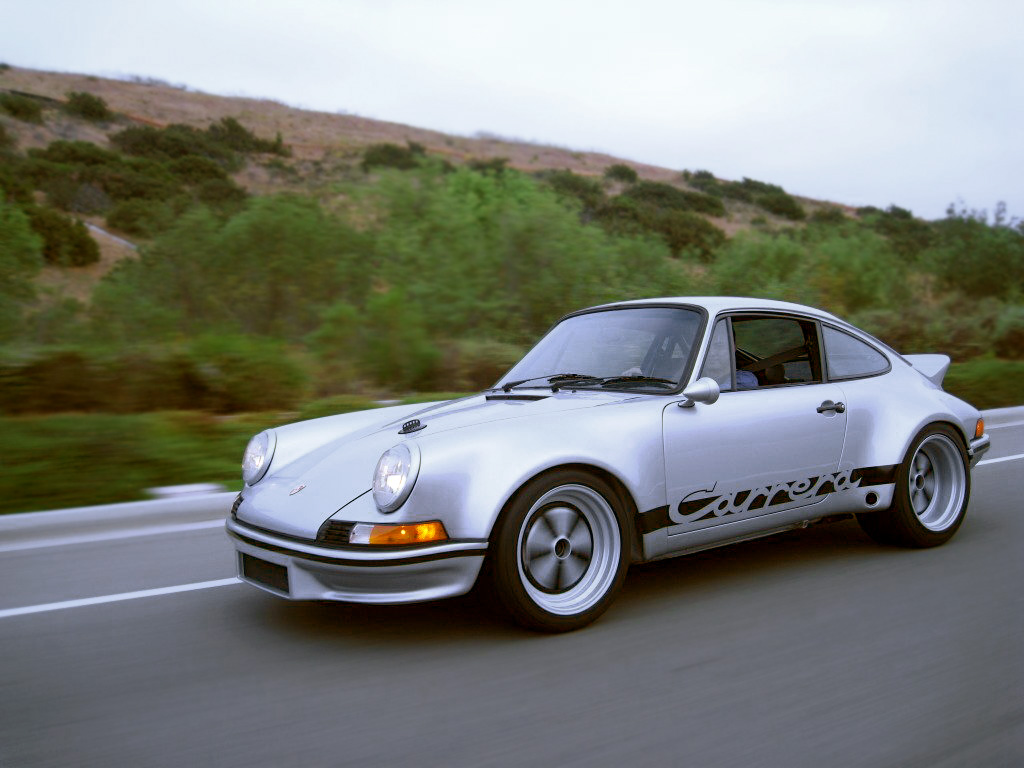
The narrow front fenders and slightly bulging rear arches of the RS had always appealed to me. That was it! I was going to build me a car that resembles the RS!! The plan was to keep it simple, just the bare essentials. Basic interior with no rear seats, no radio, just the minimum to operate the car. On the engine side, carburetors and headers to keep the rear uncluttered. Well… most of what I had in mind would change when I ran across an online thread on the Pelican forum. It was about a local guy who was about to install the engine on his RSR clone. Since he was about 40 minutes from me, I asked if I could stop by, check out his car and possibly help out. WOW! The car was incredible and didn't take long for me to lust over the RSR look. Doug, the owner of the RSR interpretation as he calls it, encouraged me and offered some good information and advice to follow.
This is Doug working on his RSR interpretation.
So I started looking for parts, I needed an engine, transmission, suspension and so on and so forth. Doug recommended I look for a "donor" car instead of piecing the car together from different sources. This bit of advice would prove to be invaluable.
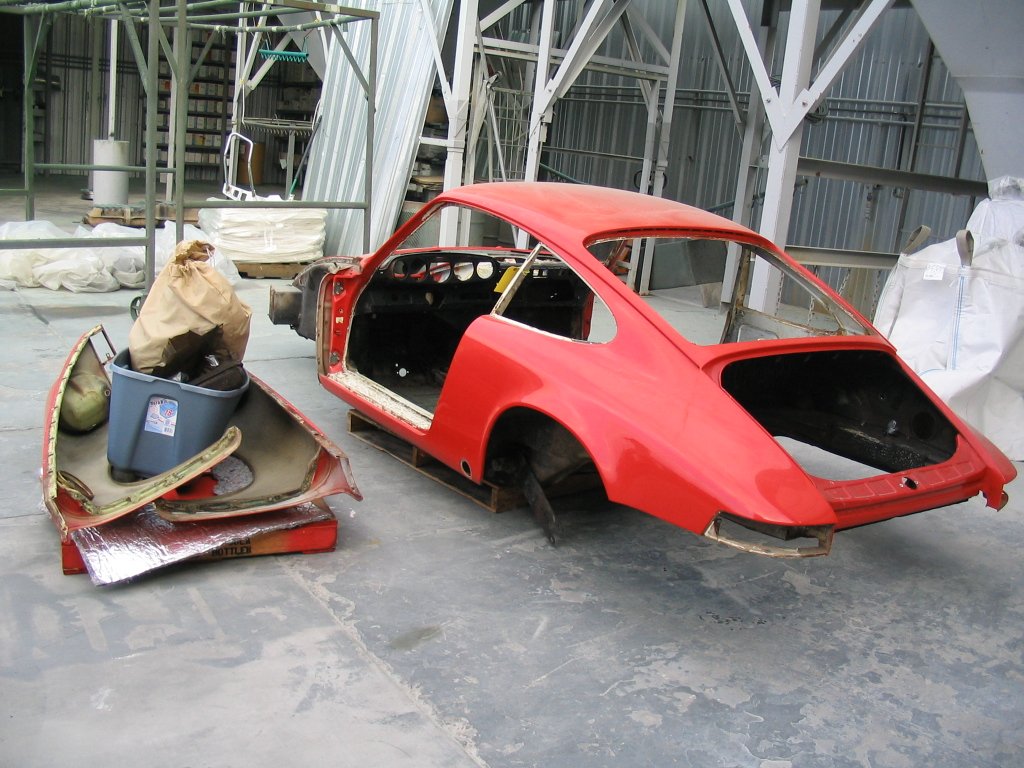
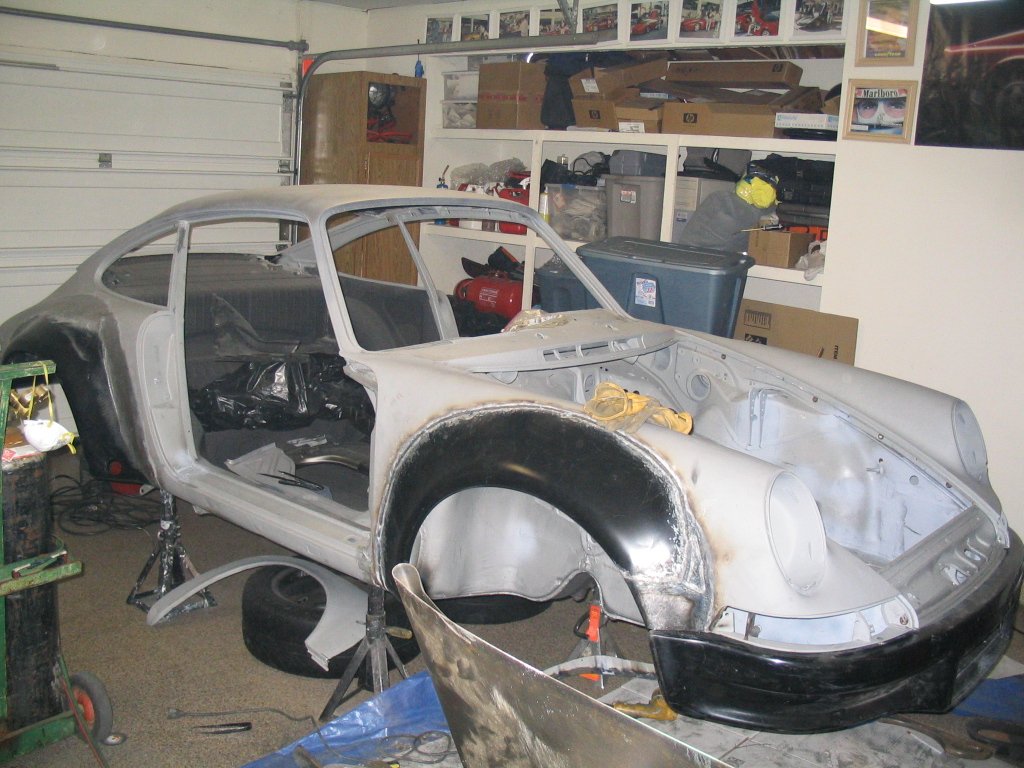
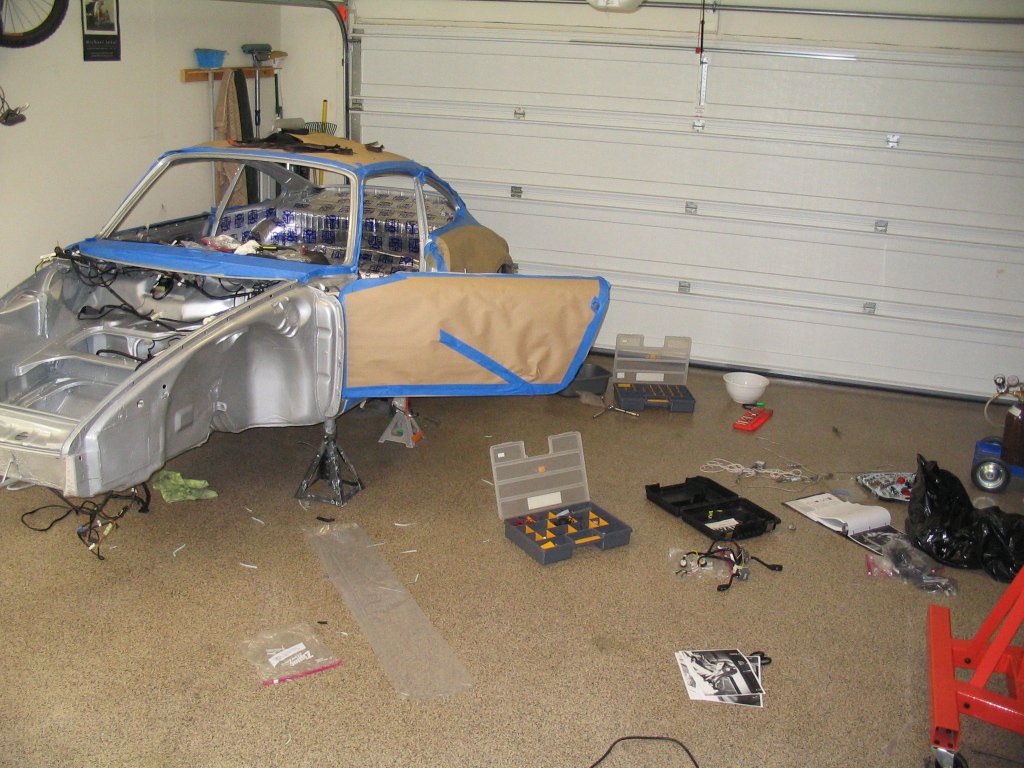
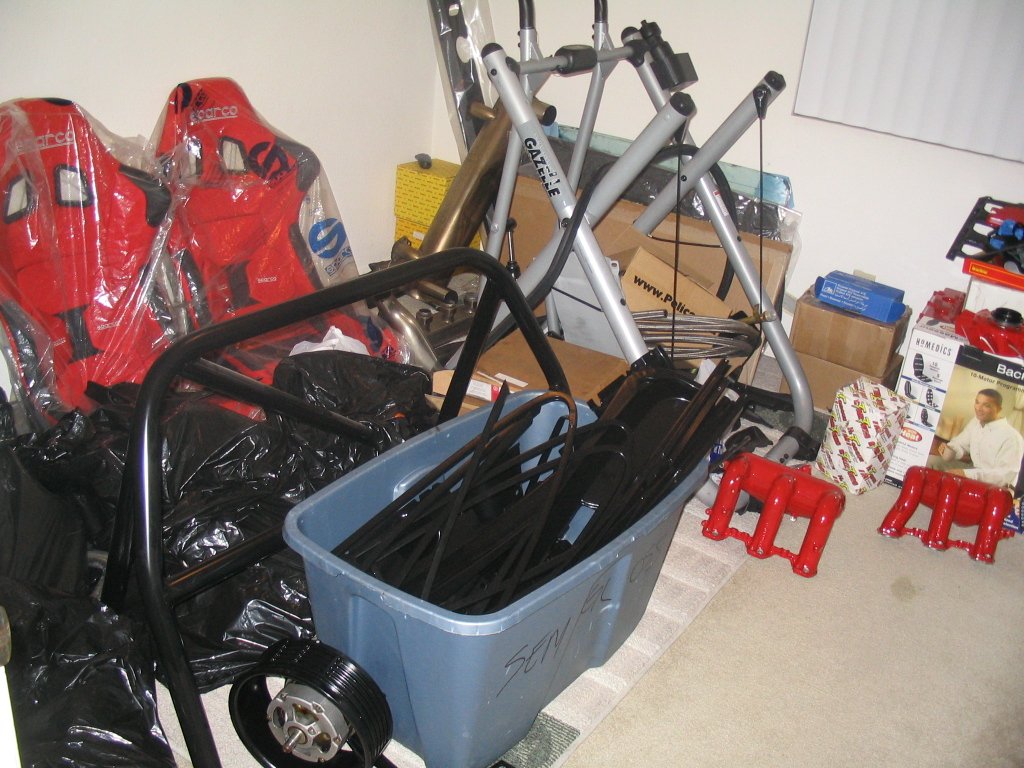
So the fun begins. It took a few days, but the 911T became a carcass with only suspension bits and wheels to keep it rolling. This was all in preparation to have it sandblasted.
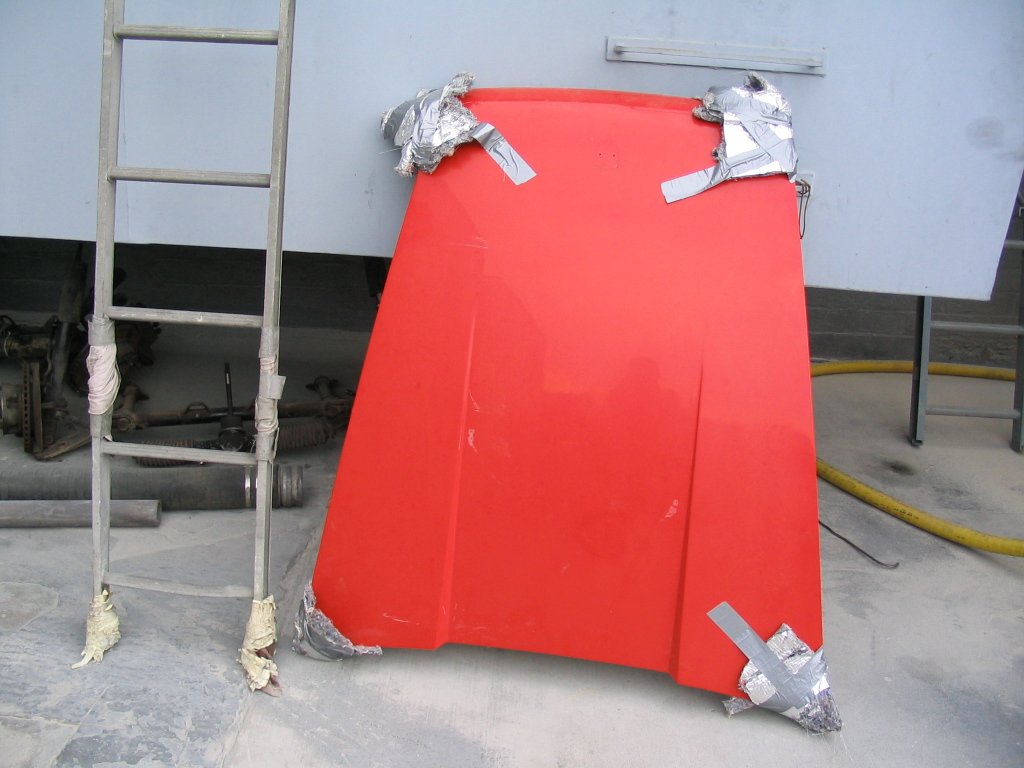
The sandblaster shop was fairly busy and it took 5 weeks before I saw the car again. Everything had gone well except for one thing, the hood. Somehow they managed to warp the hell out of it. I couldn't believe it! It was in such good condition, no rust or dings... but now it was pretty much useless. All I can think of is the hood was thrown in with some other jobs that required more pressure and ultimately ruined it. A good body man could have fixed it by heating, shrinking, pounding, etc but it would've taken way too much time and effort. The shop and I settled on a discounted price for the sandblasting. I posted the hood with a clear description on ebay and sold locally for ONE DOLLAR!! actually, after ebay fees I got about 73 cents.
In the meantime, I had been browsing the web for a wrecked 911 with a 3.0 or 3.2 to use as a donor. Found a couple in different parts of the country but didn't pull the trigger on either one, I was concerned about the cost of shipping and buying something sight unseen. To my good fortune, I ran into an ad in the local paper for a 1985 Carrera for an incredible price (no picture in the ad). For the price, I even had my doubts it was a 911. I called the person and was expecting to get a story as to how the Carrera needed a water pump or the rear hatch didn't close correctly and so on. I even asked the seller to describe me the "shape" of the car; does it have "bug eyes"? He said yes, and told me there were plenty of people ahead of me and was more than likely sold. I figured, it was too good to be true, so I thanked him and hung up the phone. Ten minutes later I convinced myself to call him back, "If it's the right car I'll pay you cash and pick it up today... I can be there in 15 minutes". Loll and behold, it was a 1985 911 Carrera that had been sitting in his driveway for about a year after it started smoking, paint was faded and chipping off from a bad repaint, tags had expired, the driver's seat was torn and so on. Bottom line, the wife (and neighbors) wanted it gone. I didn't care about the exterior or interior, I was interested in the drive train, suspension and electrical along with gauges, sensors, DME etc. We struck a deal and the transaction was done in less than an hour.
With a smile and a feeling of incredible luck, I started my way home on the 15-mile drive. The car was doing fine until about the last two miles on the freeway, the engine was spewing enough smoke to cover 3 cars behind me!! I could actually see the driver immediately behind waving his hands franticly to clear the smoke in front of his face - that much smoke! I coasted the car as much as I could and got off the freeway. As I made my way home through the city streets, with a trail of smoke behind me, the original joy of the purchase had quickly diminished. On an uphill street near my house, the car choked and bucked a few times and completely died. I managed to get it started again after sitting for a few minutes and was able to finally make it home. WOW! Something was seriously wrong.
To make a long story short on why the car smoked so much... drum roll please... TOO MUCH OIL! The dipstick measured full at rest and cold. Not sure how this happened and it took me a few days to figure out. Although it was better news than anticipated, it didn't change my mind from doing a top-end rebuild.
So things were looking up for me, I had two cars to build one. It was interesting trying to explain the concept to nearby neighbors. "so you're keeping the old one?", "you're taking this one apart for parts?" "but this one (carrera) looks better". I don't blame them for asking those questions, the carrera was complete with no body damage. My plan was to take the parts I needed and sell the rest and get some money back of the original purchase. For those of you that have seen the original website may be wondering why I never posted pictures of the donor car... it was guilt and I honestly didn't need the criticism. Stripping a seemingly perfect 911 for parts didn't seem right, but financially it made a lot of sense. As a precaution, I registered the carrera in my name to have a paper trail of where the parts came from.

The build begins, what to do first? I had a bare tub and a complete donor car side by side. The next few paragraphs are in no particular order but are merely memorable anecdotes and for the most part interesting events I can remember about the build. So here we go:
Before I forget, two of the best tools I used to give me direction and keep my sanity during the build was a label maker to tag all electrical connections and a digital camera to take lots and lots of pictures. Each picture is about 400K in size, up to date I have about 6 GBs worth of pictures. And of course, the bentley manual for the 84 - 89 years.
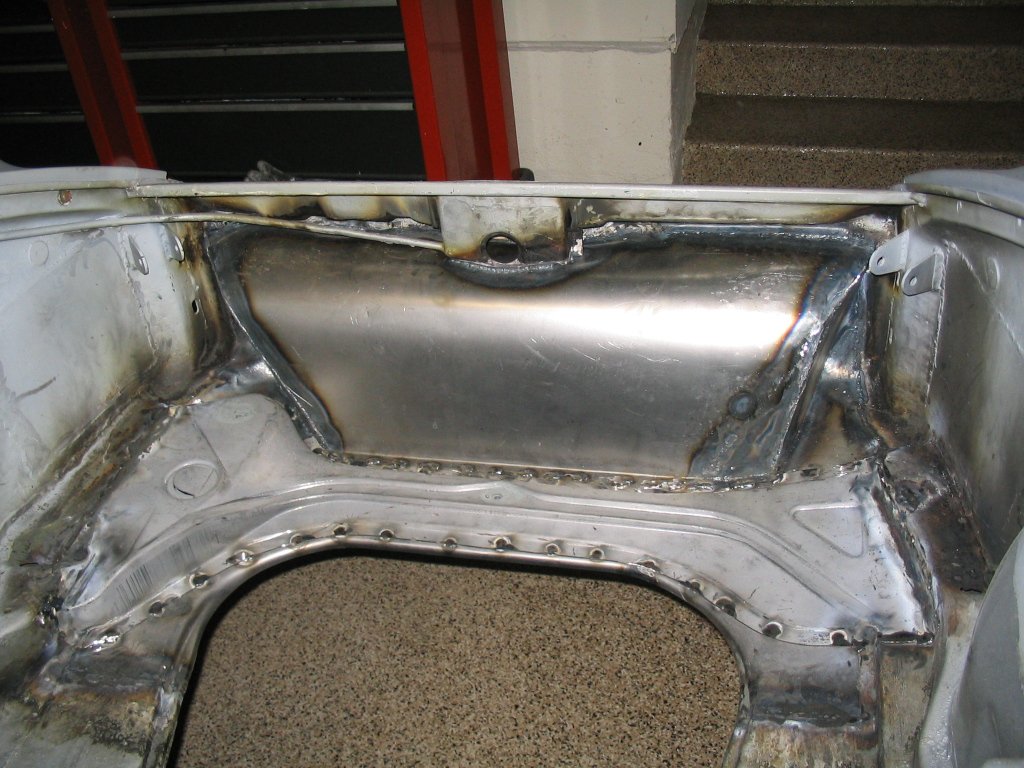
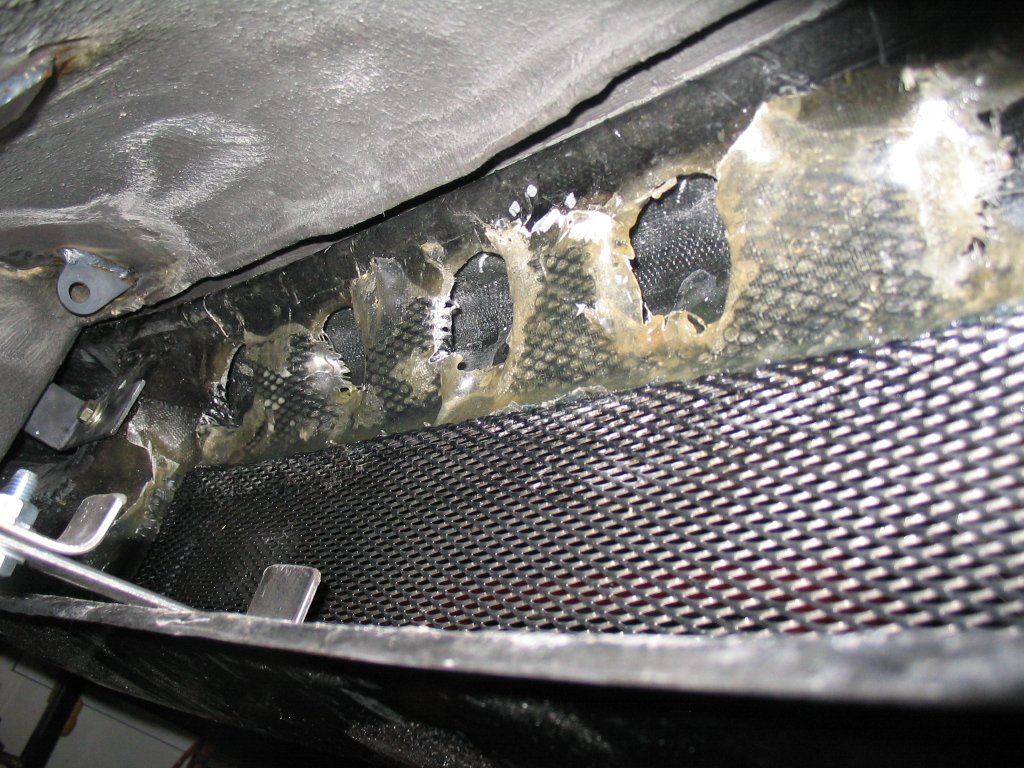
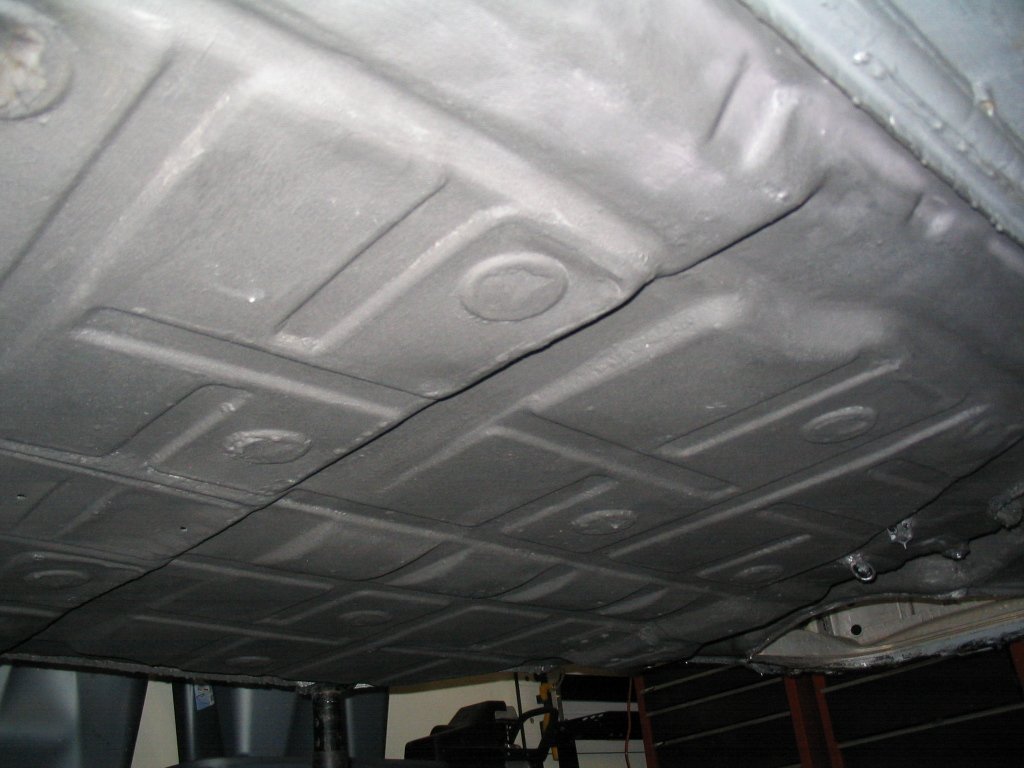
Unfortunately the sandblasting didn't remove all the undercoating so I had quite a bit of dirty work still to do. Lesson learned though, remove all the undercoating before taking your car to the sandblasters or use a different method such as acid dipping if available in your area. It took a few days but I was able to remove all the undercoating and used POR-15 to seal the metal. In my opinion, the epoxy coating is much tougher than POR-15 but either way, the body was sealed with a combination of epoxy coating and POR-15.
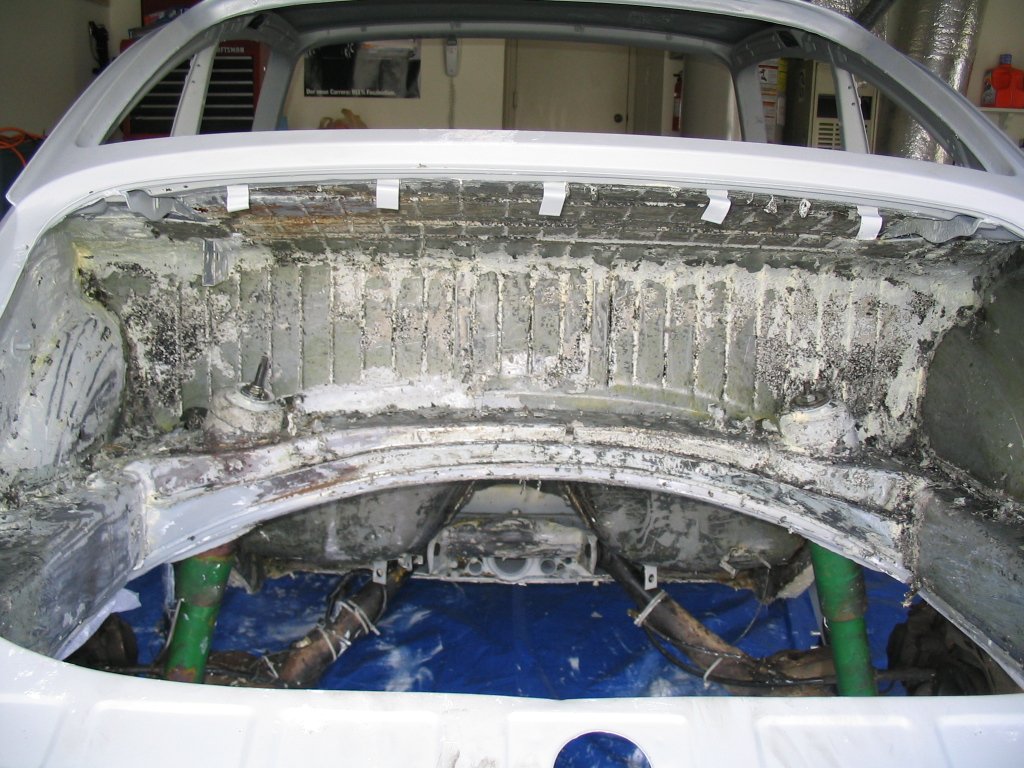
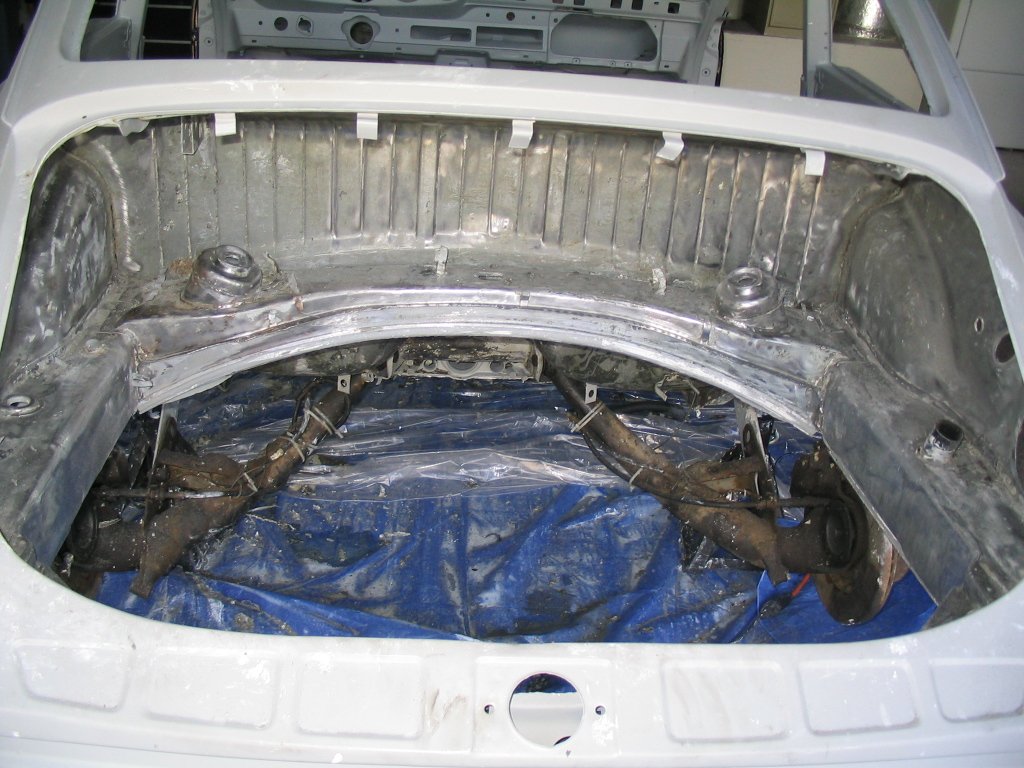
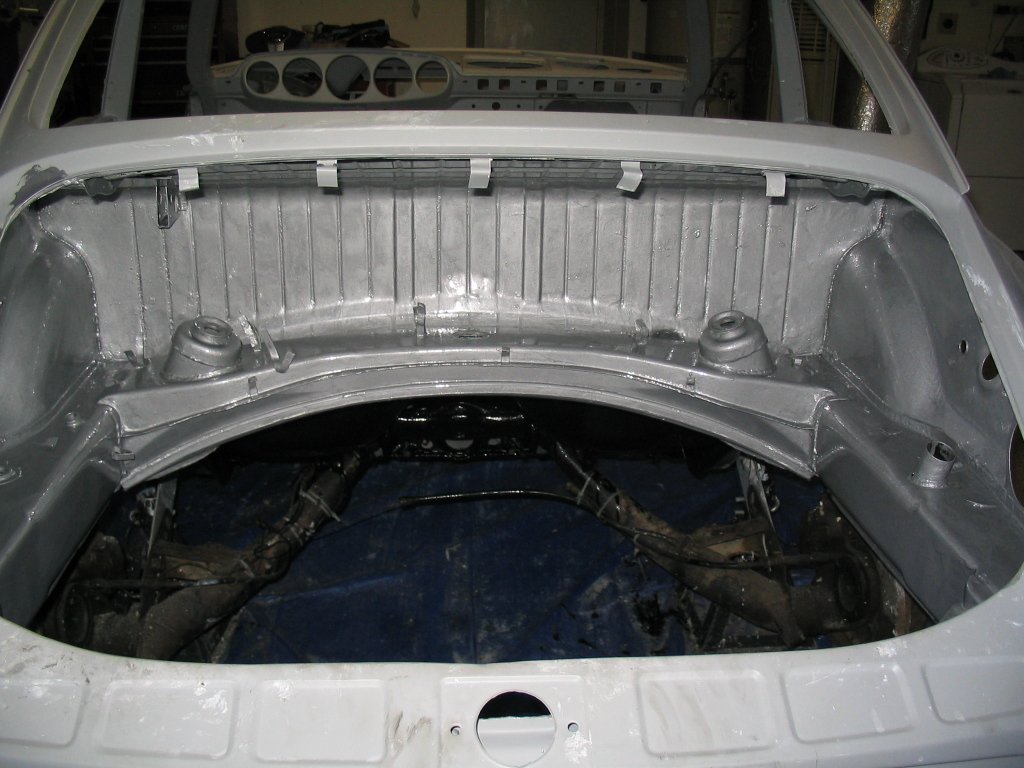
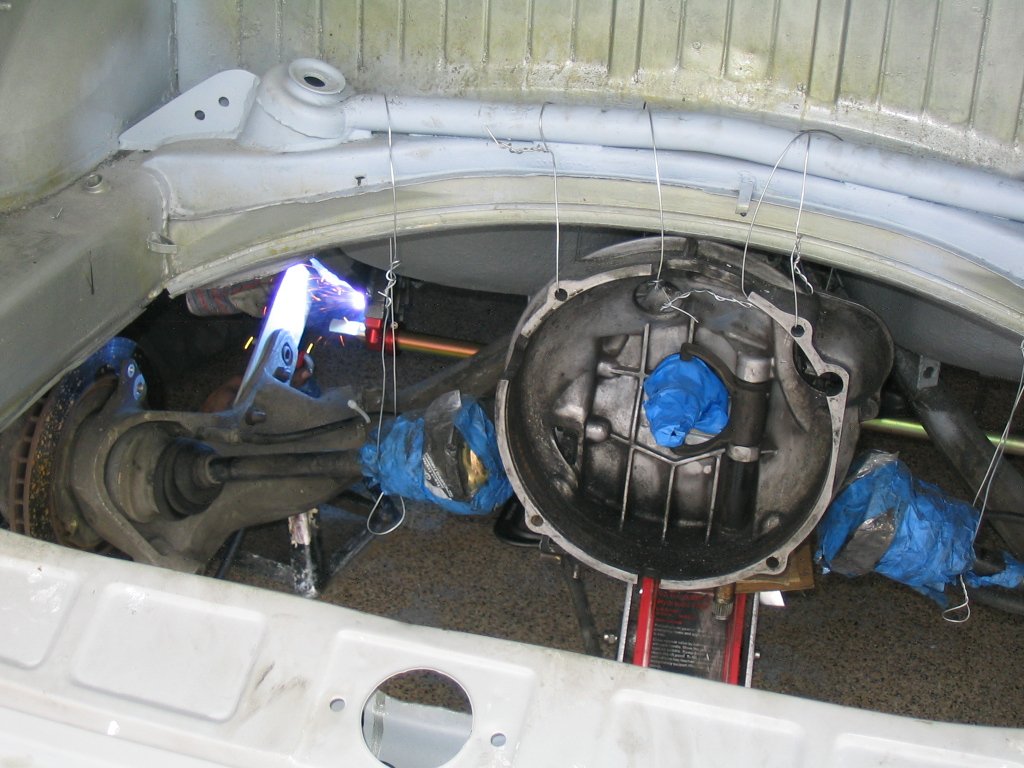
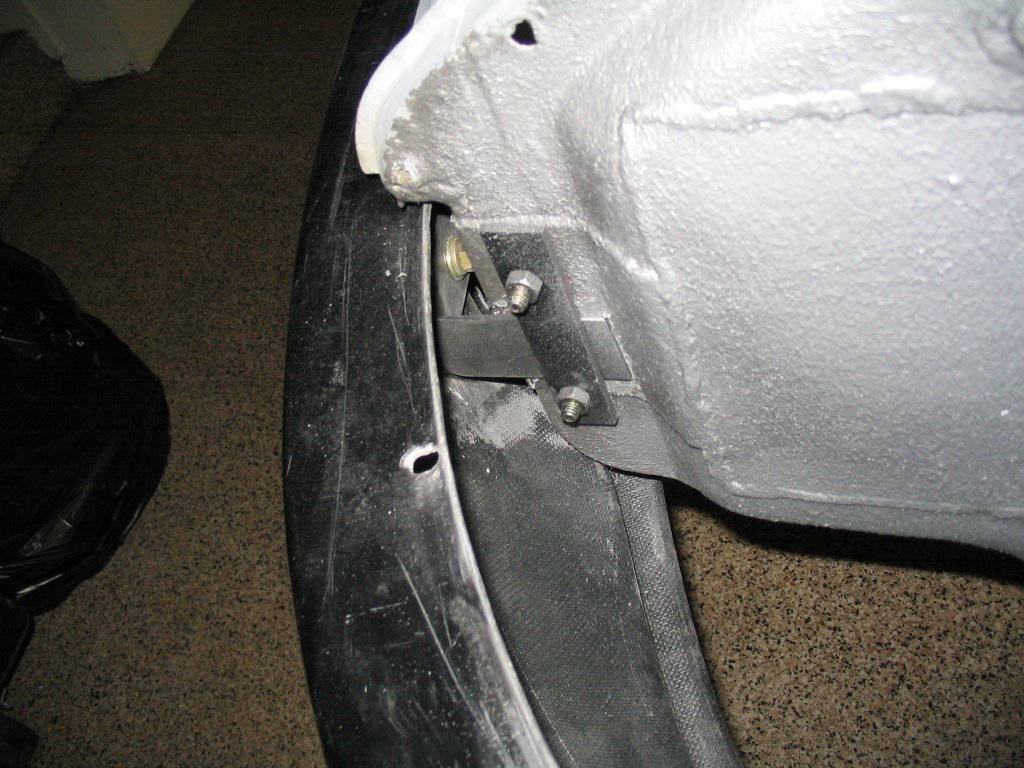
After the sandblasting, it was apparent the tub had a bit more rust than I originally thought. It was the front suspension pan, a couple dime size spots on the passenger door sill, some on the rear seat area and by the very back rear shelf. The biggest job was the suspension pan, the others were minor. The person who did my flares made a second trip to take care of the suspension pan and the oil cooler pan modification. I had the oil cooler at hand so we were able to modify the section to clear the entire cooler from the front bumper. The suspension pan and cooler mod were a full day's job.
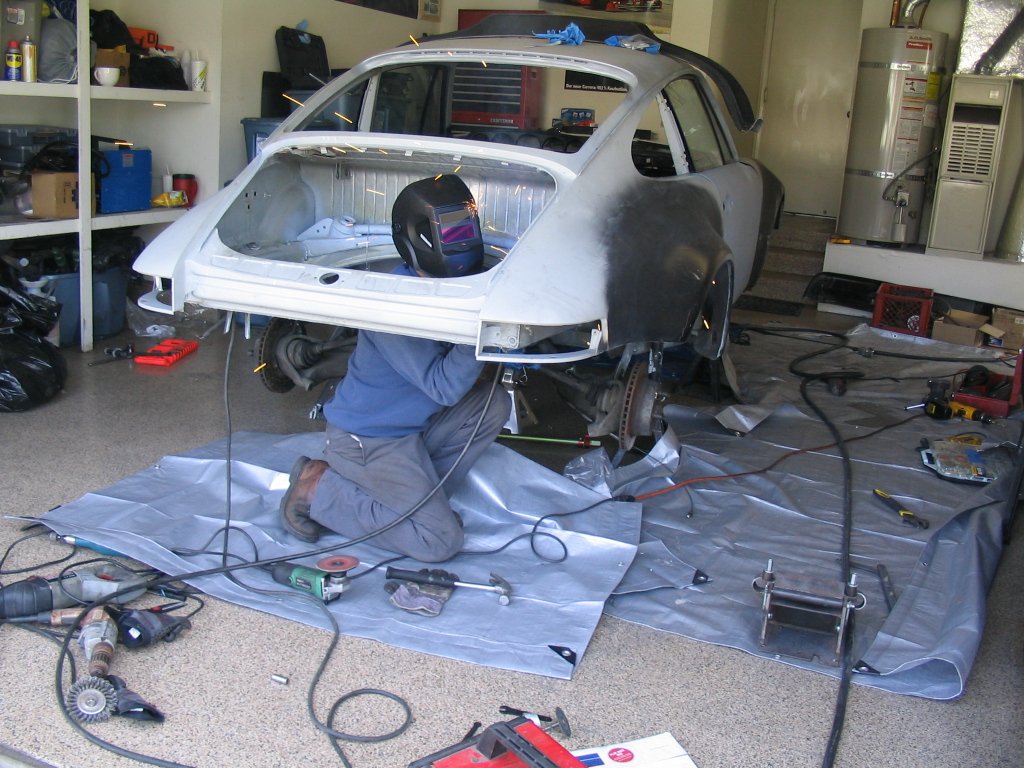
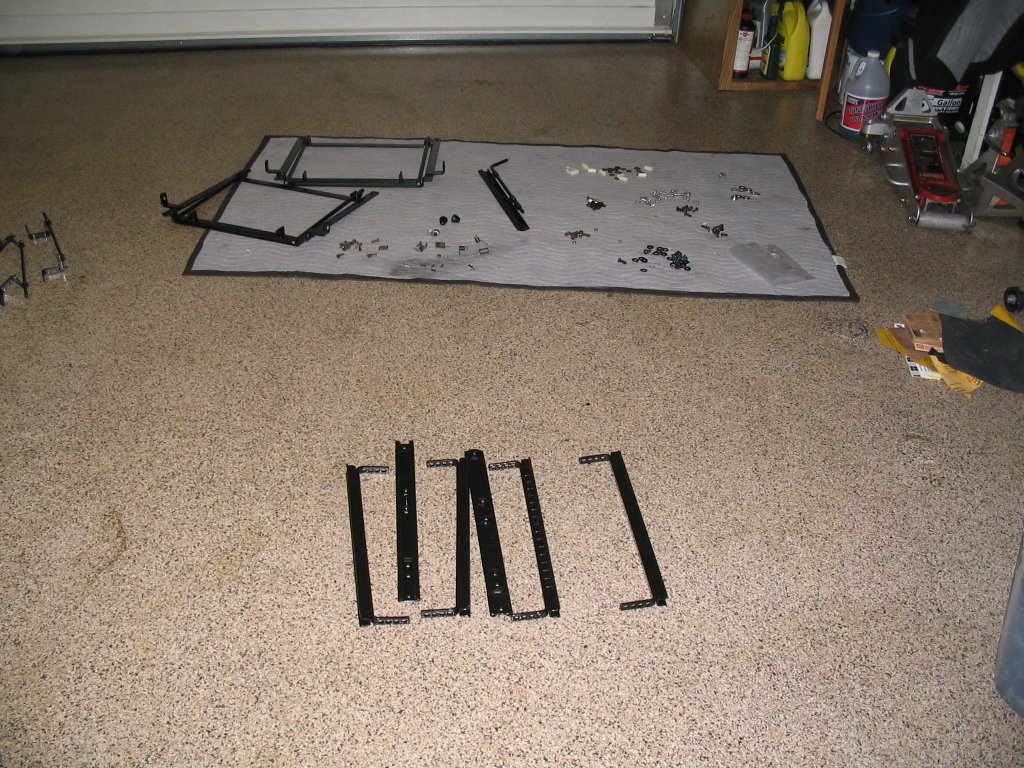
Ten years ago I learned an important lesson about fender flares, most shops will agree to install them but unless they have proven experience, for one reason or another, the flares usually do not come out right. I searched the Pelican forum and local resources for a qualified person. It took about 2 months to find the right person. He had quite a bit of experience and was willing to come to my house and install them. He was essentially a mobile body man with all his tools in the back of his truck. Keep in mind he wasn't local and had to commute about 3 hours to get to me. It took two days to install all 4 flares. I paid for a one night's stay at a nearby hotel so he could continue the next day. As some of you know, there is no such thing as a turbo flare for a long hood front fender, so you have to fabricate an extra bit of sheet metal to cover the area equal in length to the turn signal box.
I sold the transmission and original seized 2.2 engine along with carburetors and exhaust for $1200 locally. The buyer called a few weeks later to tell me whoever had the car prior to me had taken good care of the engine and possibly had it rebuilt at some point. Aside from the water damage that seized the engine, it was in good condition.
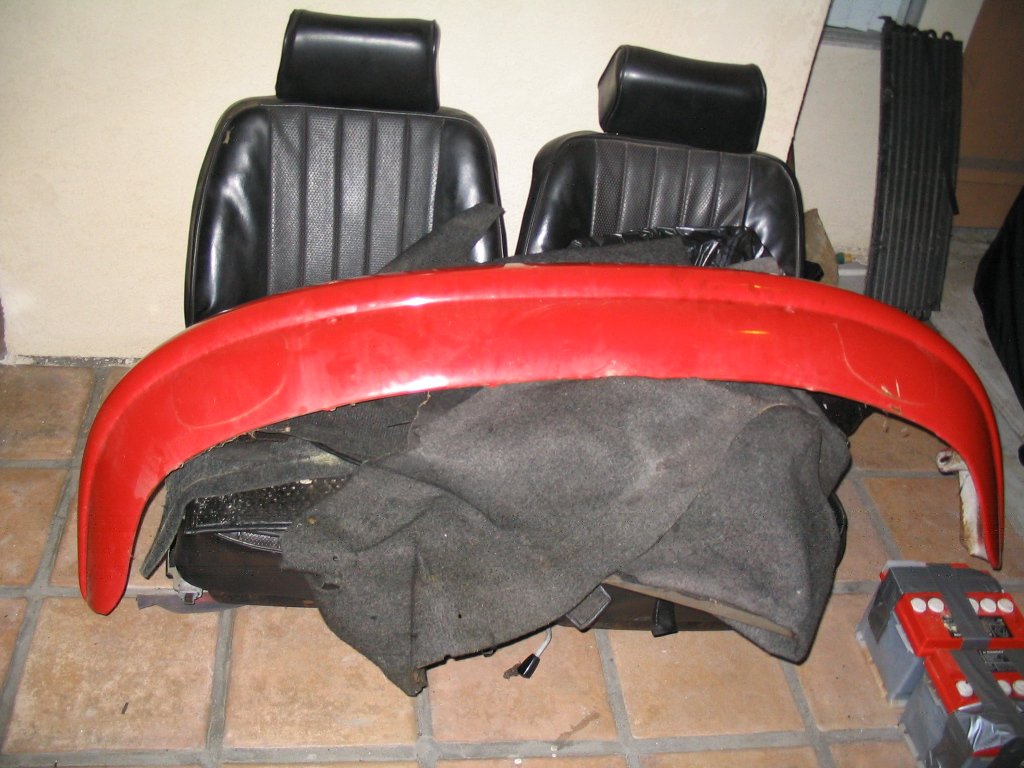
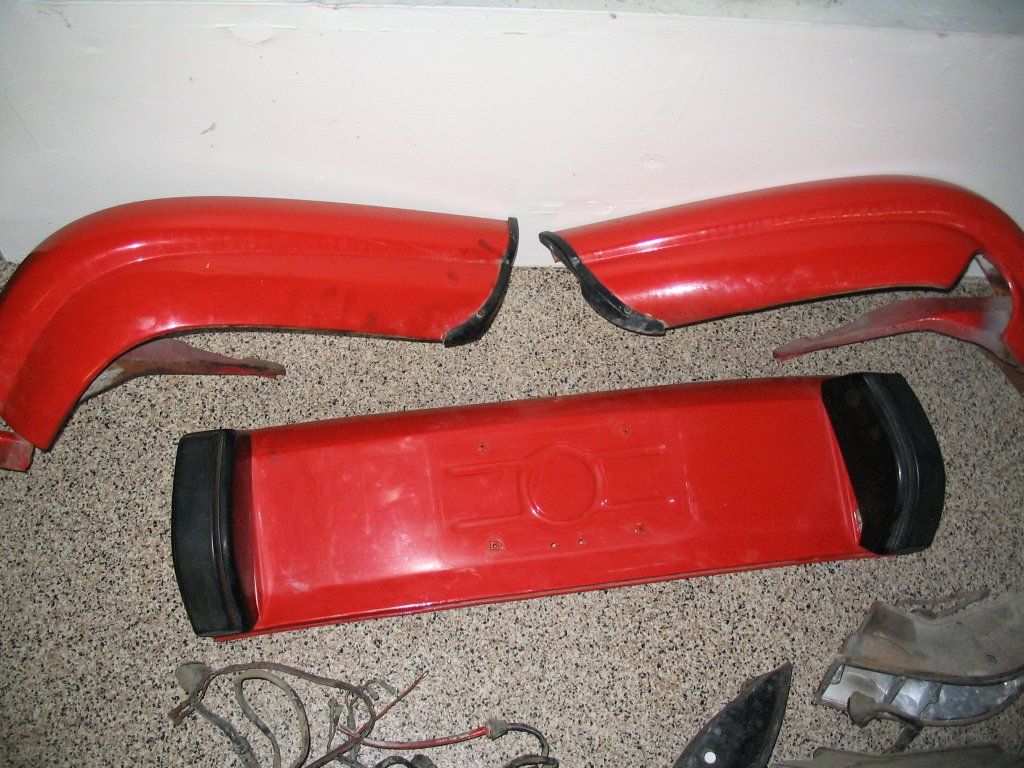
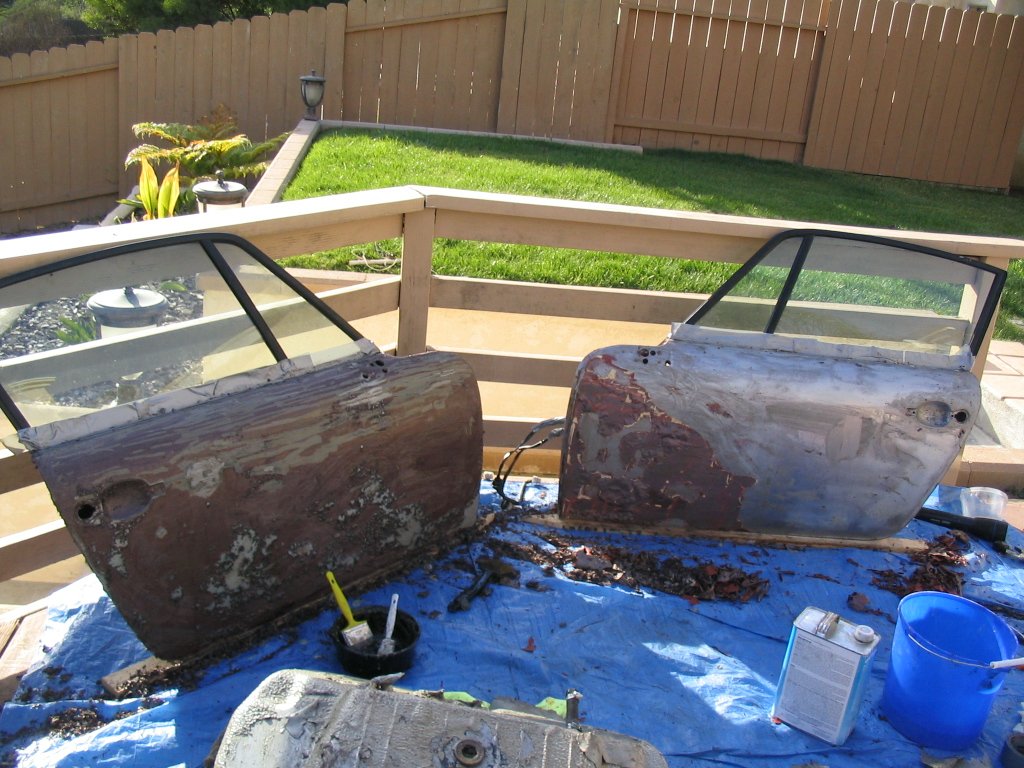
A person from Northern California bought a lot of body parts from the '70 as well. I gave him a bundled price for two doors, rear bumper (3 pieces), rear deck lid, gas tank, front seats and other misc. Looking back, I wish I had kept the rear deck lid, it was in great condition, no rust, sandblasted and epoxy coated. Oh well, I needed to bring money in instead of shelling it out as quickly as I was.
On the plus side, the same person traded me a set of 16X8s for my 16X7s. It was his idea and although his 8's were rough, they were straight. I also sold other stuff on pelican, 911sregistry and ebay.
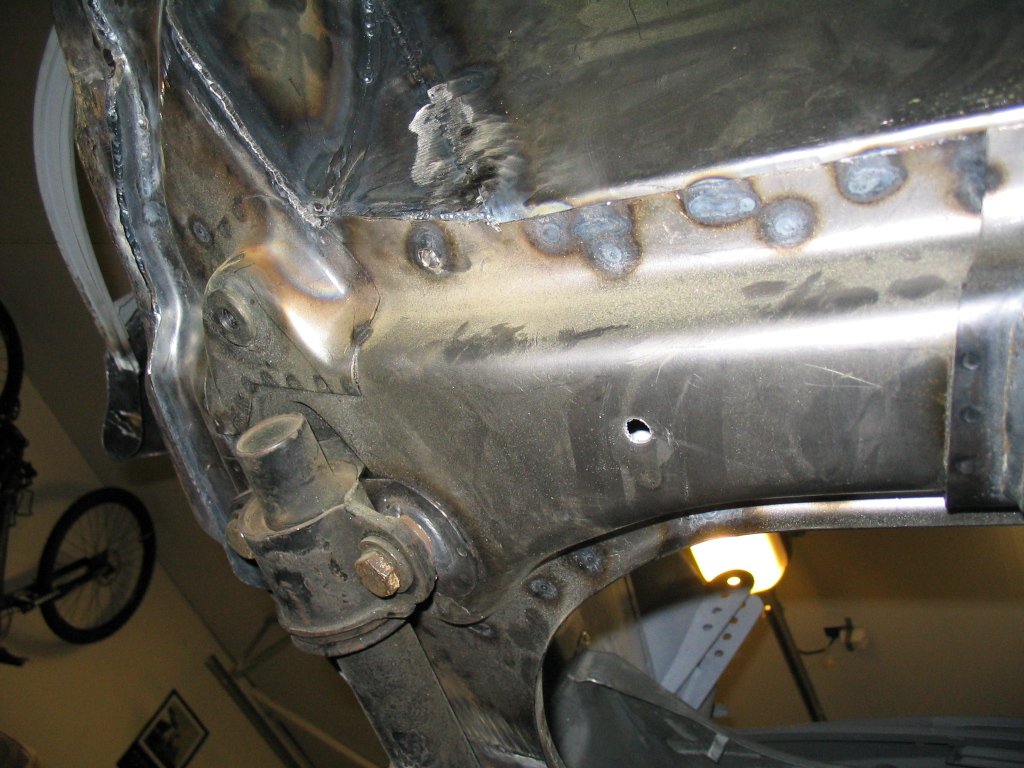
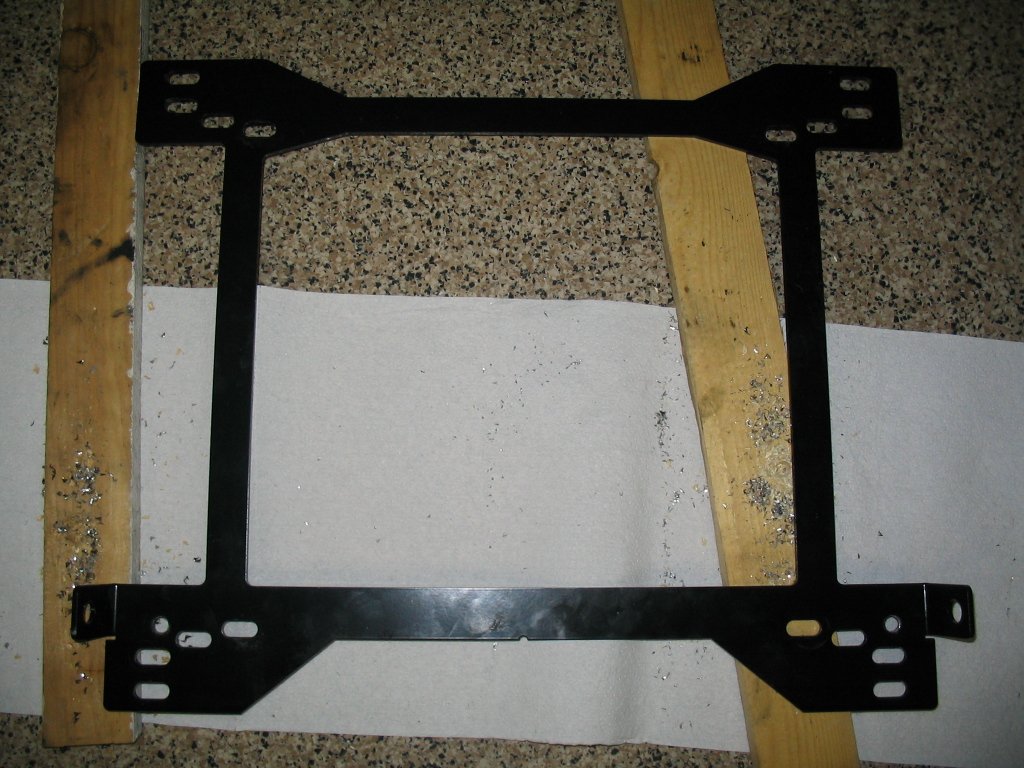
My friend Alonso came through once again with a person that knew roll bars and was a master welder with 17 years experience. I must say, he was a blessing to my project, he delivered an outstanding job every time. After seeing his work, I couldn't help but actually pay him more then what he originally quoted me. This is the work he did on my car:
Built a custom removable roll-bar
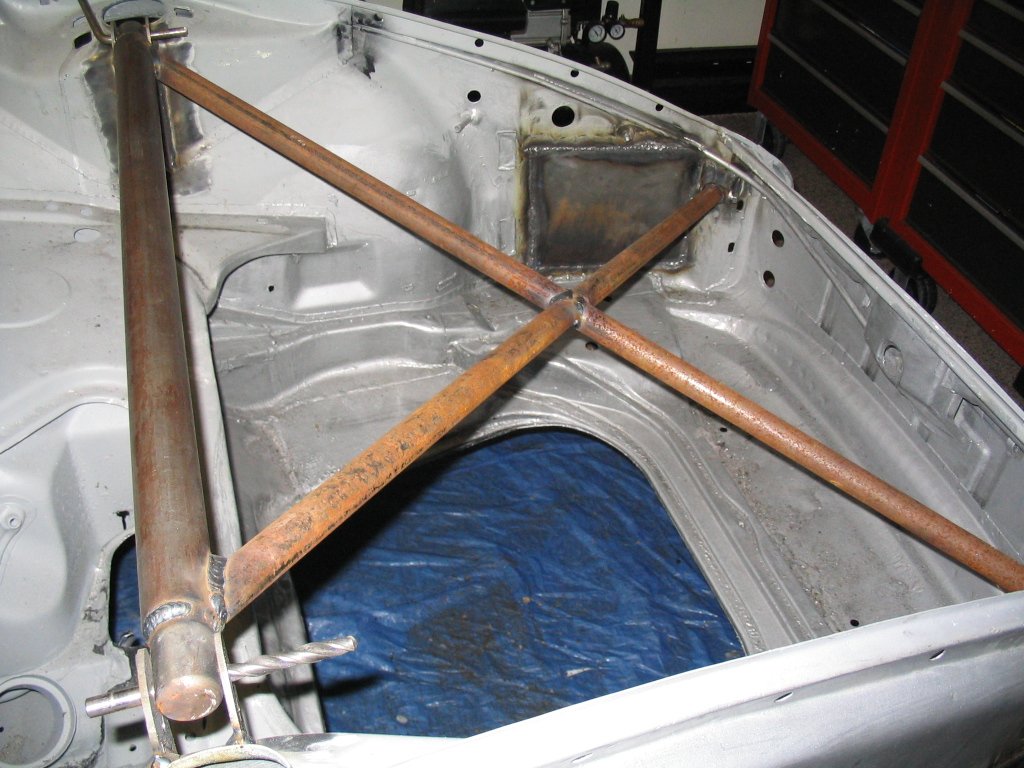
Built the front X brace with all 4 brackets
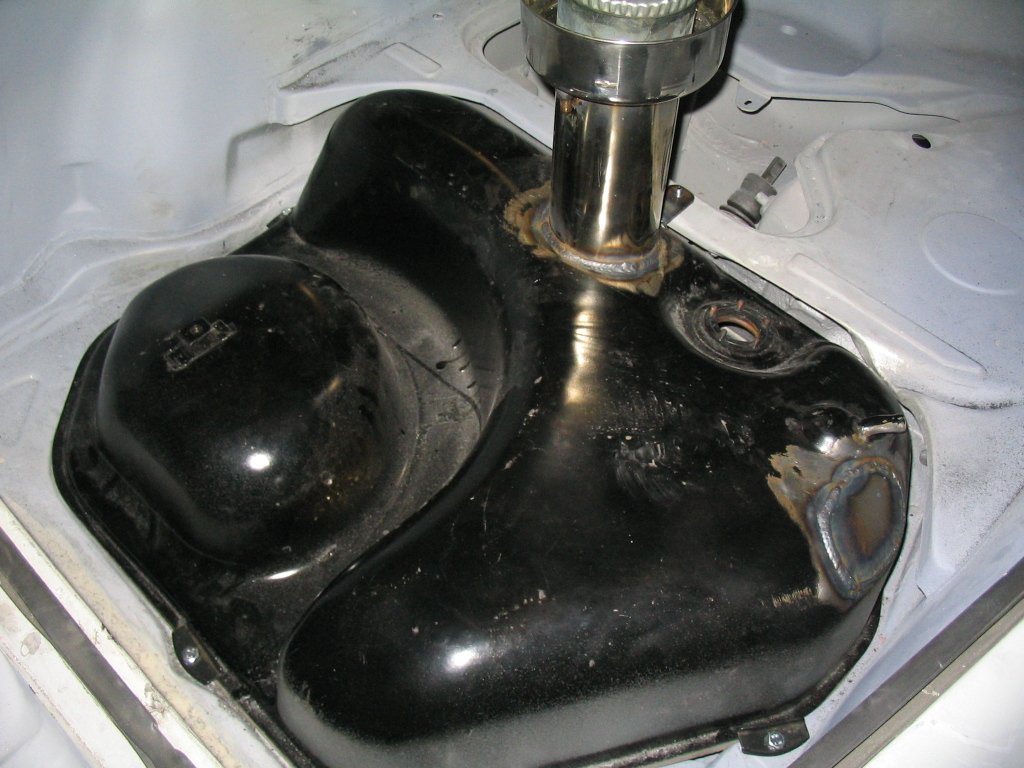
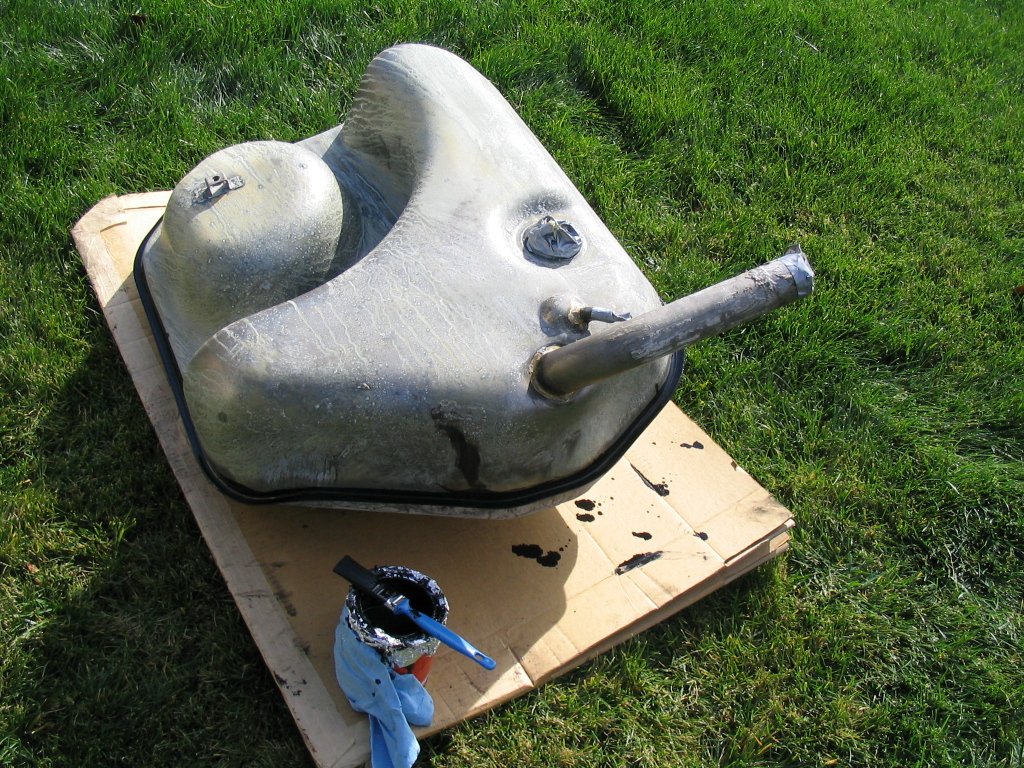
Modify my fuel tank for a center fill neck along with the cut on the hood
Installed wevo rear sway bar brackets (as some of you know, wevo doesn't make sway bar brackets for 69 - 71, he made them work)
Stiffened the torsion bar tube by welding brackets between the tube and frame
Welded a later oil tank opening on the passenger side engine bay
Fabricated and welded a rear shock tower brace and gussets
Added mounting tabs for the front oil cooler and tabs for the later style fuel pump
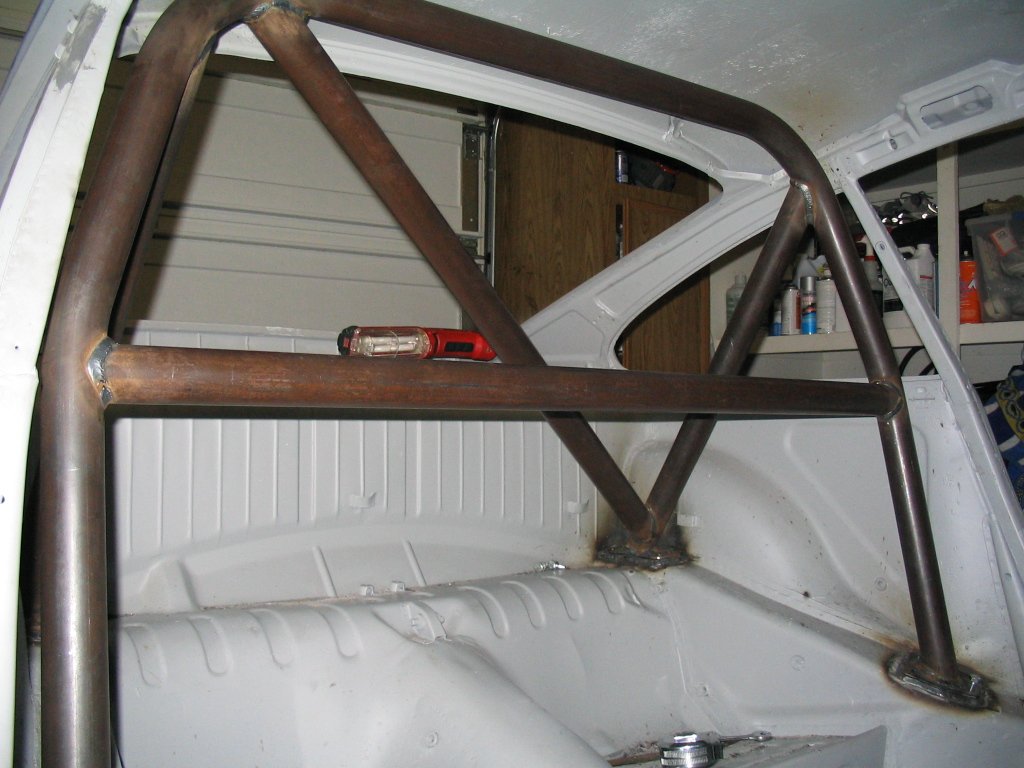
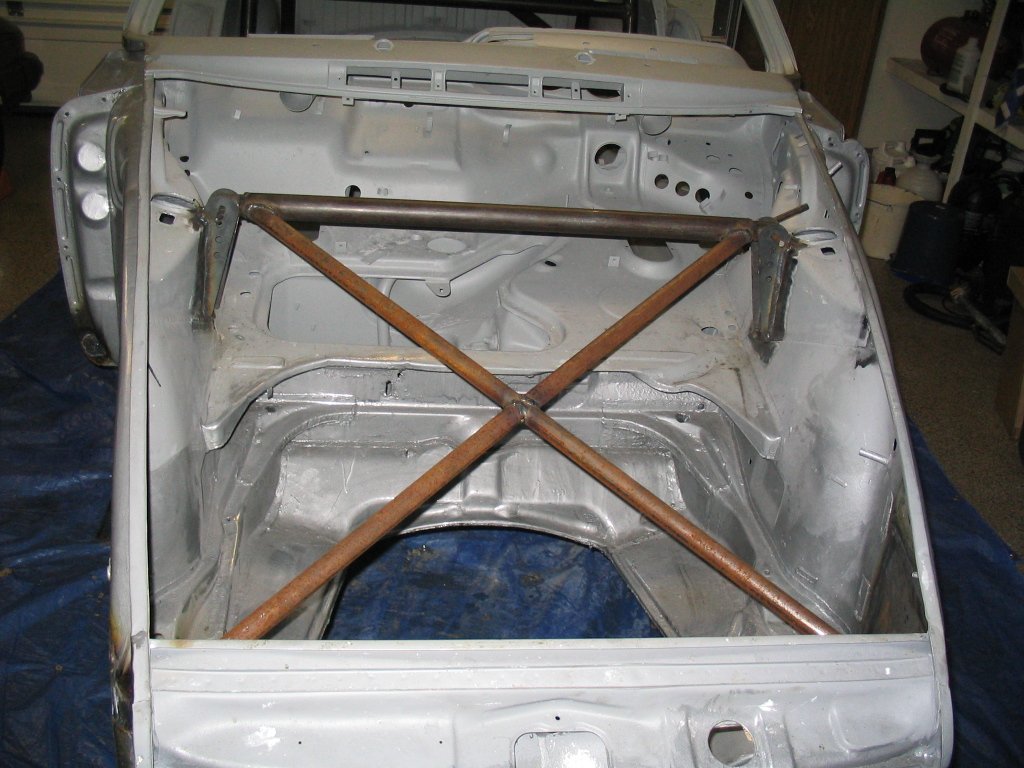
It's noteworthy to metion that I did not have a single problem with any of the work above. I'm still in awe how good of a craftsman he is and how quickly he could turn your idea into a workable solution. Many thanks Nacho!
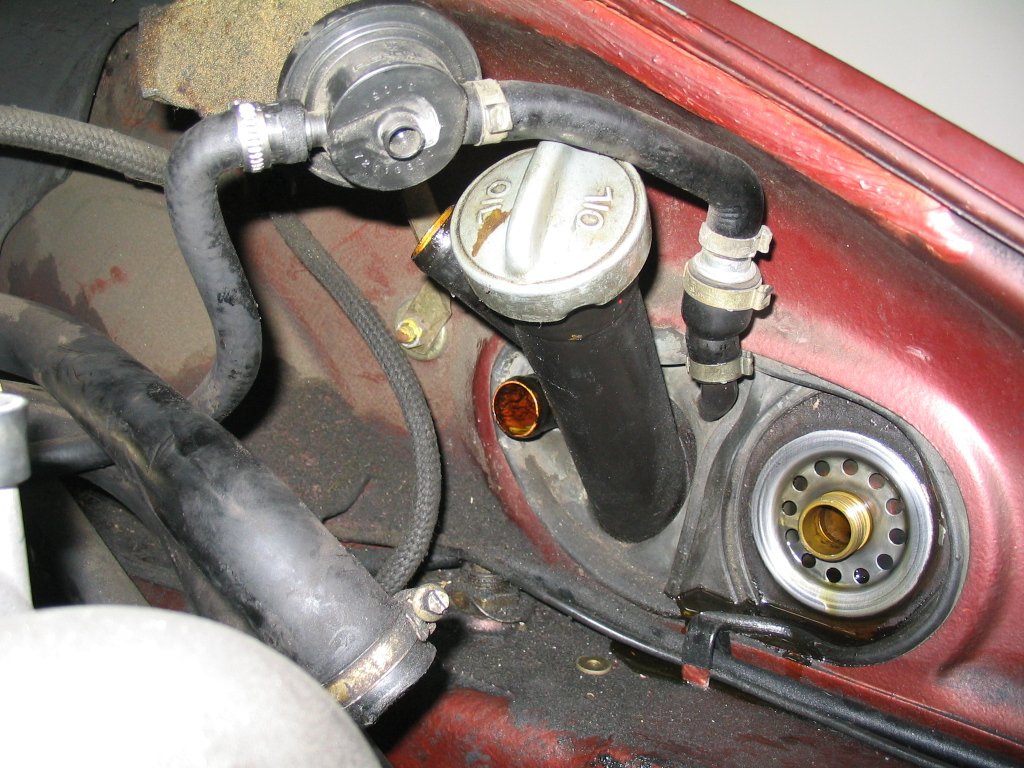
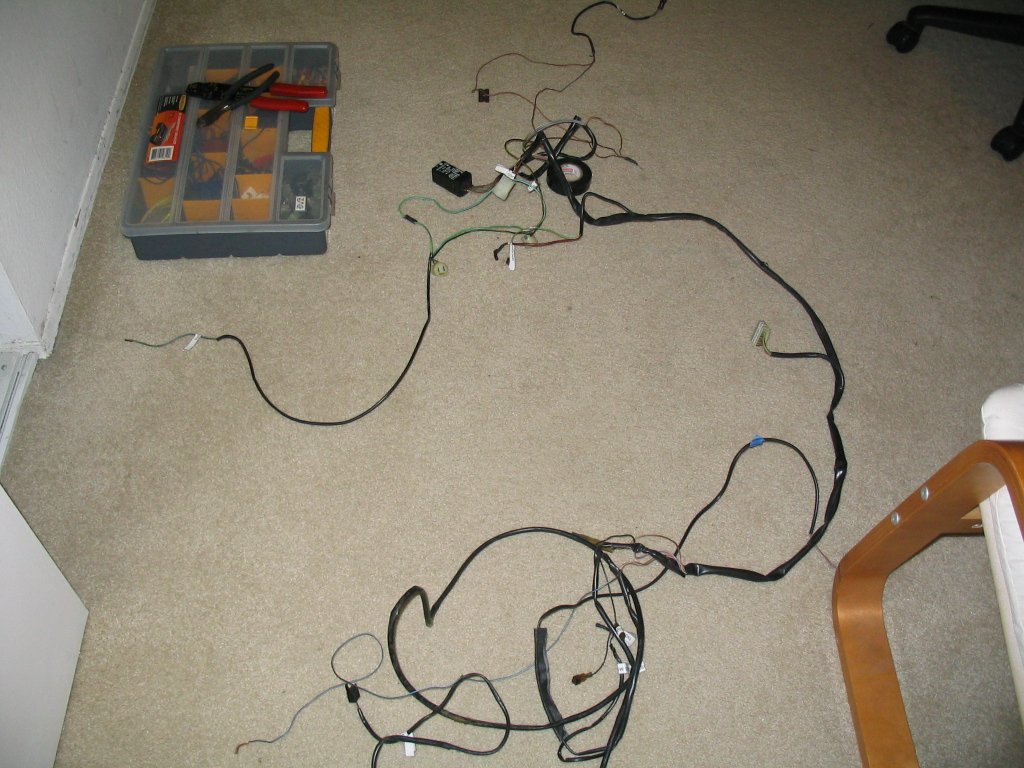
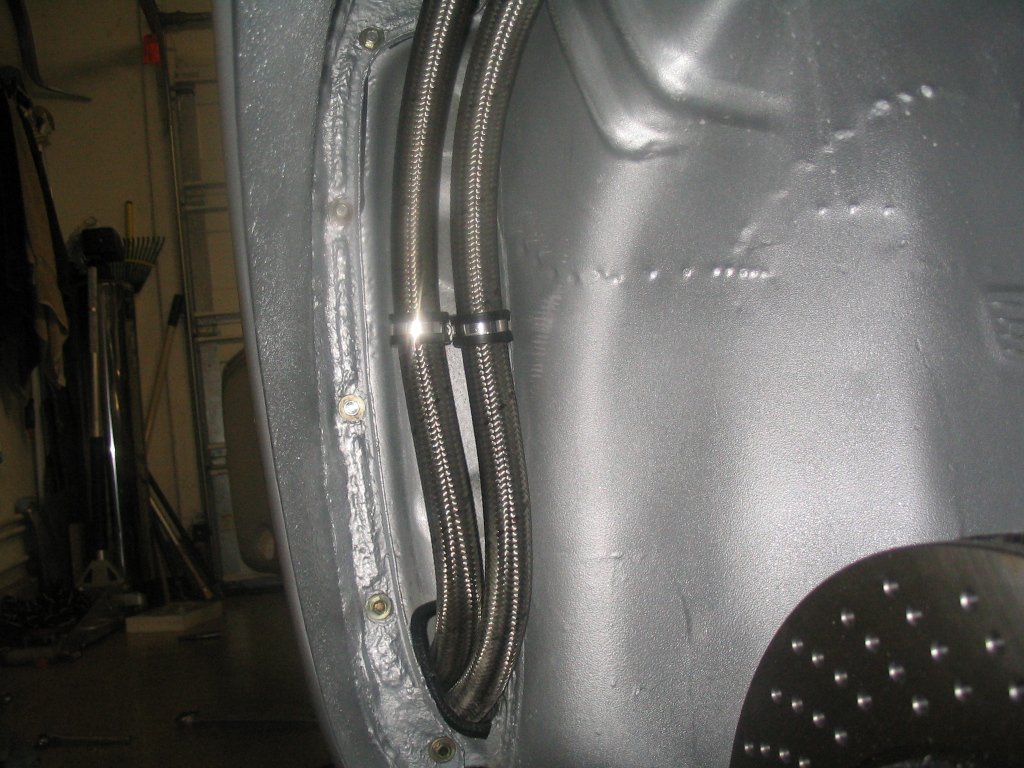
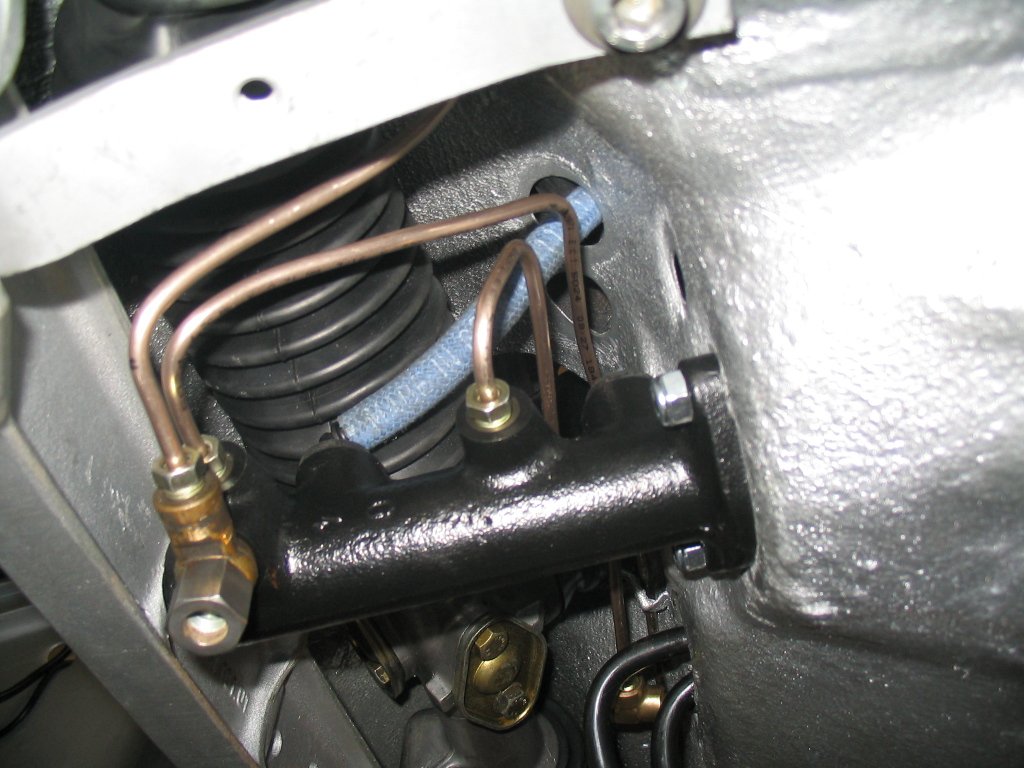
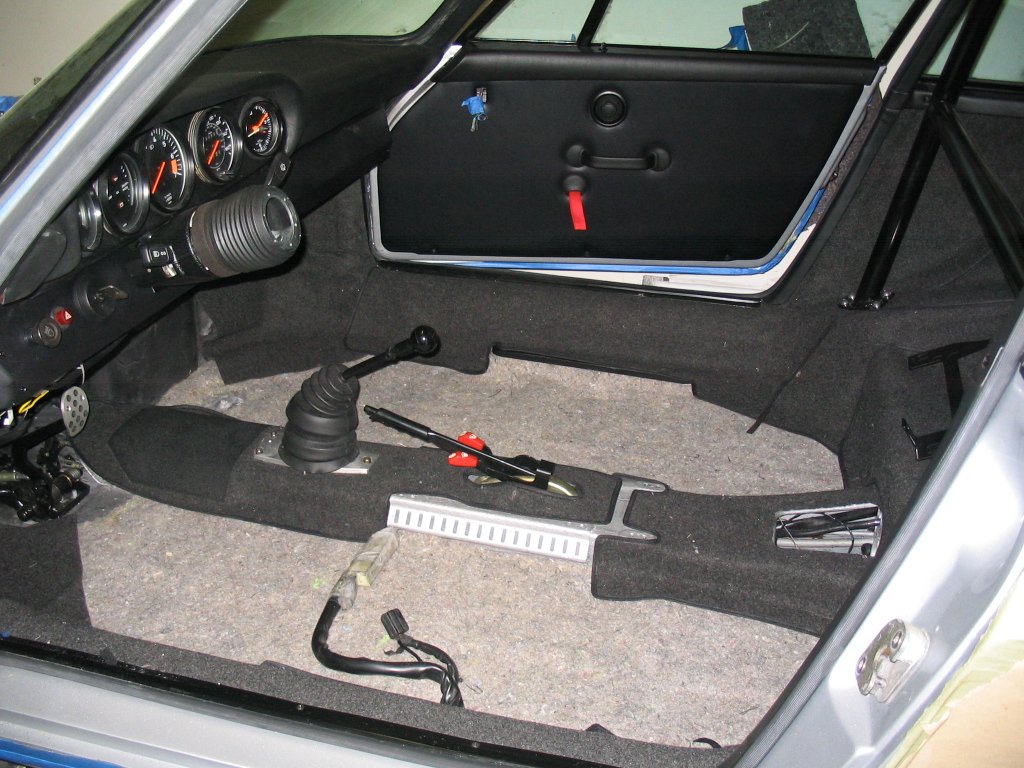
The tunnel is another area of the car that can drive you crazy. It's hard to believe they squeezed so much in there. My car originally came with one hard fuel line (supply) through the tunnel. Since I was going to use a 3.2 engine, I needed two fuel lines, one for supply and one for return. I decided to remove the hard line and replace it with a later soft line as well. It was a good thing I removed the original hard line, once removed, I tapped it on the ground and a pile of rust came out.

Installation of the new fuel lines was easier said than done. As you tug and pull, all you can think of is the damage you could be causing to your new hoses at $130 each! I could've rigged some generic fuel line but didn't want to deal with figuring out the connections to the gas tank, fuel pump and at the rear hard lines, clamps etc. Although the OEM hoses cost a lot more, they were the right hoses. And oh by the way, you need to drill holes on each end of the tunnel for the new return line and enlarge the existing one where the original supply line was. Then you have to worry about chaffing the fuel lines with the new sharp holes you just made. I used modified rubber grommets to protect the lines.
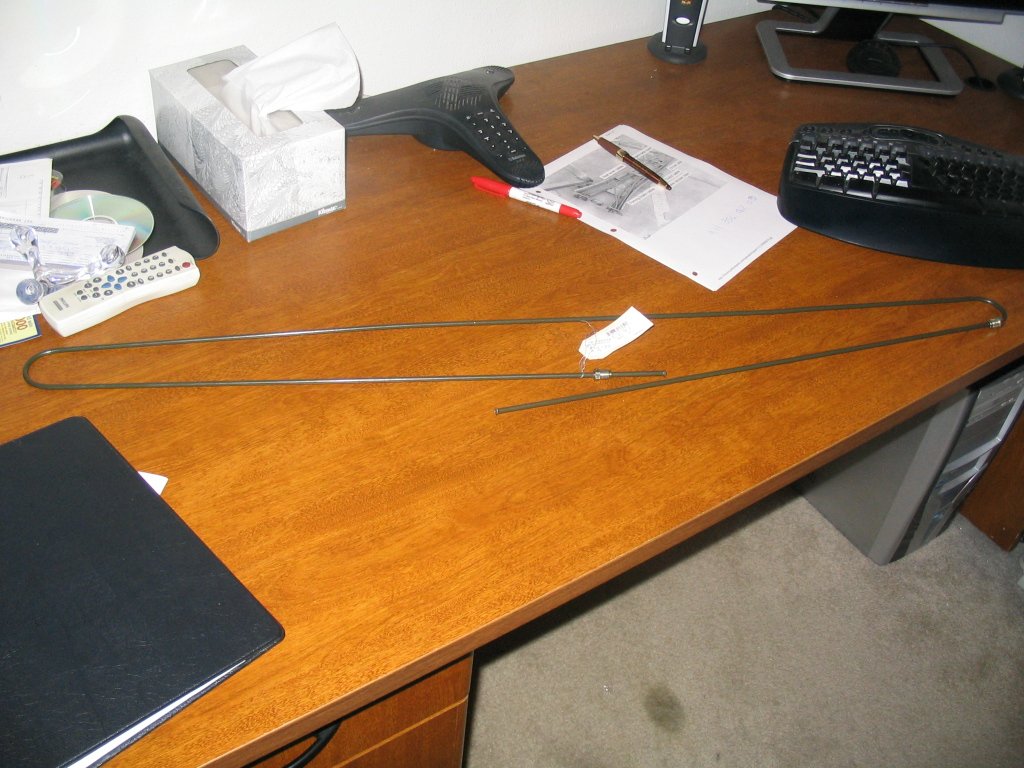
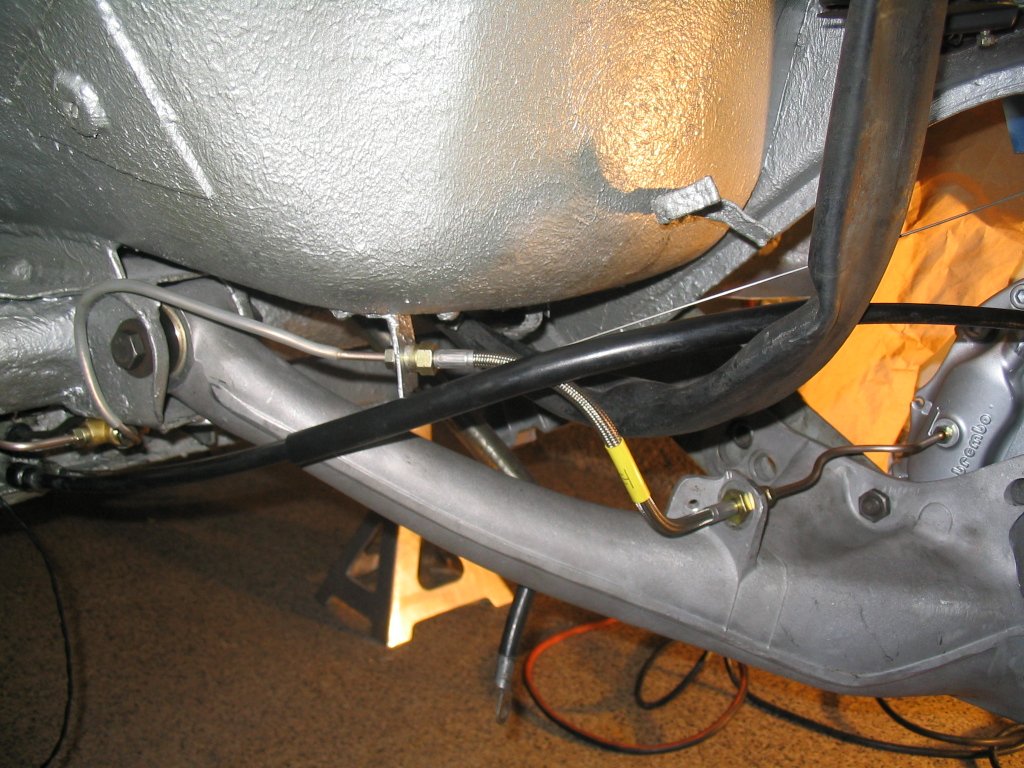
The brake line that runs through the tunnel also needed replacing. Unfortunately most parts places, pelican and Stoddard included do not stock this item any more. So I had to go to a local VW shop and buy one that was slightly longer, cut it, change the fittings and flare the ends.

There are some subtle differences between a 69 - 71 compared to a 72 - 73. One of the differences that comes to mind is the transmission tunnel is narrower on the 69 - 71. If you're fitting a later 915 transmission, you either have to grind down some material from the transmission or pound some sheet metal on the tranny tunnel to clear the transmission. I chose to modify the tunnel.

It wasn't too bad, a few taps with a hammer created enough clearance.
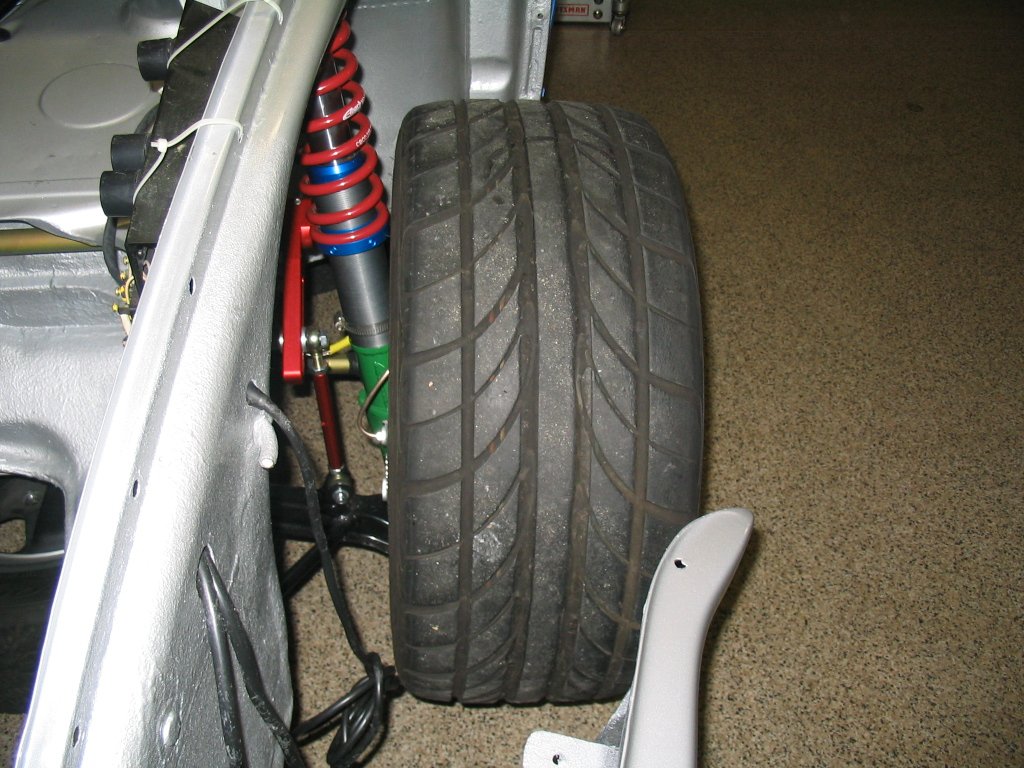
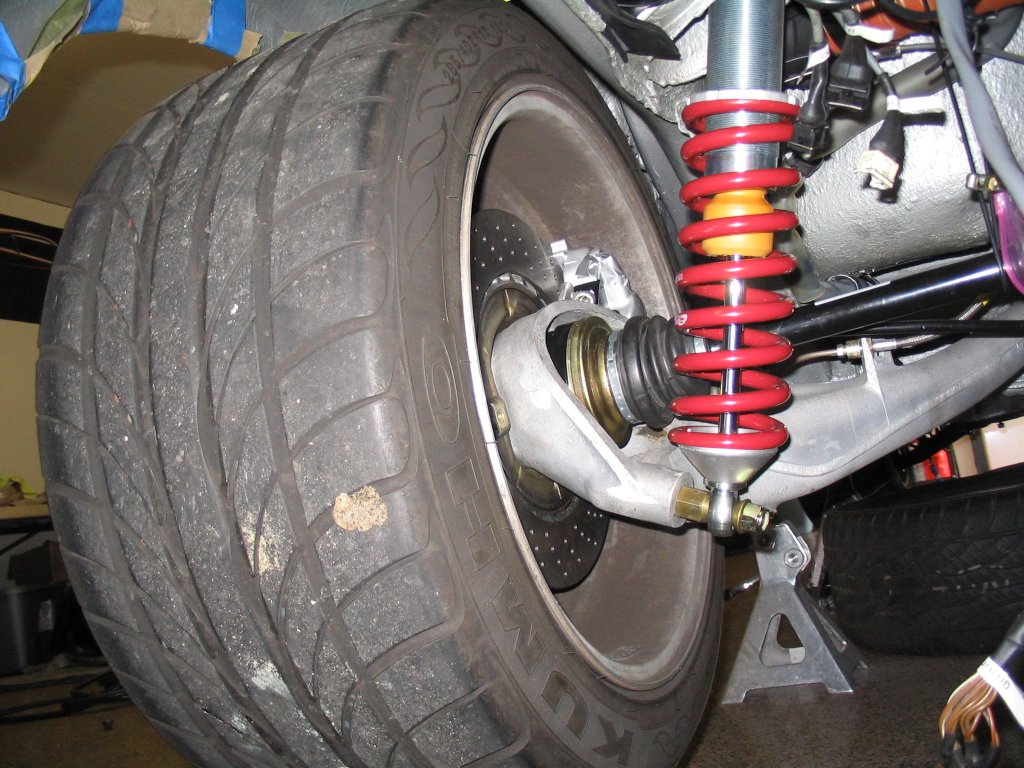
Another difference is the rear shock towers on the 69 - 71 are narrower than the 72 - 73. Normally this wouldn't be much of an issue unless you're running coil-overs like me! It's possible to run the coil-overs upside down which is what I opted to do, but this means you'll have to buy additional hardware like special bolts for the trailing arms at about $90 a piece. Unfortunately running the coils/springs upside down also creates a clearance issue with the heat exchangers and the return engine oil line. Argh!!
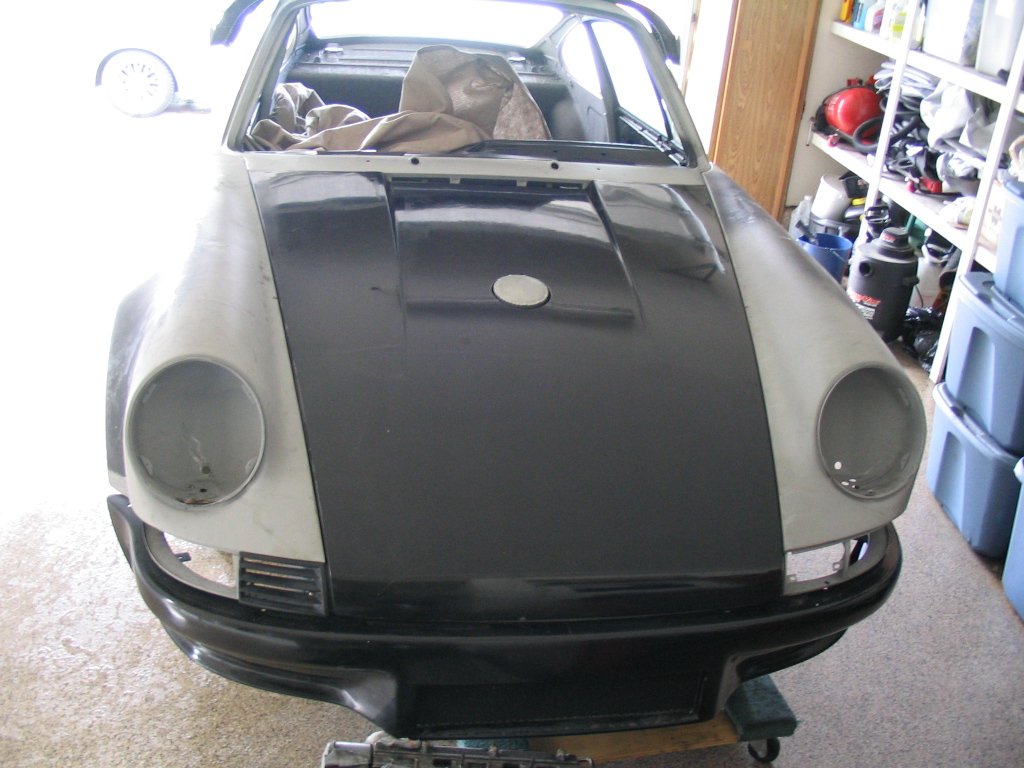
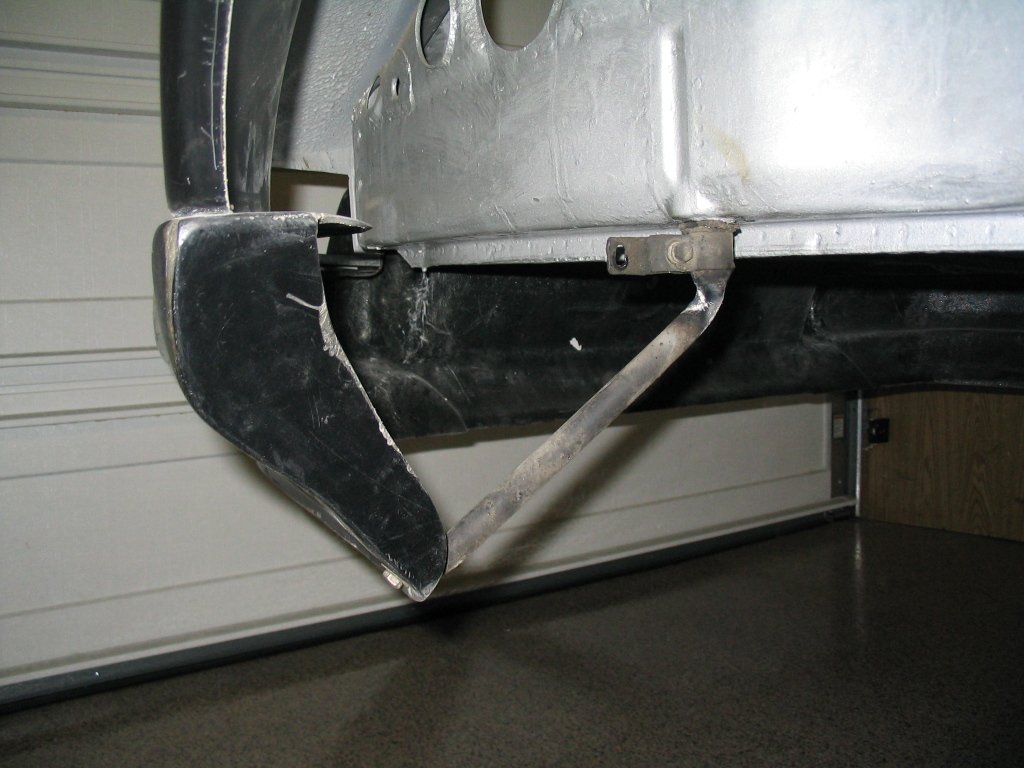
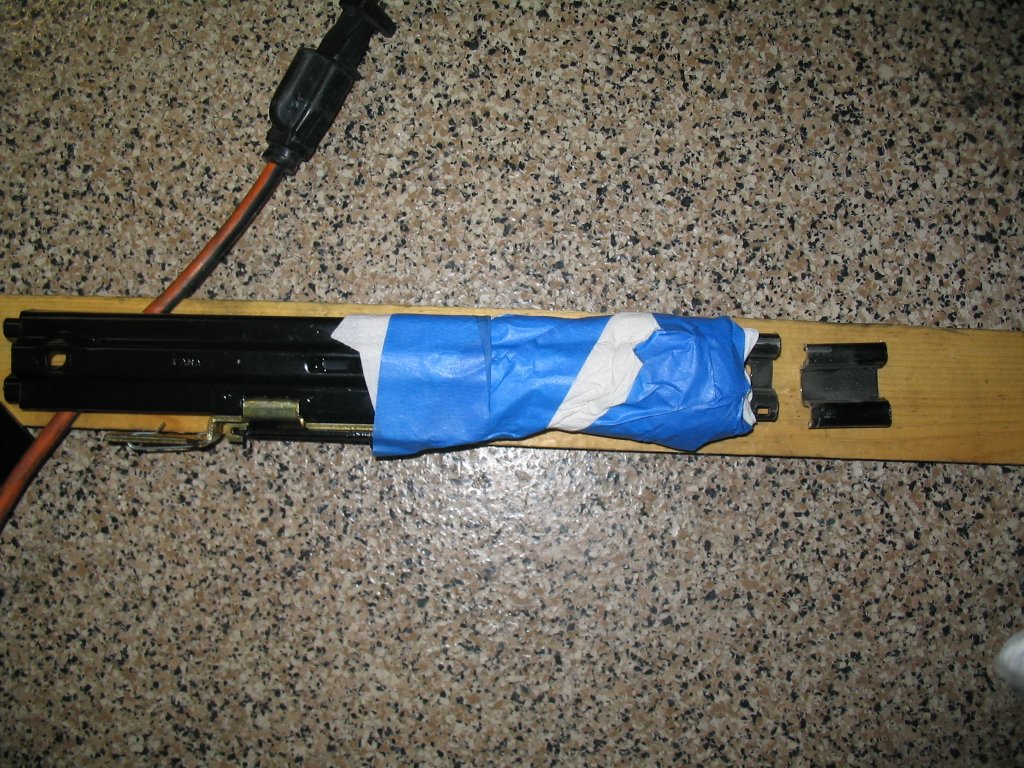
Hardly ever will an aftermarket fiberglass part fit your car perfectly. Although I have to say Getty Design puts out a good product and the adjustments were bearable. Here are some things to keep in mind when mounting your fiberglass bumpers, hood and duck tail. The front bumper does not come with any mounting hardware. It comes with some threaded inserts but no instructions on how to mount them. Maybe they forgot to give me the instructions but it took me a couple tries to fabricate some brackets that were sturdy enough to mount the front bumper, this (pic below) was my first attempt, the ultimate solution was a 90 degree tab with two holes on each side.
There are some tabs towards the ends of the bumper and you'll have to figure out some brackets to mount to. I did quite of bit on tinkering and research online to figure out the best way to mount the front bumper. After several tries, I'm pleased with the outcome, you can push on it and will not budge. The mesh for the front bumper opening also needs to be attached with fiberglass.
The rear bumper comes with two extensions you are supposed to magically figure out how to install. After looking at lots of pictures online, I figured out I had to attach them to the bumper with fiberglass. I made a mess of things but I laid enough cloth and poured enough resin to use this area as jack point! Then you have to drill the extension so you can fasten the bumper to the tub. There was no real way to fasten the rear bumper ends (by the wheel) to the tub, so I bent the original late model bumper brackets and drilled a hole on the very bottom of the bumper ends to attach it to the bracket.
I also made some holes on the lip underneath the turn signal lenses and bumper extensions. It is sturdy, but it's quite a bit of work. How these hold up, is directly proportional to how much work you're willing to put into it. The ducktail needed a few spacers, about two on one side and one on the other where they mount to the arms.
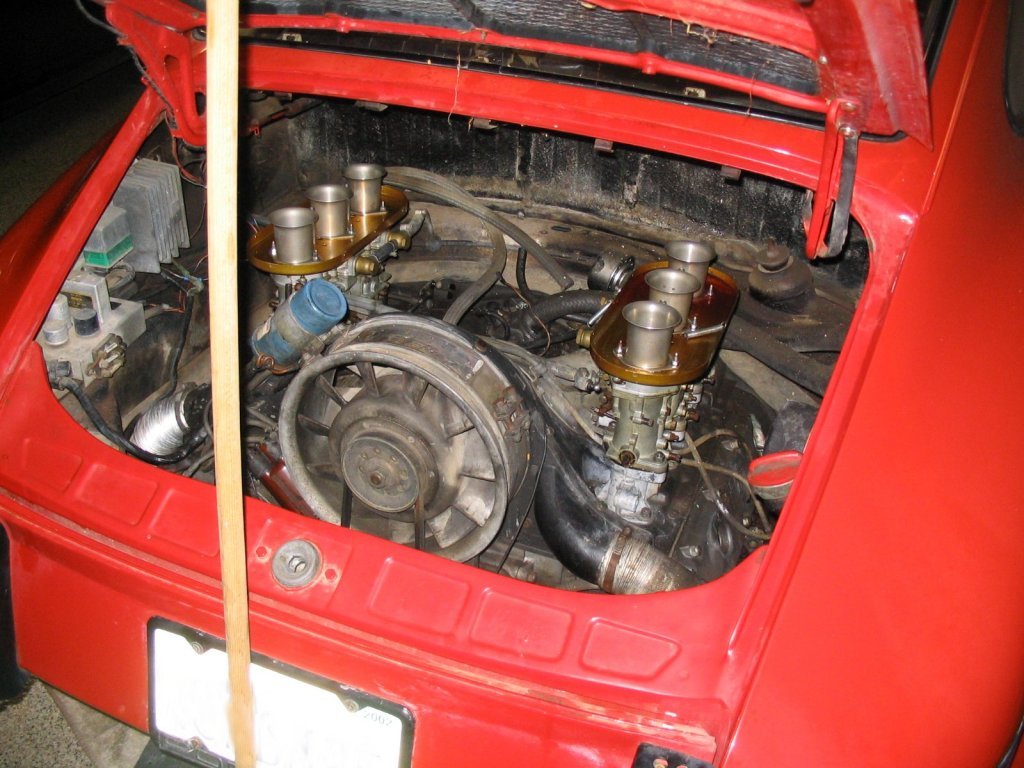
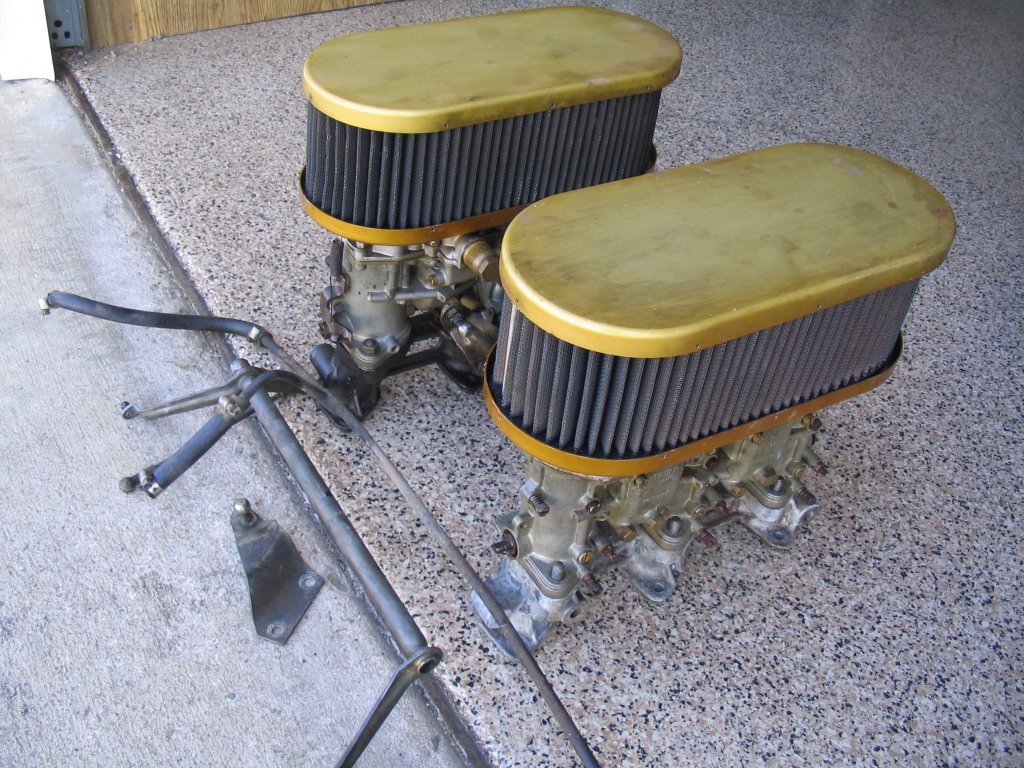
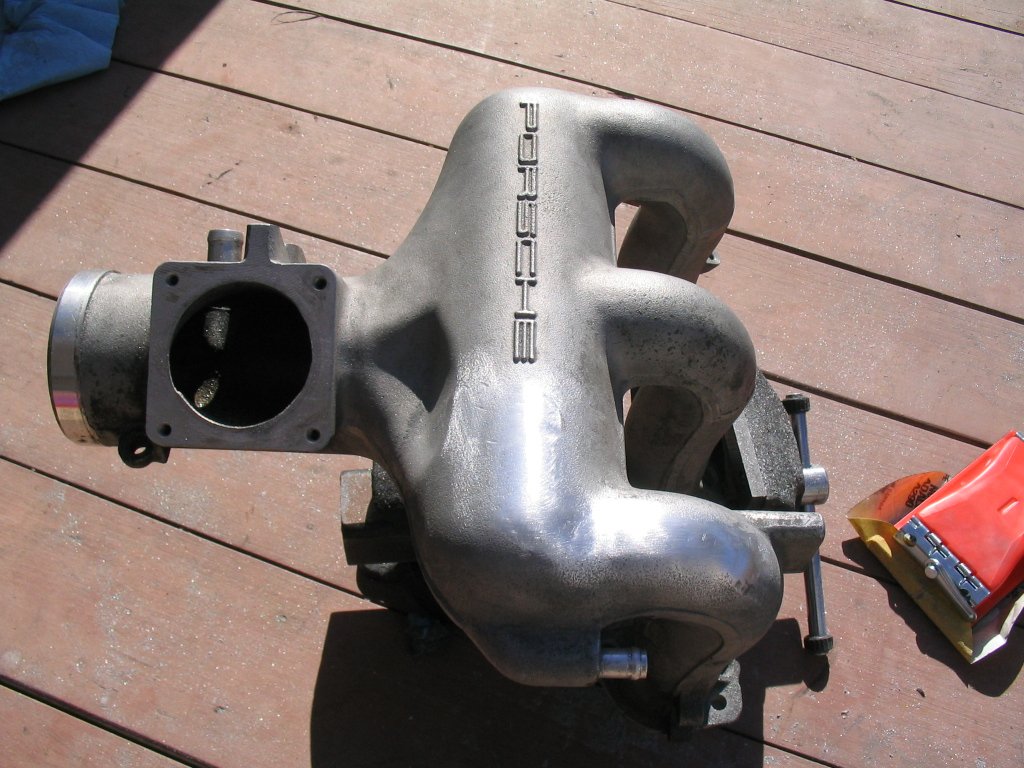
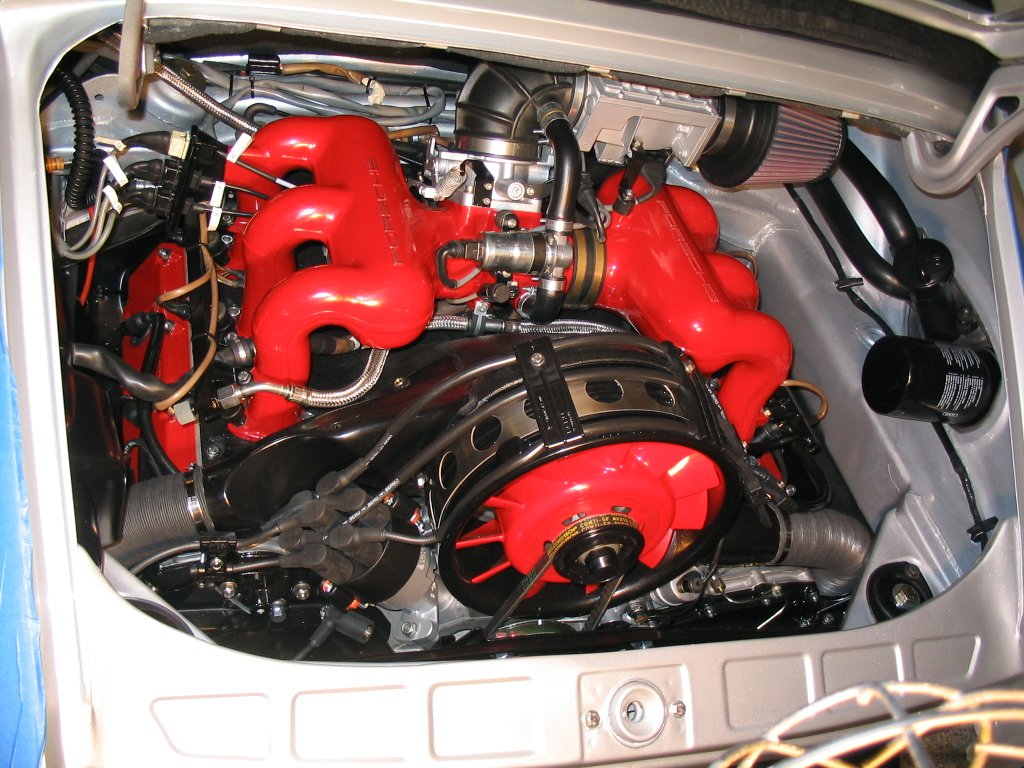
My intentions were to backdate the heat and install a small cone filter to replace the original air filter/box. My plans were to powder coat the intake as well. I decided to grind down the large tab where the cruise control mounts to and the tabs where the air box attaches to. This would make for a clean look of the intake manifolds.
Excessive perhaps, but it only took a bit more work to clean and remove unsightly and now unusable tabs.
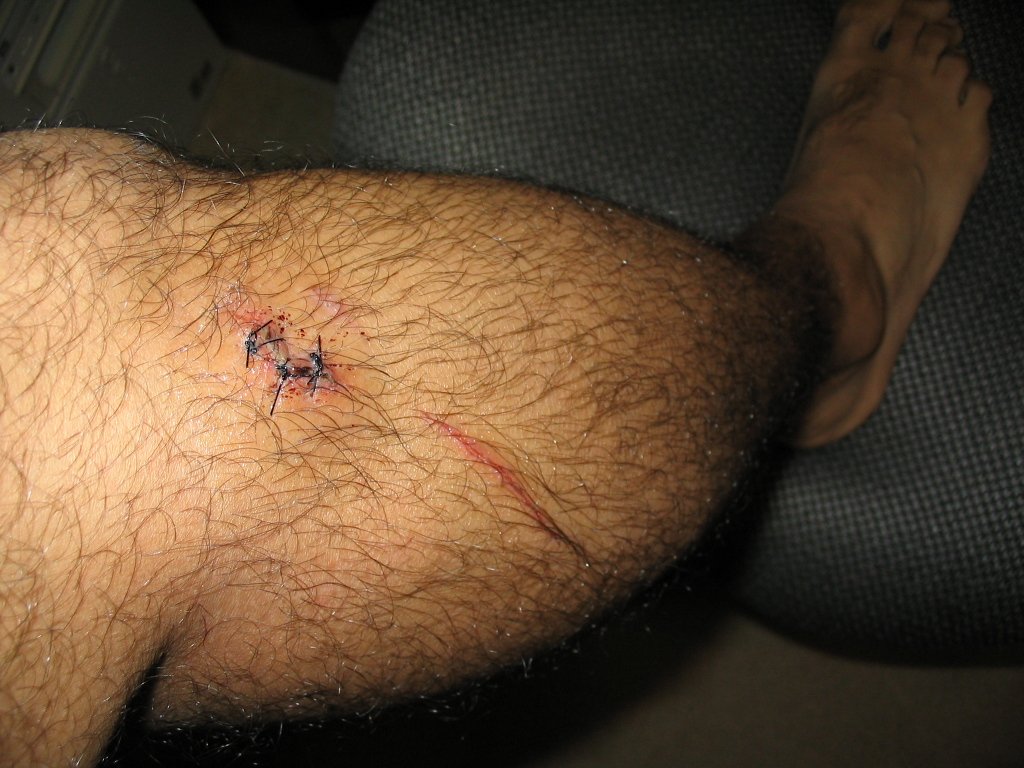
Blood sweat and tears. In all my years of existence on this earth never had I visited an emergency room until I took on this project. While not paying attention, I stabbed my knee with the engine's sheet metal. I took a quick look at the injury and knew right away it was bad. The cut was deep enough to see "your inner stuff"… damn!! Interestingly enough, I didn't feel any pain. I was consumed with the feeling of stupidity that pain didn't even come to mind.
Another injury happened with the heat gun. I was removing the tar/undercoating from the cabin floors and brushed my arm against the tip of the gun. It was so hot that my skin blistered right away.
After almost 2 years, I still have the mark on my arm.
Like they say in racing, "brakes are only good to slow you down". My choices were OEM 930 turbo calipers with floating rotors or 993 calipers with late 930 rotors. Thanks to Bill Verdug and others on the pelican forum for figuring a lot of this stuff out. I decided to go with the 993 calipers. The first step was to find a good set of calipers and then getting the adaptors to fit on a 911. The fronts are straight forward and only require an adaptor, the rear calipers need machining along with adaptors to fit carrera rotors. Although I wanted to fit the rears on 930 rotors, the shop did not have experience on doing a minor mod to make them fit on a wider rotor, so I had to do the mod myself. The rear new pads also have to be grind down some to fit.
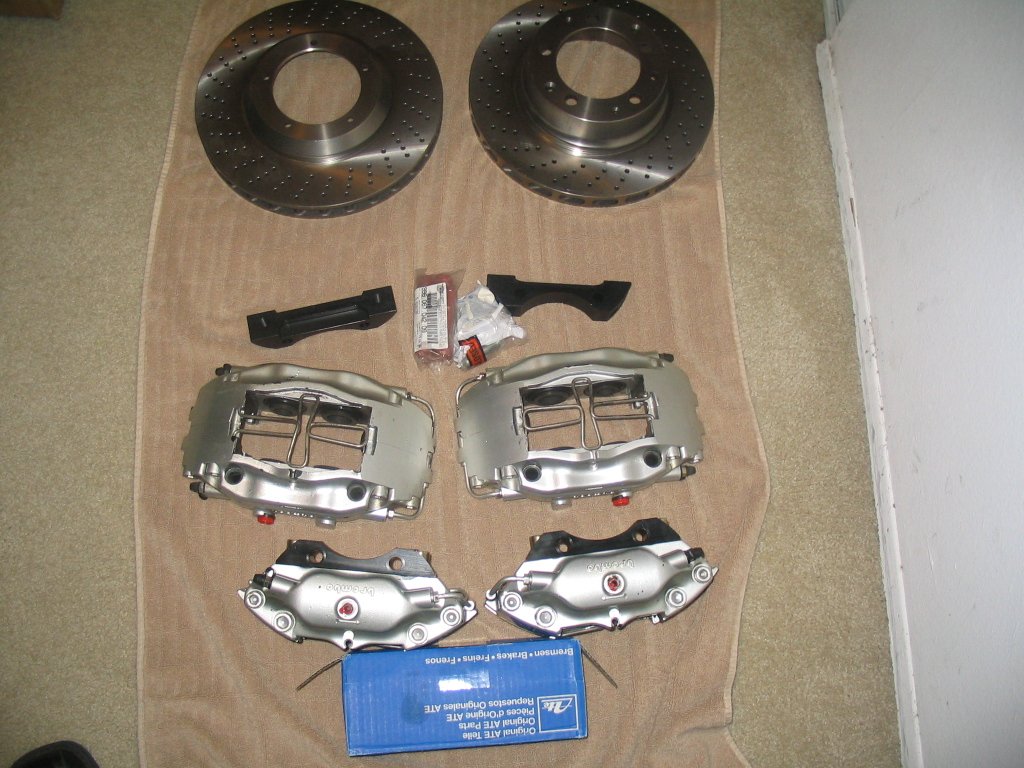
You'll also need a 23 mm master cylinder to push enough fluid to all calipers. No need for a brake bias valve.
The X front strut was derived from Alonso's suggestions and pictures of 935s. To this point, we still don't know how effective it is, but I'm sure it helps... I think ??
These are the major parts I took from the donor car
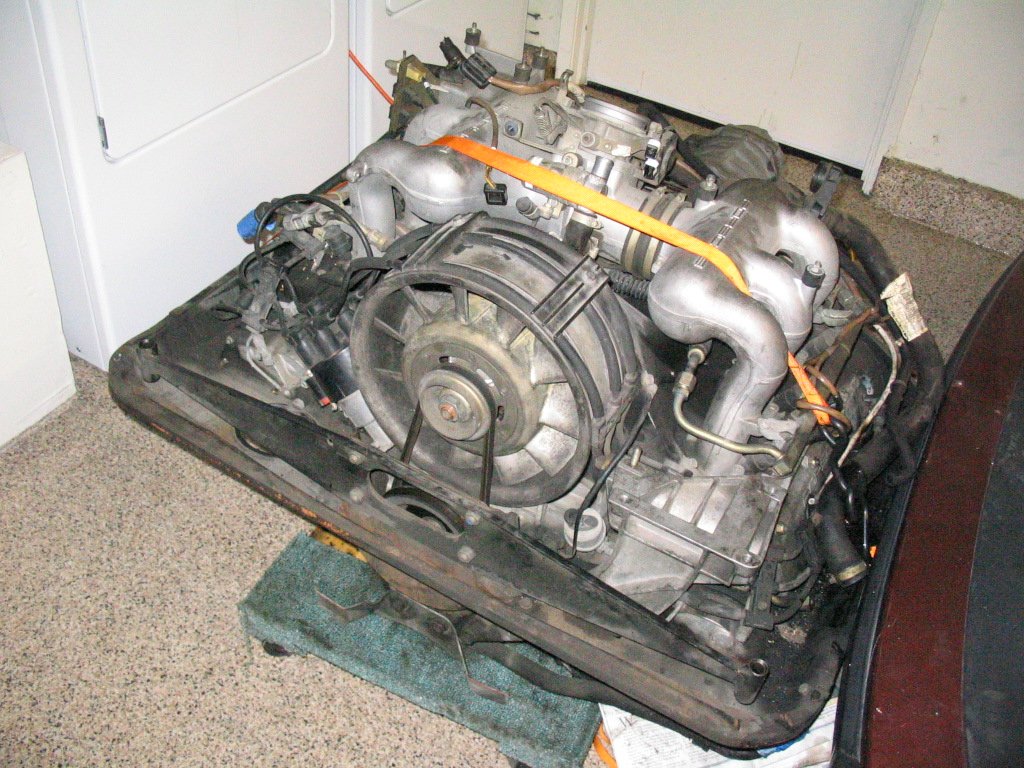
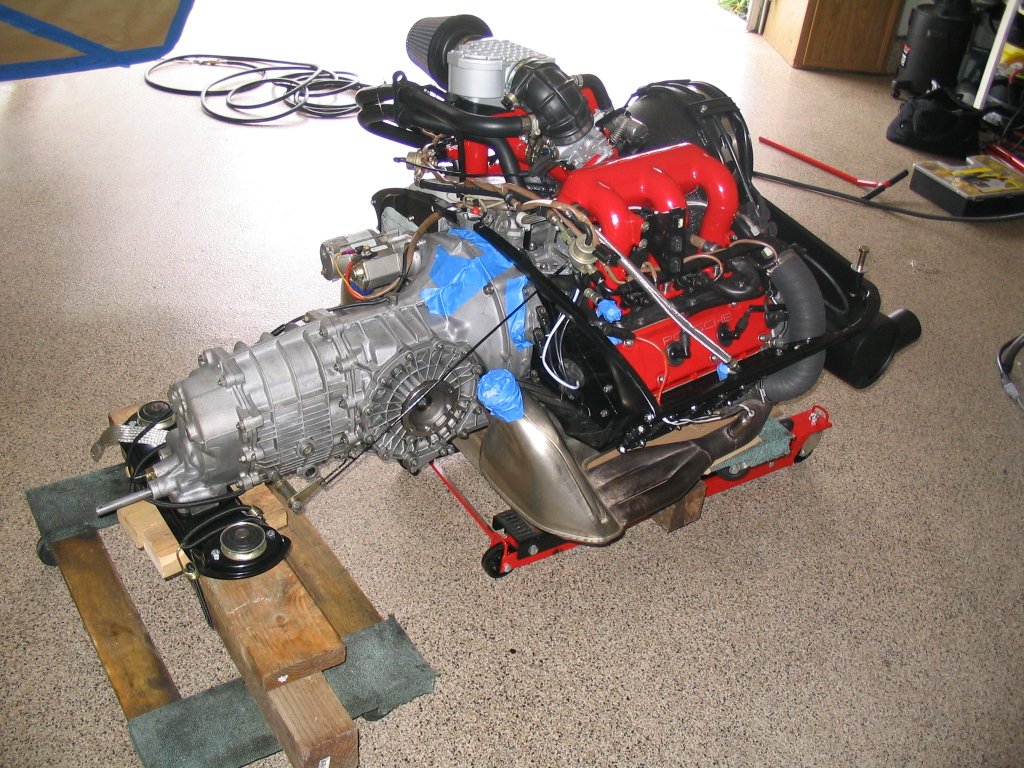
Everything associated with the engine and transmission including shifter
All wiring harness including DME
Windshield wiper motor
Gauges
Gas tank
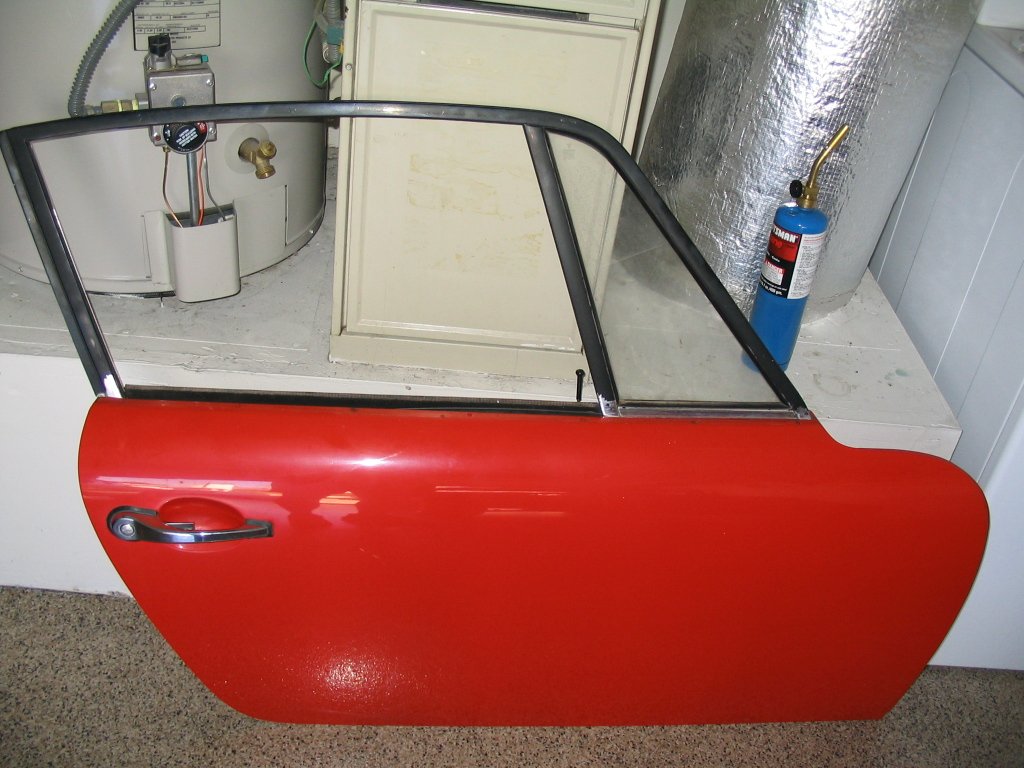
Both doors
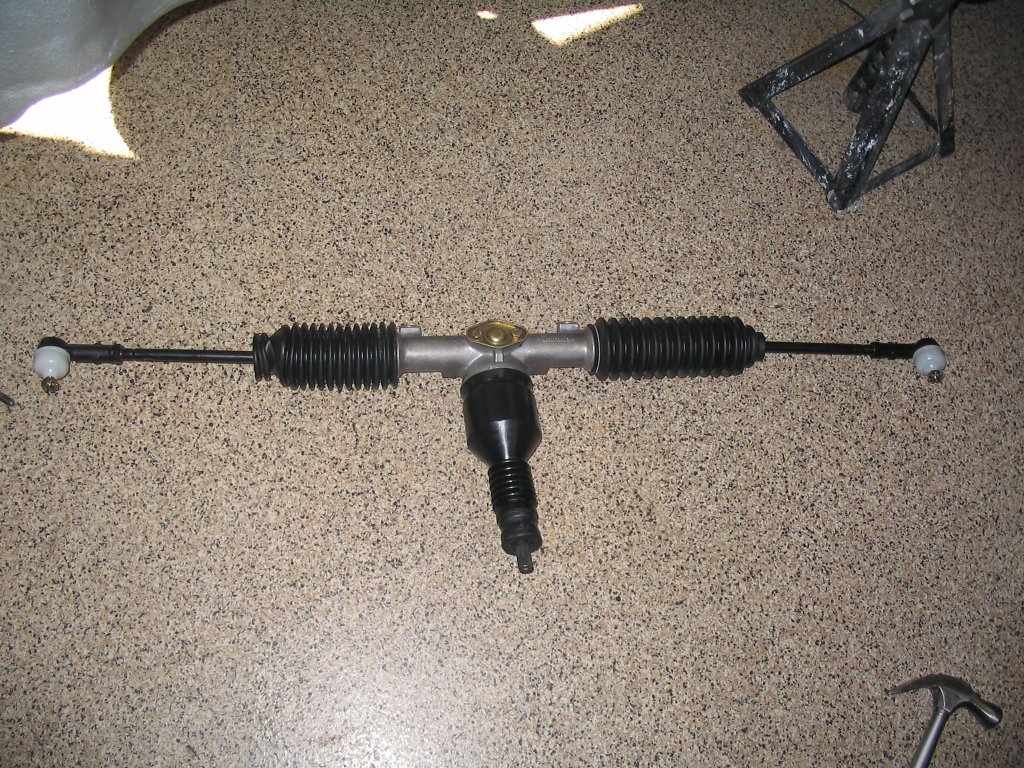
Complete steering rack and column.
Oil tank
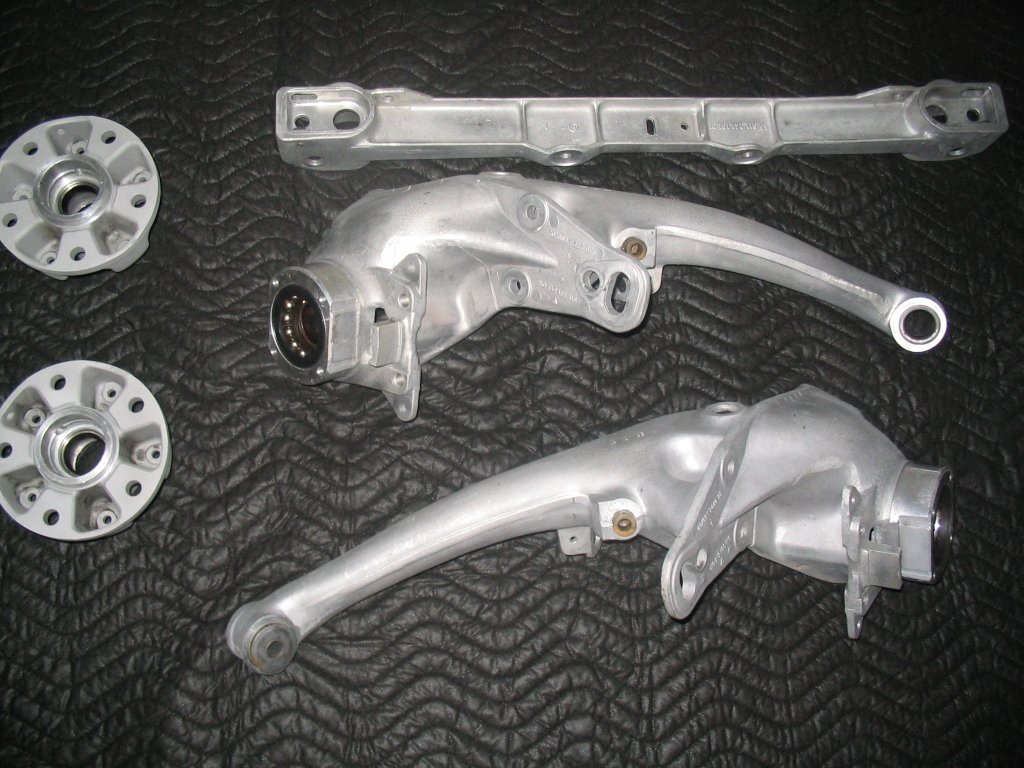
Rear trailing arms
Aluminum cross-member
Rear turn signal buckets
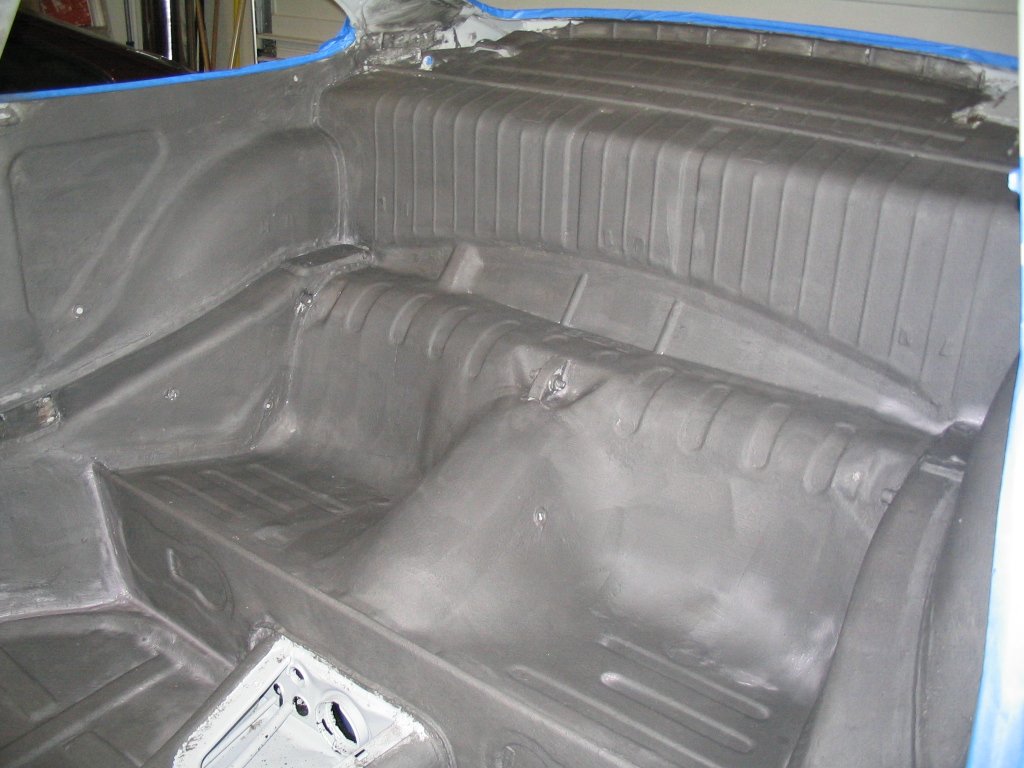
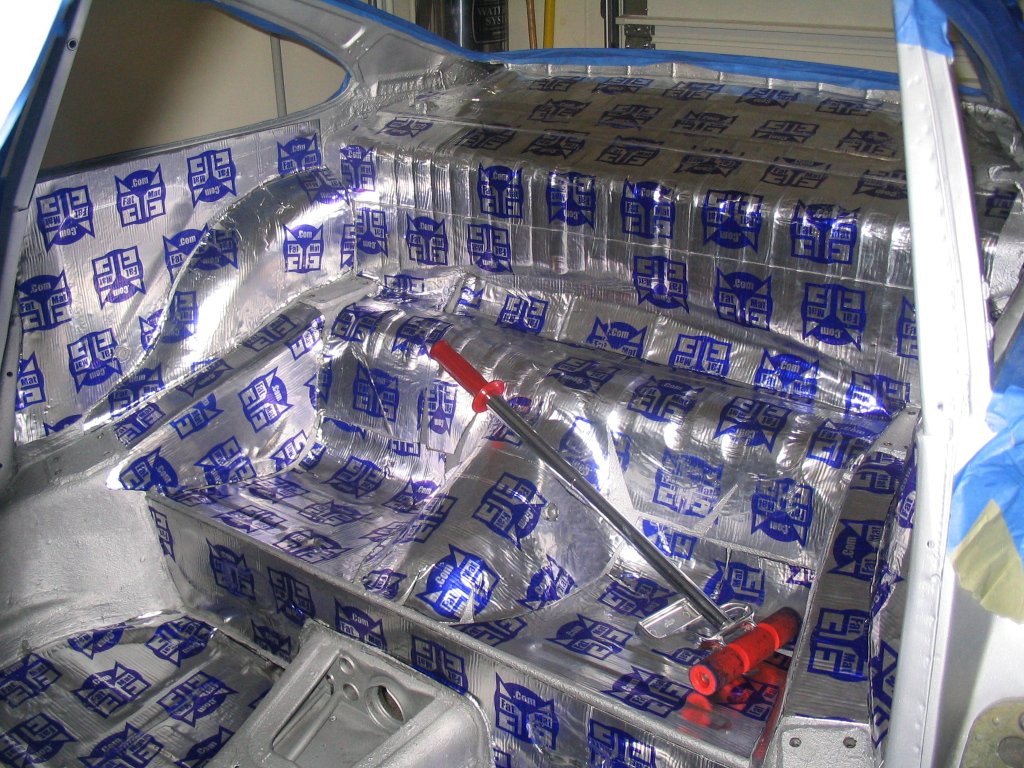
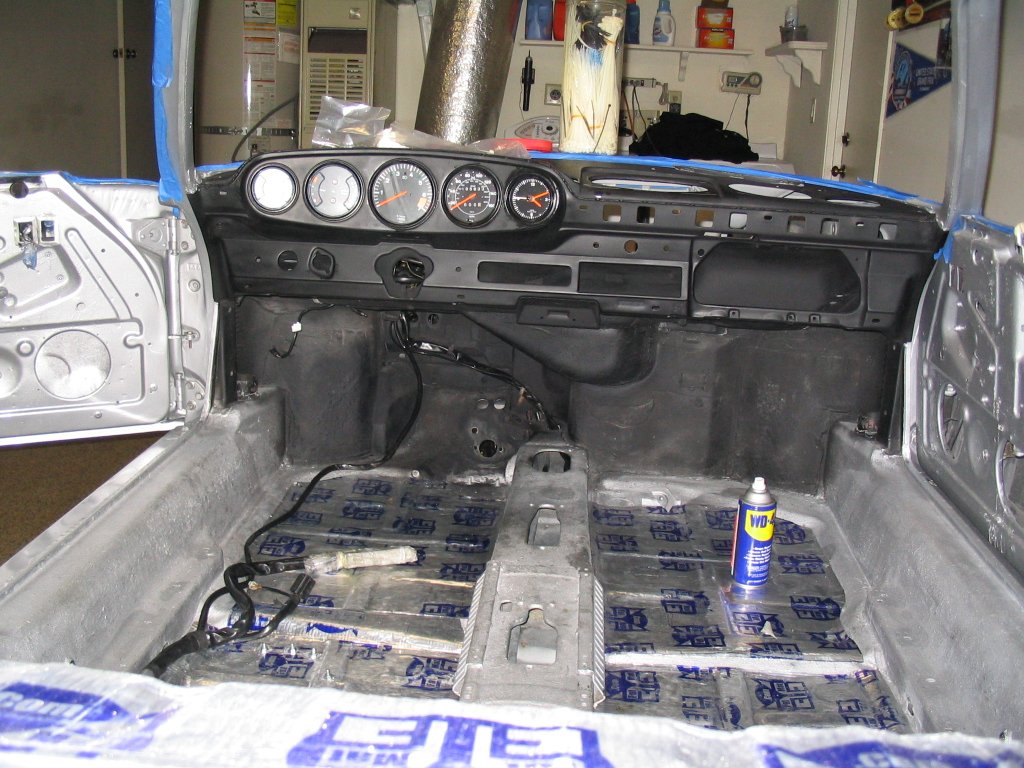
In the interior I used a product called "quiet car" for sound deadening. It could be shot with a special air gun or could be applied with a roller or brush. To this day, I'm not sure how effective it is, but nonetheless it's on the top and bottom of floor pans and forward engine bay.
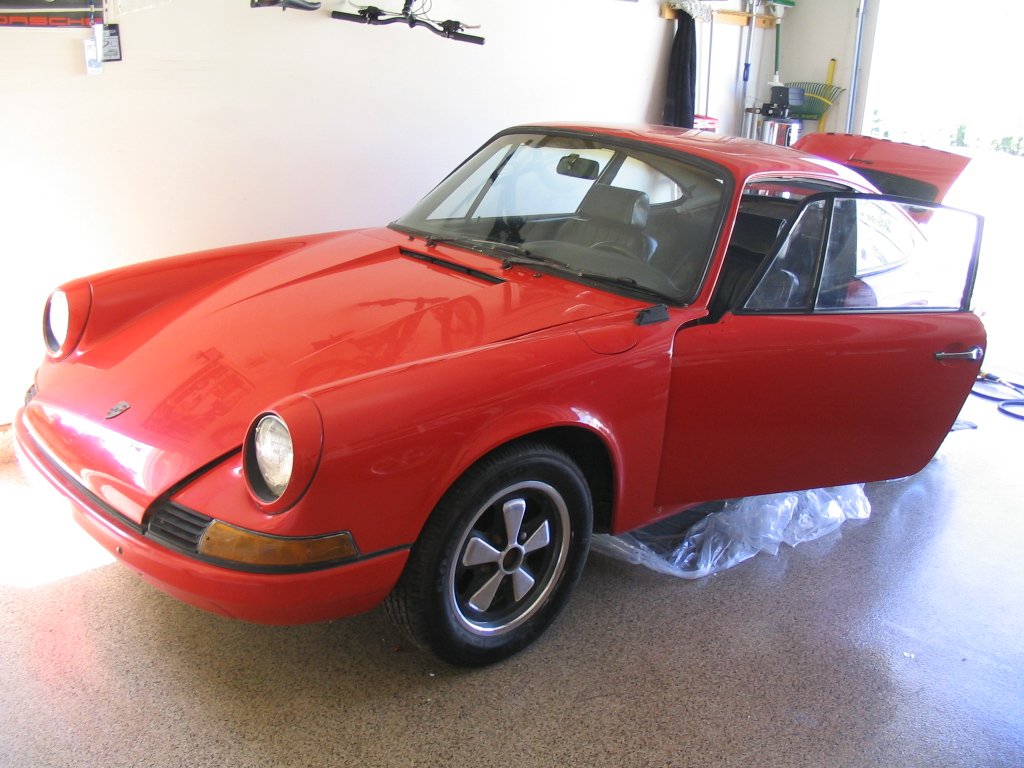
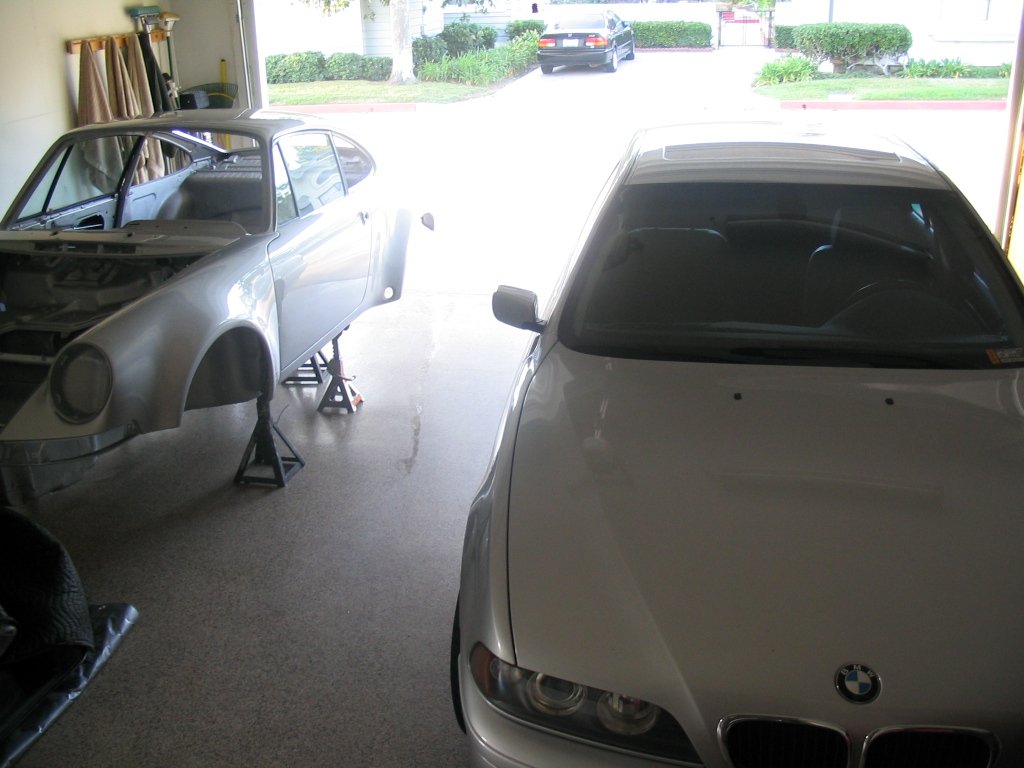
My other car is a BMW 530i in titanium silver and really like the color, so when it came to choosing the paint for the 911, I chose BMW titanium silver.
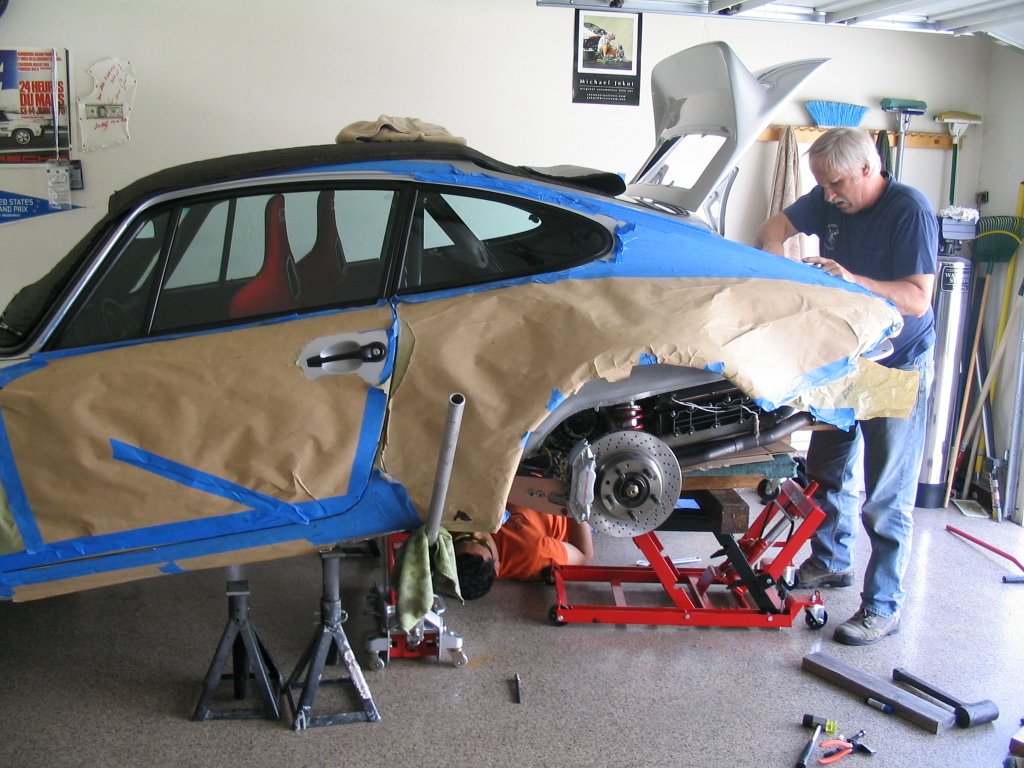
The car spent about 4 months at the body shop. As most paint and body shops will tell you, custom jobs are not their bread and butter but the shop took the job because I've known them for many years and felt comfortable leaving it in their hands. However, their price was about twice what I had in mind, but then again, have you priced a full paint job lately?
Knowing how loud the exhaust was going to be I decided to add a bit more noise protection. Fat Mat is a similar material as dynamat but cheaper, you could buy a large roll on ebay for $80 to cover most of the interior. I ran out and didn't have enough for the doors so I purchased some dynamat locally. Dynamat is more expensive but you can tell your buying better quality.
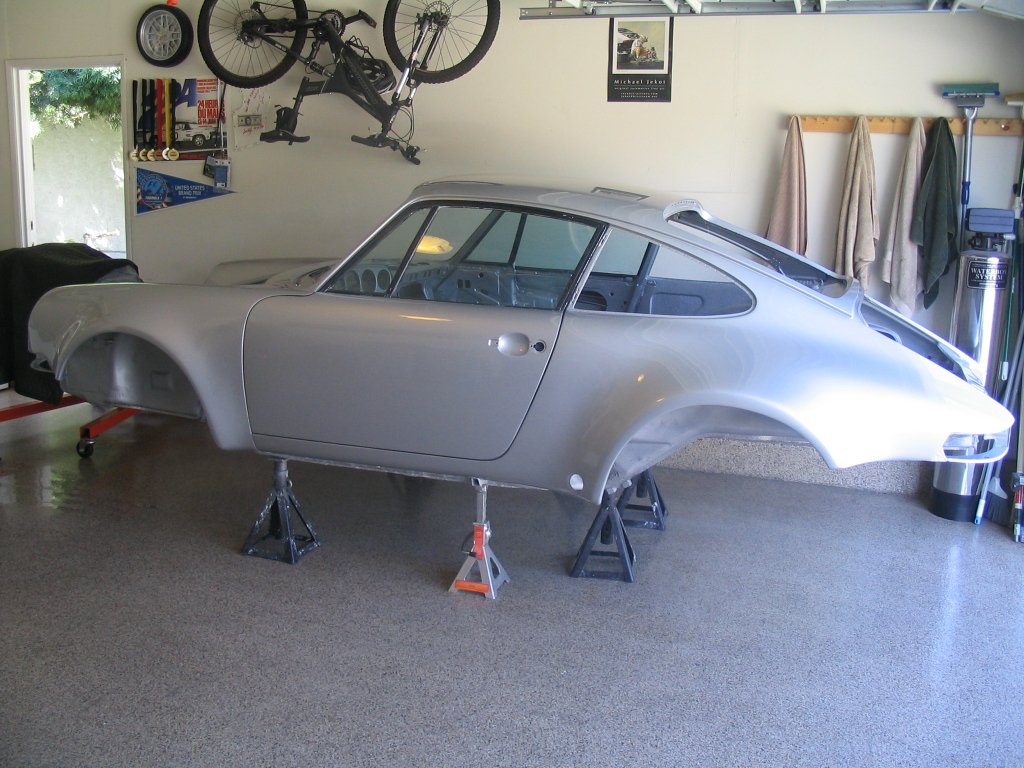
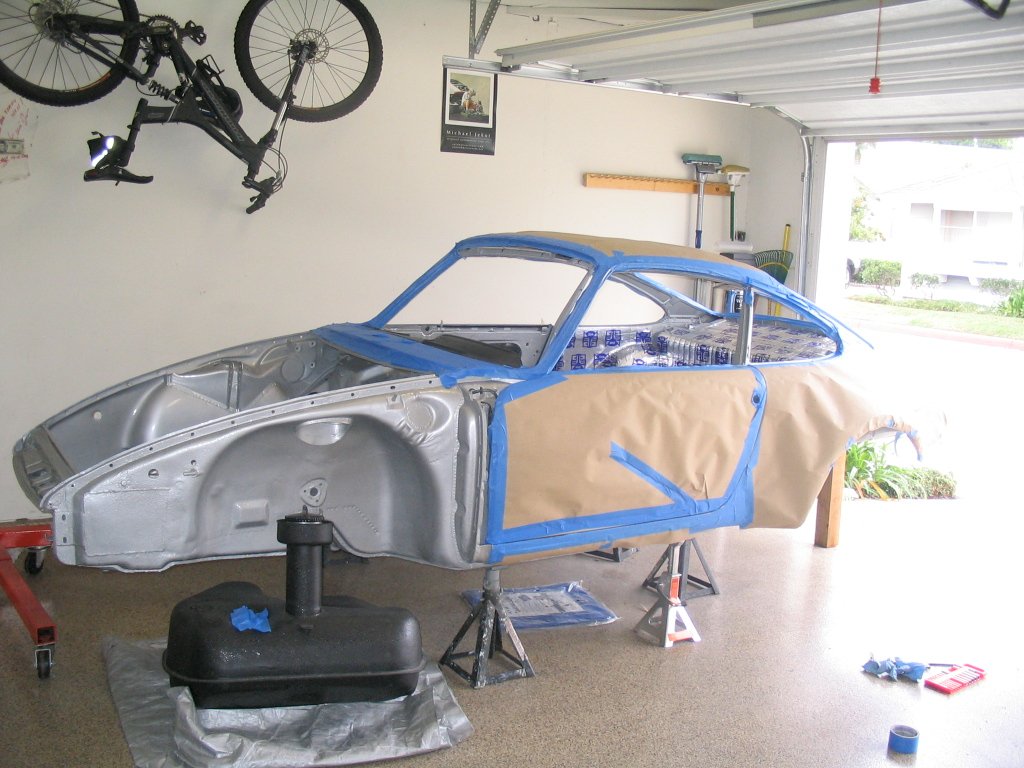
I was careful during the build to not scratch the paint. I covered the entire car in blue painters tape and masking paper. Removed the fenders and put them away until I needed them towards the end of the build.
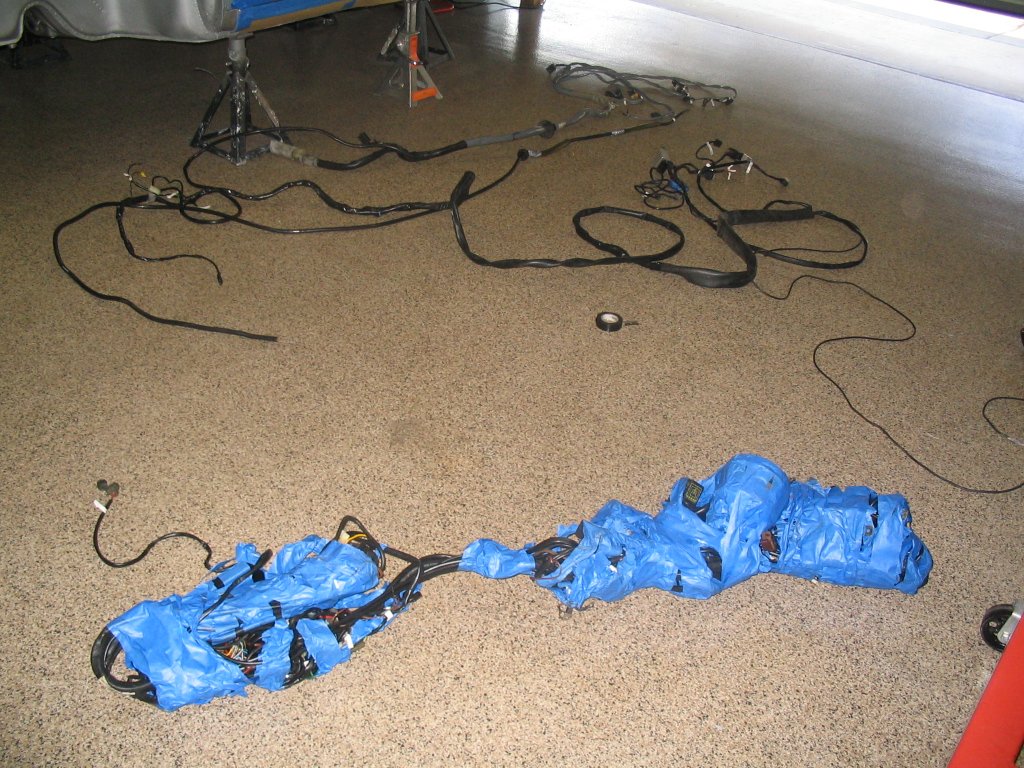
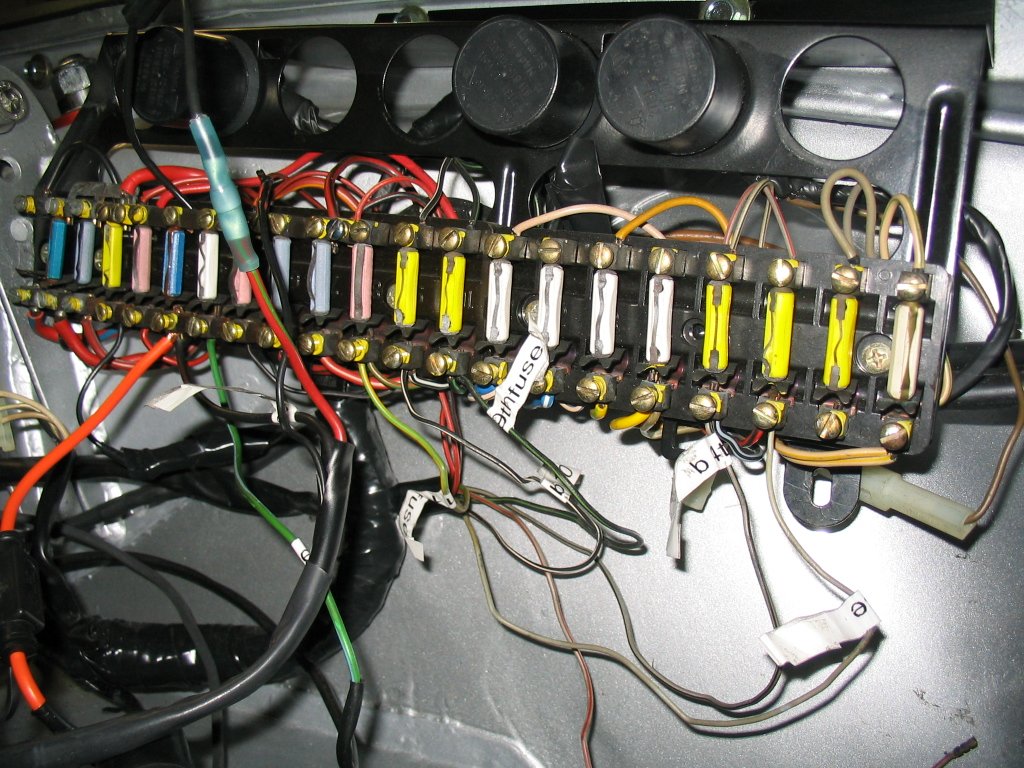
The label maker paid off big when it came time to install all the electrical wiring from the donor car. One other thing that helped was that I did not disconnect any wiring from the gauges from the donor car. I finally understood the reason why Porsche uses a rubber gasket to hold the gauge on the cluster. You can easily install all gauges pre-wired.
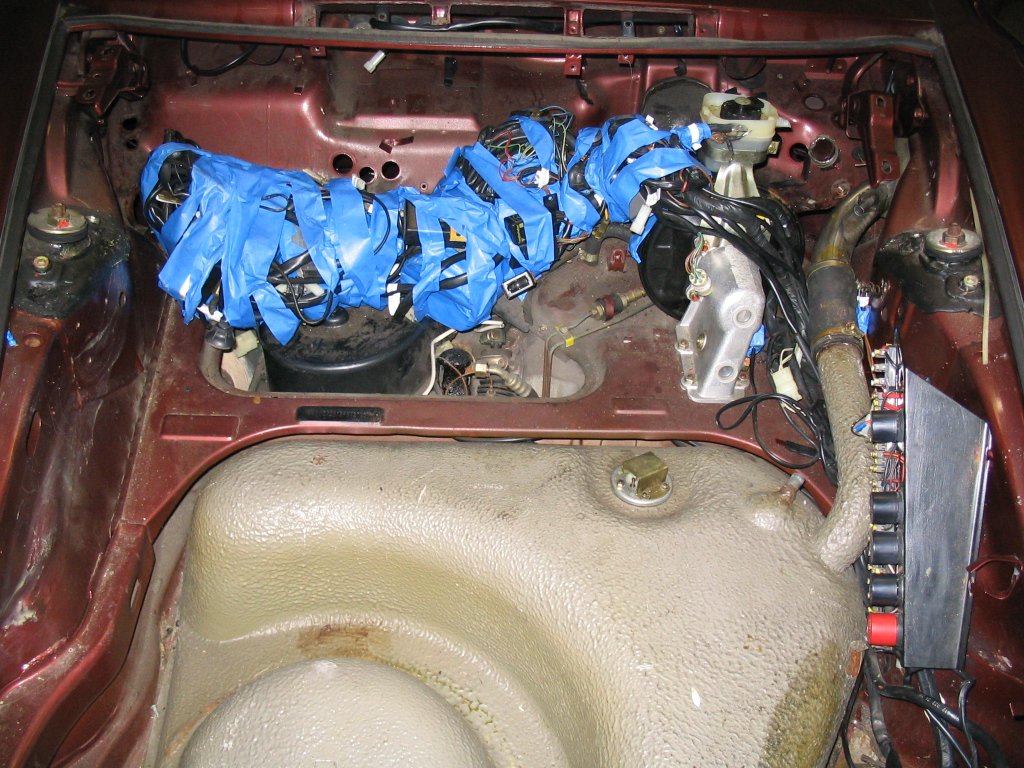
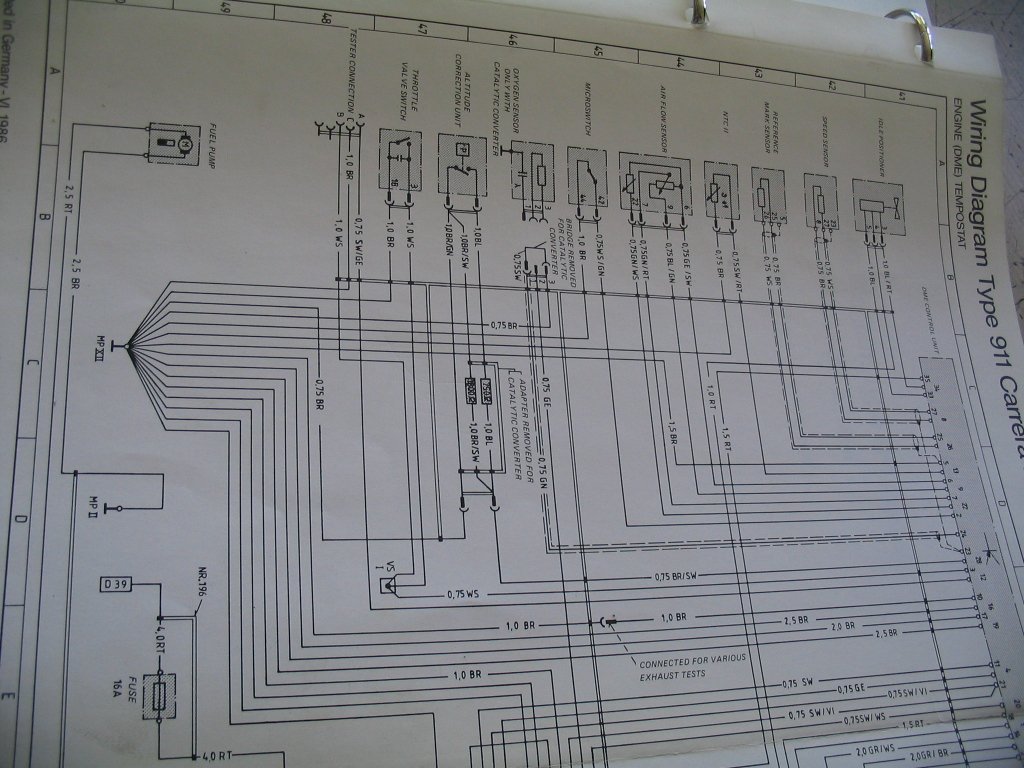
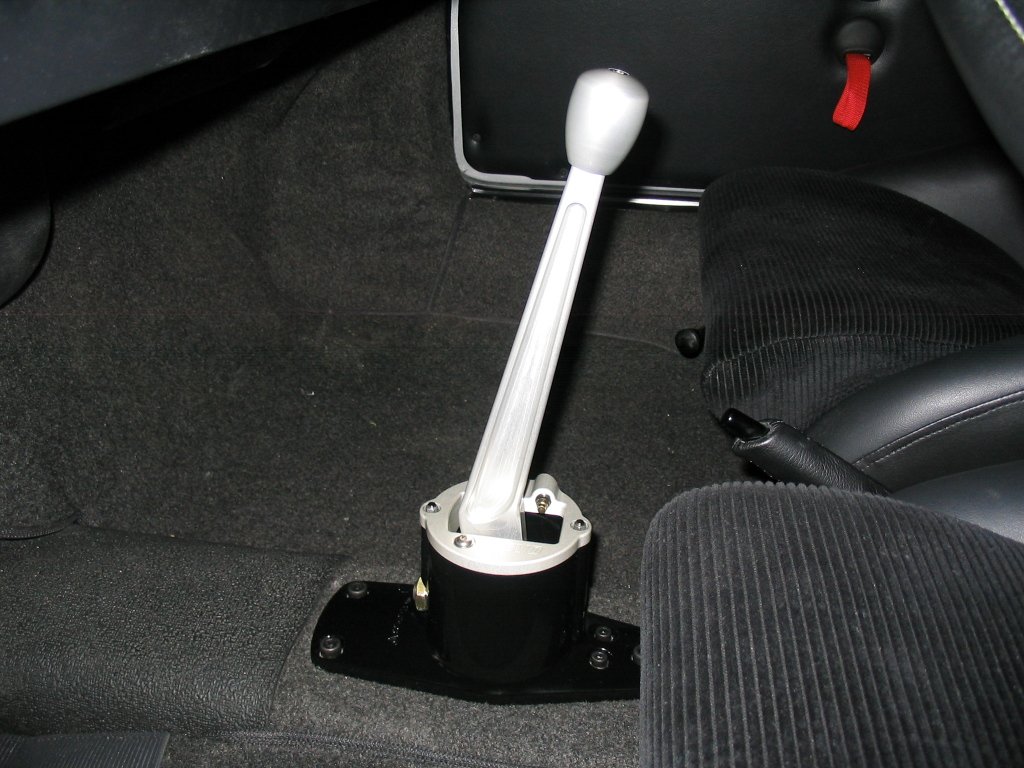
The biggest challenge was figuring out which unnecessary wires to cut. The 1970 was not going to have AC, power seats, cruise control, heater fans, power door locks etc. Lots of time was spent tracing wires and reading up schematics to figure out what I needed. And of course, this meant I had to dig back into my least favorite area of the car, the dreaded center tunnel.
When it came time for the install, I bundled all the wiring and even used some grease so it would slide through the narrow tunnel opening. It included the positive cable and set of wires for the tail lights, etc.
After many months of advertising the 1985 tub for sale, I was glad to have finally sold it and get back some garage space. It had been almost one year having to park my daily driver on the street, the paint already had some oxidation.
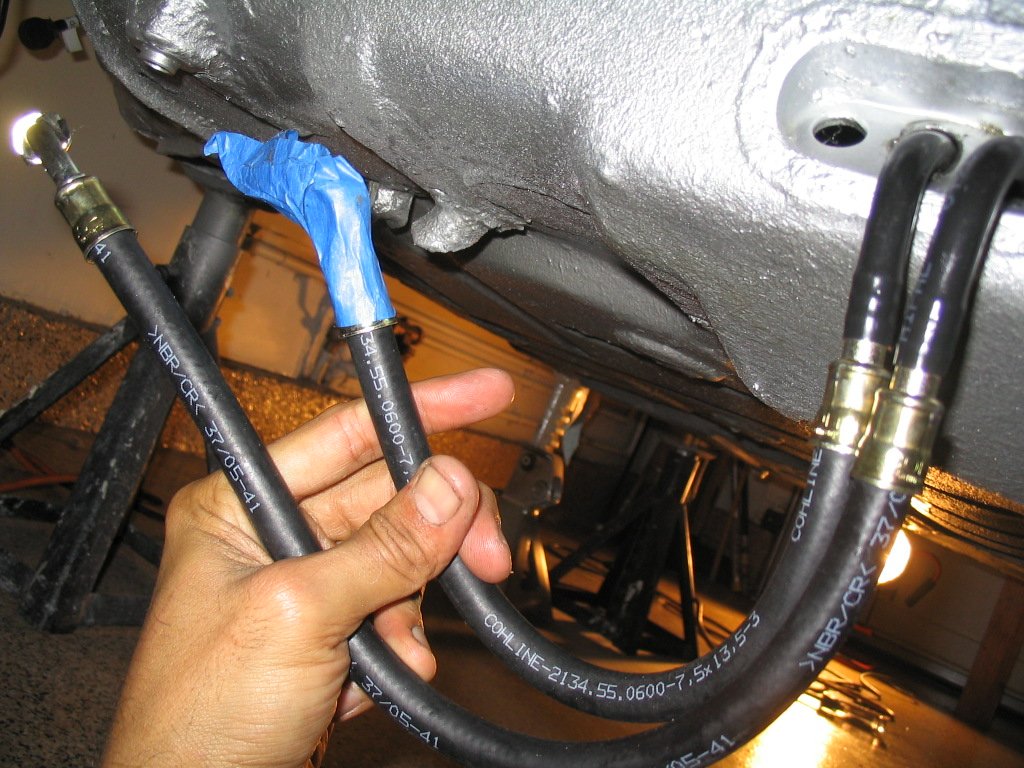
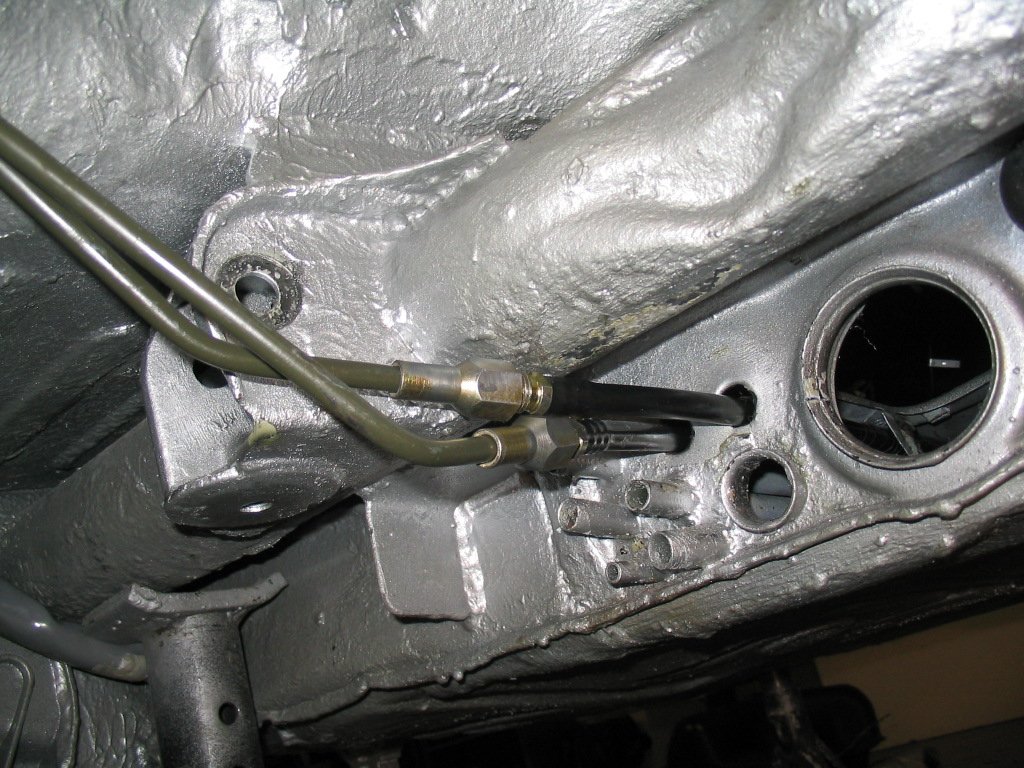
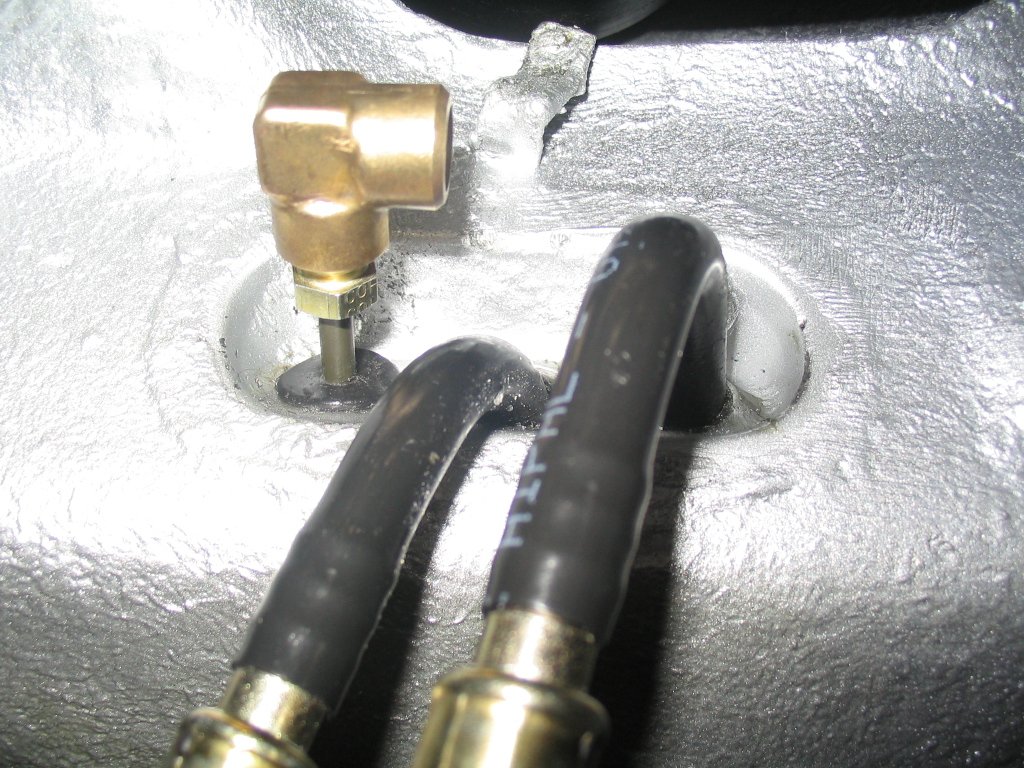
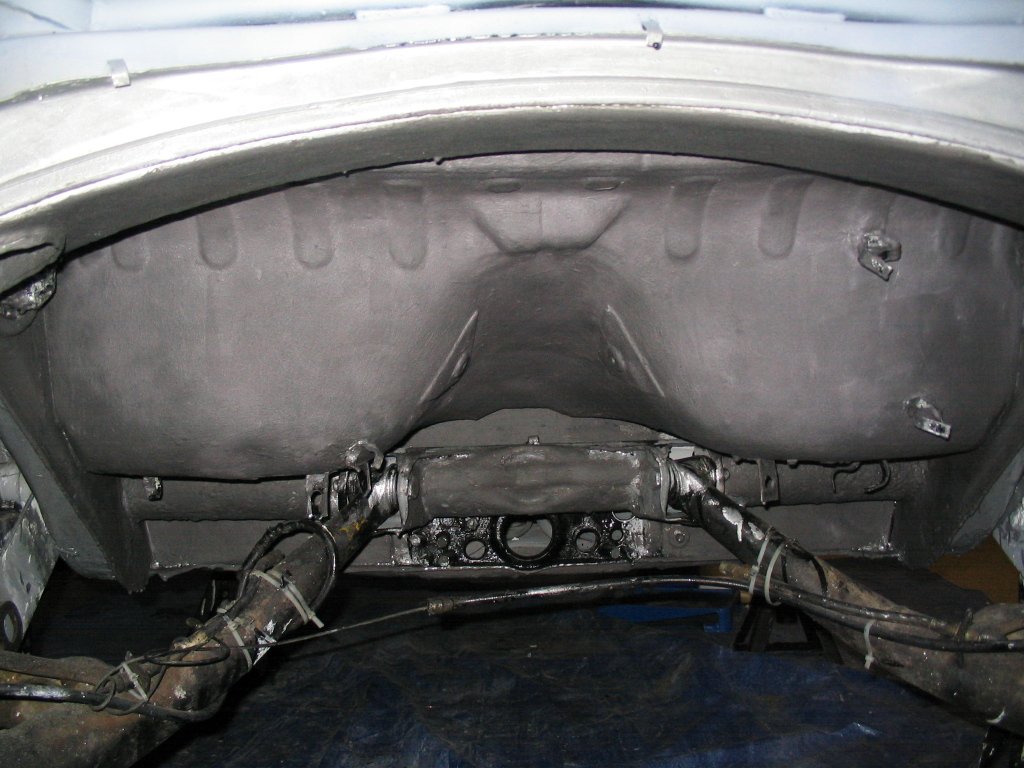
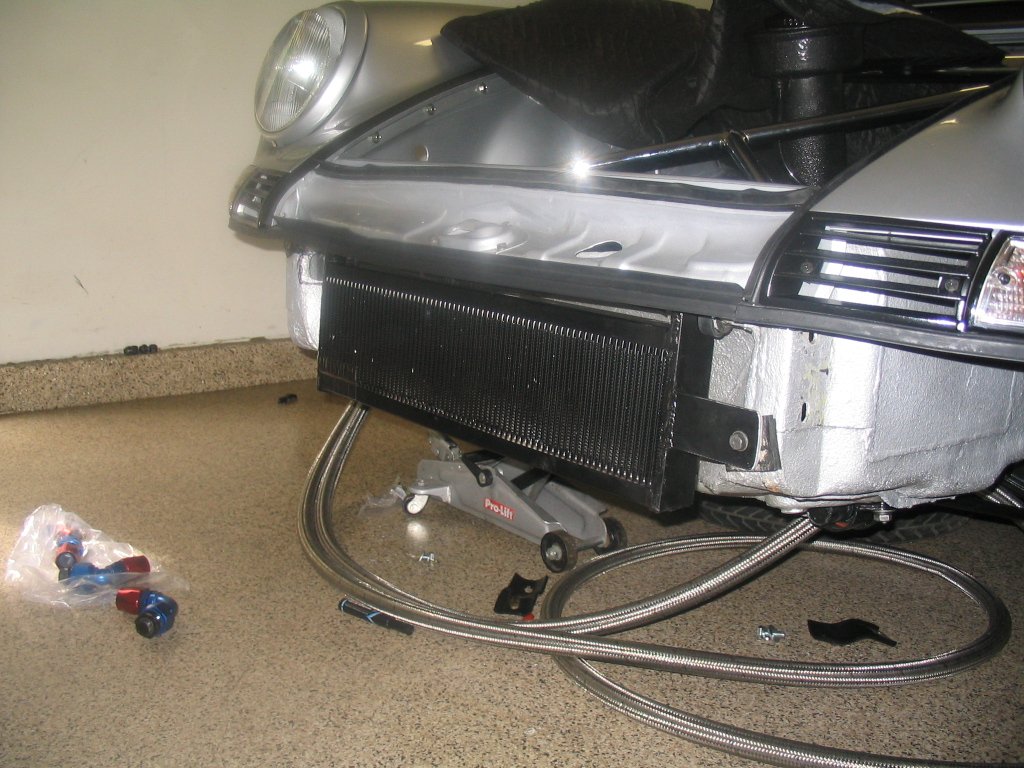
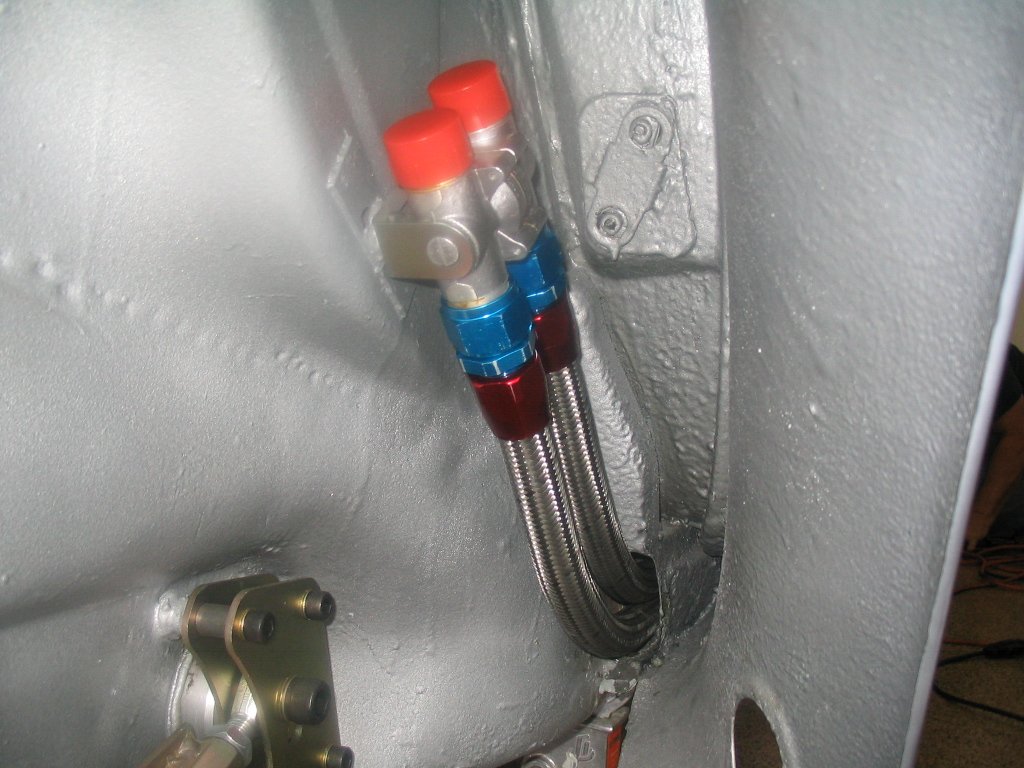
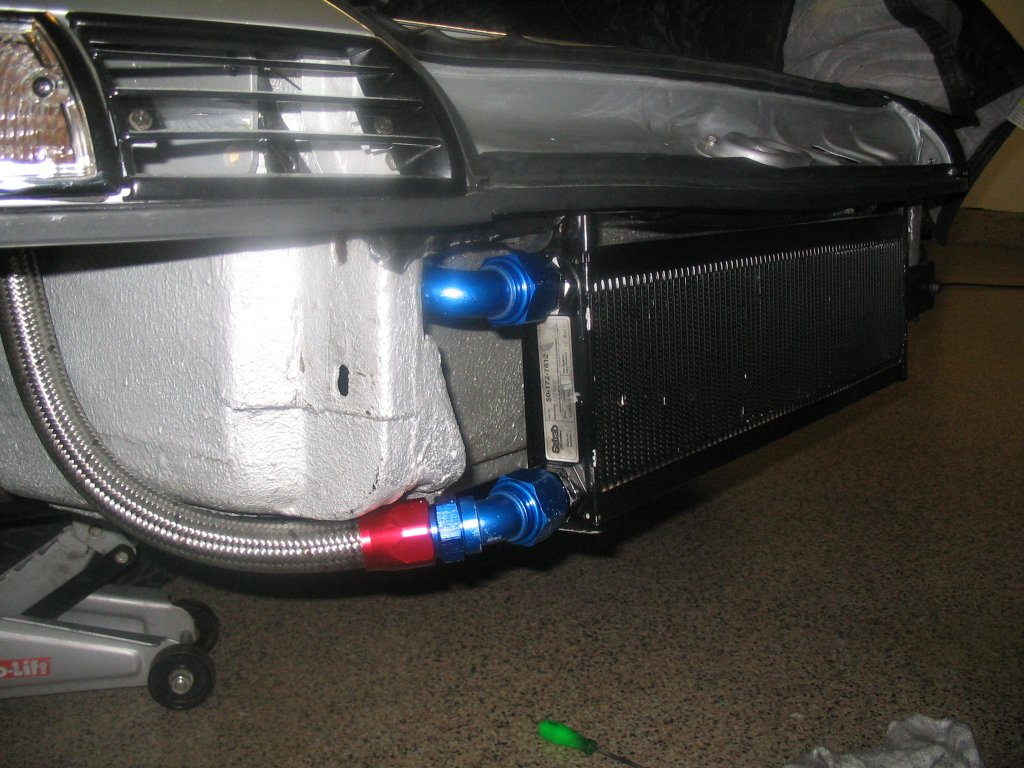
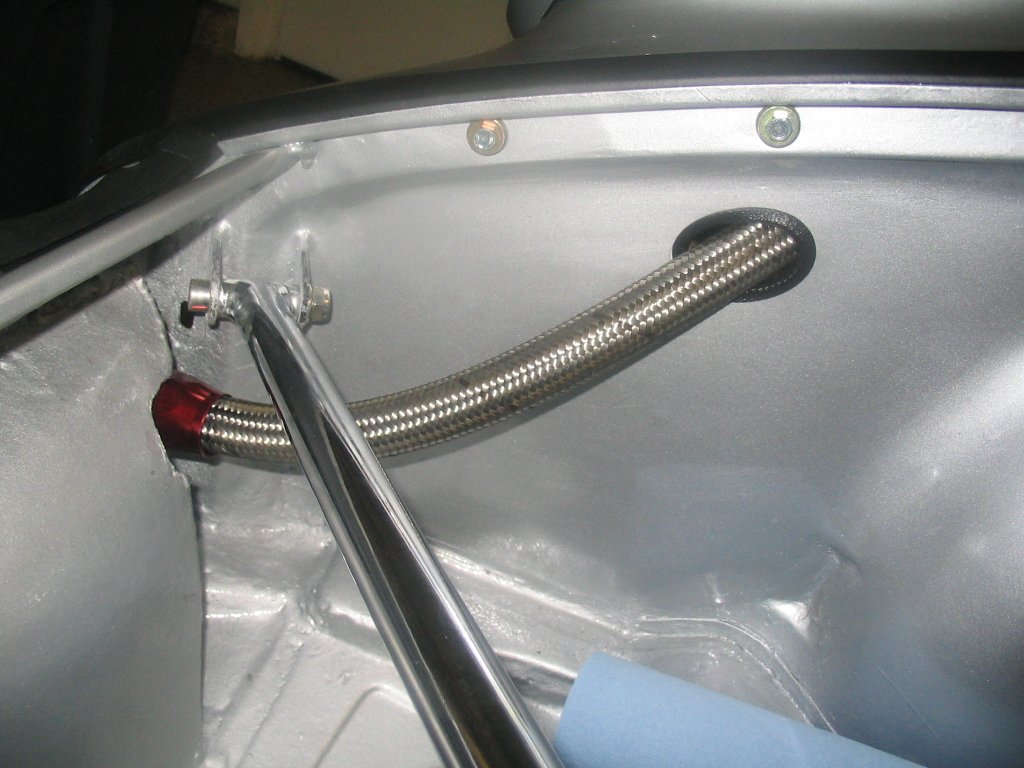
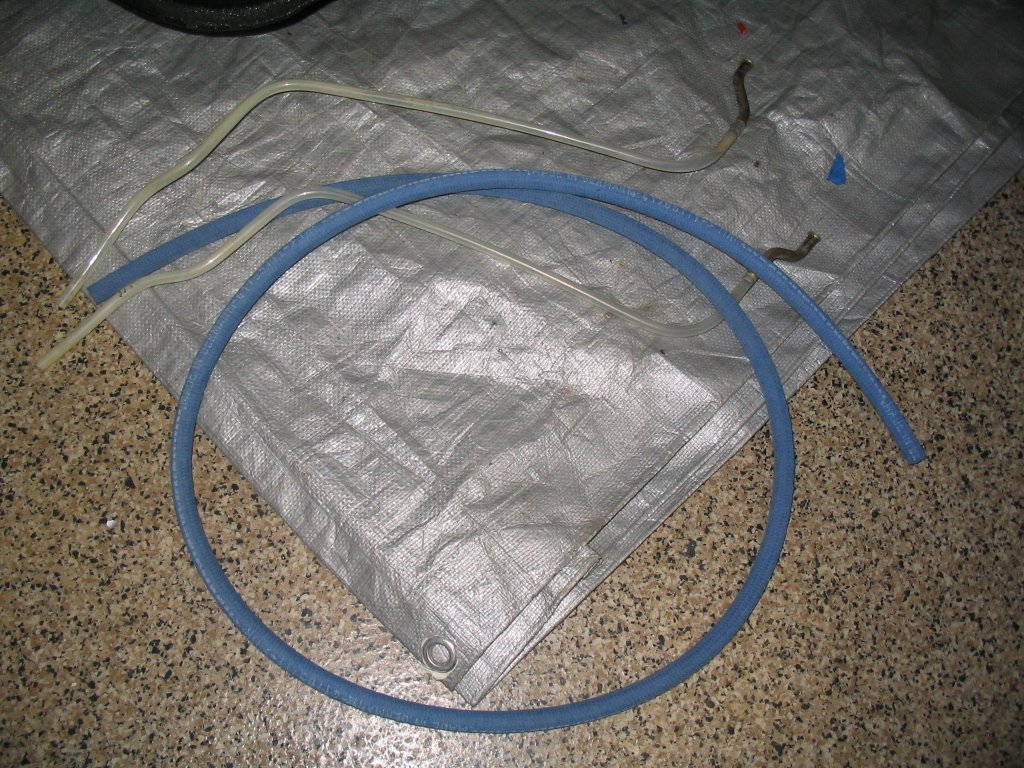
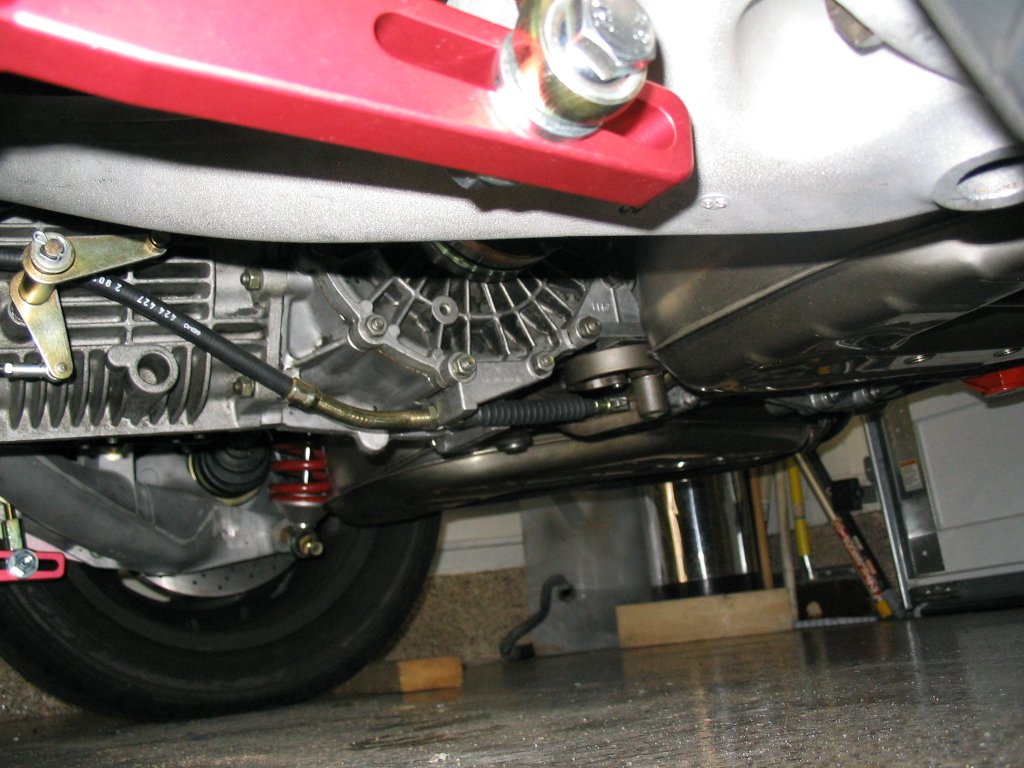
The oil lines from the front cooler to the engine were a real pain. There are two schools of thought on this matter, those who think -12 hoses are enough and those who say -16 is the only way to go. Since my plan was to route the hoses through the rockers, I initially chose -12 thinking it was the largest diameter I could fit. Reading some archives on pelican, I was then convinced -16 was the better size and took a gamble on 36 feet of braided hose. I had previously tried to fit two one-inch OD water hoses from Home Depot through the rockers and they fit snug. Cutting the rockers was nerve wrecking knowing I may not be able to fit the hoses and had to revert to running them on the outside. Flexible hoses on the outside usually sag and are just unsightly. Luckily I was able to barely fit two -16 hoses through the openings on each side of the rockers. The upward bend (almost a 90 degree turn) by the passenger wheel well was suspect but with some good bracing the hoses bent enough to keep them away from the wheel without collapsing or rubbing against the tire.
The other painful part of using standard hoses is the earl's type fittings. Although the instructions look easy, in practice it's a lot more difficult. Trying to squeeze a metal braided hose through a narrow opening on the fitting is no easy feat. And I had to do 8 fittings total. Two at the cooler, four at the thermostat, one at the oil tank and one at the engine oil line. Cutting the hoses at the correct length was crucial as well, a little long was OK, but short was no good. For weeks I tried to figure out the angle for the fittings at the cooler side and thermostat. You see, the hose will have its own direction and angle, as well as the fittings on the cooler, you'll have to marry the two with the correct "angled" fitting. They range in 30, 45, 90, 120 and 180 degrees. The best approach is to buy several fittings of different angles and convince the vendor to take back what you don't use. Keep in mind they're about $30 to $45 each. You'll also need to convert -16 to metric at the engine side of things. I must admit, making the oil lines along with the fittings was a true test in patience.
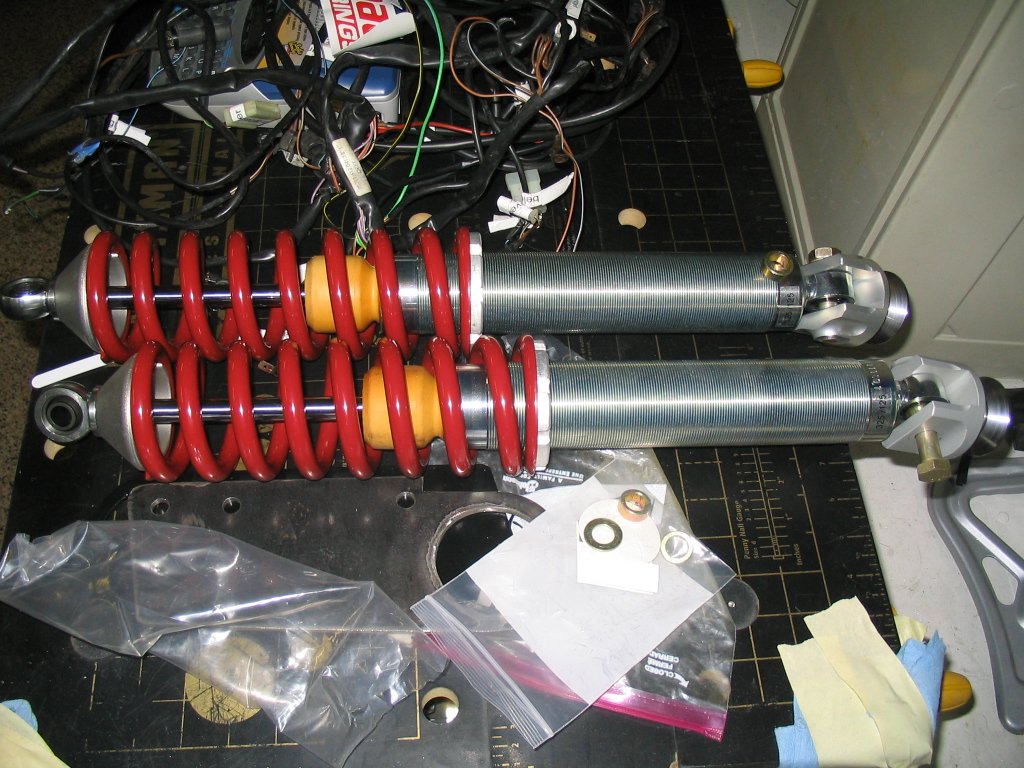
I forget, but at some point, I changed direction from using torsion bars all around to using coil-overs. I must've fallen for "it's easy to change your settings if you have coil-overs". In theory, it's true, but let me tell you, once your car is configured and you know all the trouble it takes to change your front springs, align and balance your car, you just want to leave it alone. It seems to me, front torsion bars are easier to change than springs, and vice versa, rear springs are easier to change than rear torsion bars. The phrase "six one way, half dozen the other" comes to mind. The valving on my shocks was a bit aggressive as well and it makes for a stiff ride on any road that's not smooth. On the plus side of things, I've driven 911s with stock suspension and the difference is like night and day. My car is as stable as they come, it truly feels solid and gives you a lot more confidence while on the road.
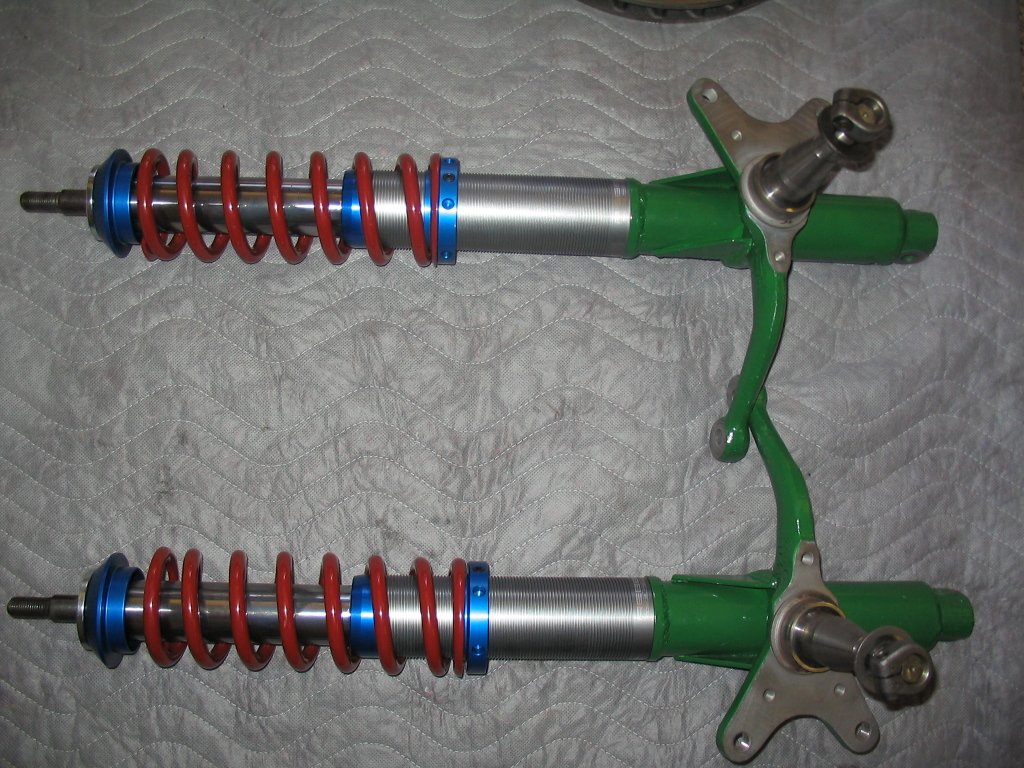
Here are the front bilstein struts modified for coil-overs by Clint Smith at Rebel Racing.
I'm sure my front and rear swaybars help the overall handling as well. The 993 brakes also benefit from a stiff suspension, they have quite the grip and the car stays fairly even with a slight dip on the front when the brakes are aggressively applied.
One store I frequented often is the local Harbor Freight Tools. With this project I found myself buying stuff such as an enclosed sandblaster, engine stand and lots and lots of air, electric and hand tools. For a while, it seemed I was there a couple times a week! The store was one of the largest in town and about 10 minutes from my house, so the constant trips weren't so bad. When I needed quality equipment such as a larger air compressor or good quality hand tools I would go to the local Sears and others.
About 15 minutes from my house is a powder-coating shop. This is one of the reasons why lots of my parts are powder-coated. In retrospect, there were some parts I shouldn't have powder-coated and got a little carried away. If I had to do it over again, I would anodize some instead. I do have to say, the rollbar, A-arms, pedal cluster, engine sheet-metal, valve covers and engine intake, plus other miscellaneous turned out great in powder-coat.
The spare bedroom became the parts warehouse.
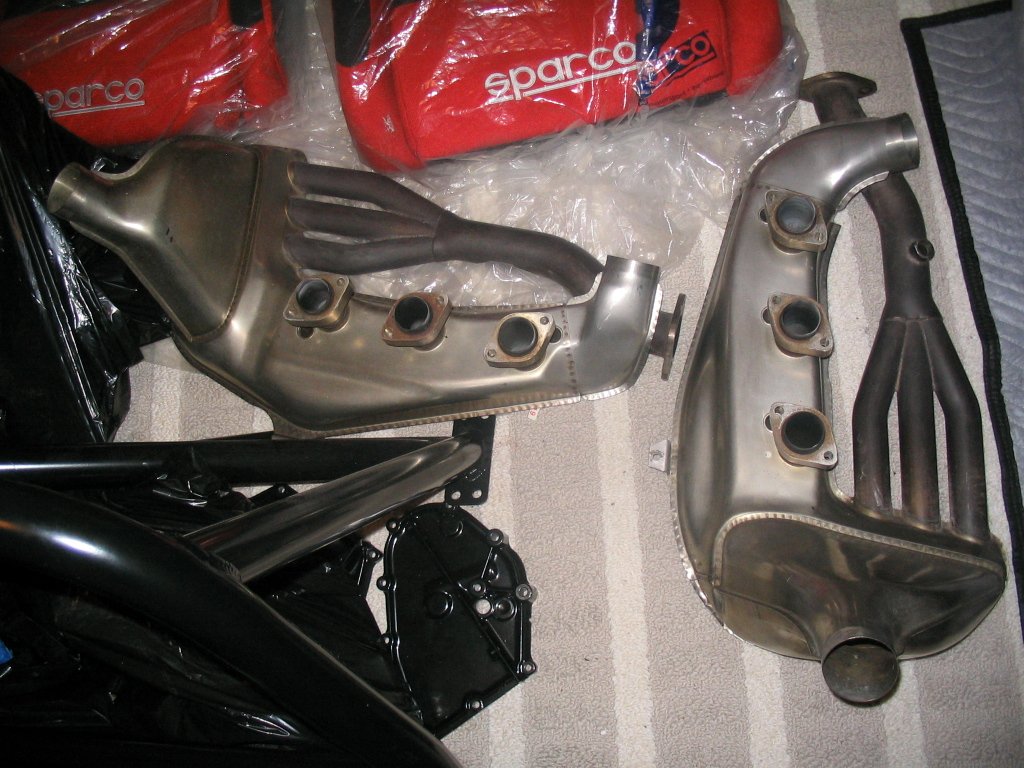
The exhaust system came from Doug's old engine. He was upgrading to a 3.6 and was selling his 3.2 to a 914 guy who didn't need the exhaust. You gotta love finding this stuff locally. It included SSIs and an early M&K sport exhaust.
Together with Doug and another local pelicanite we bought enough stock of brake line, fittings and rented a professional tool to cut and flare our own brake lines. This proved to be a wise decision and all three of us had brand new custom brake lines for a reasonable price.


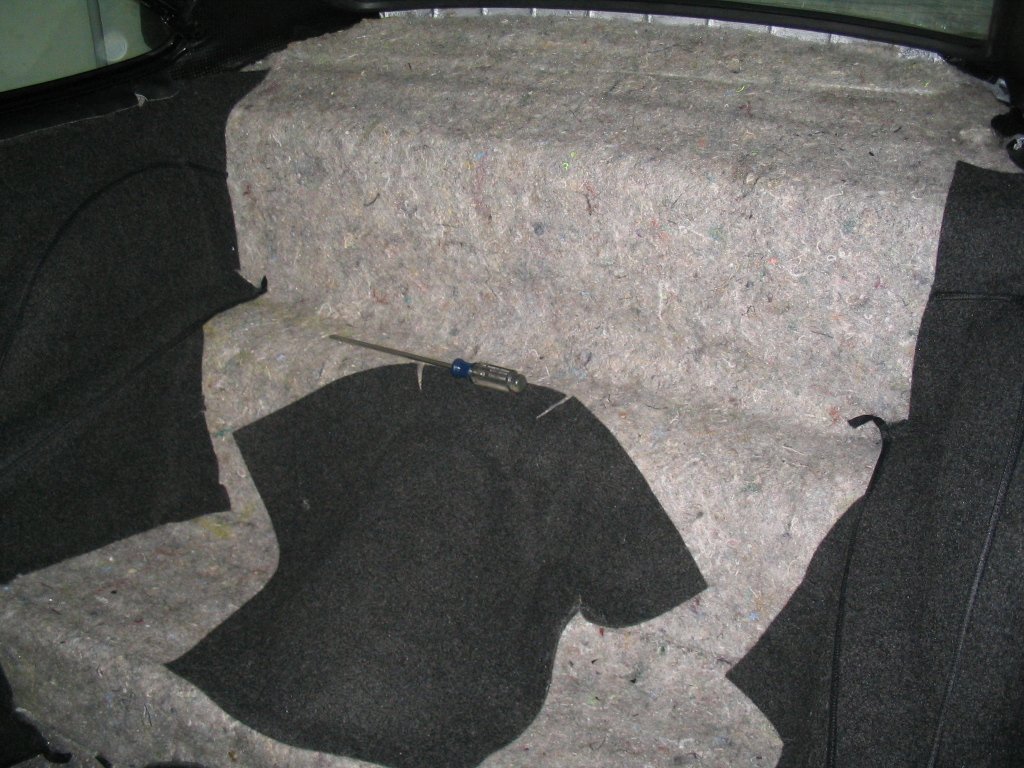
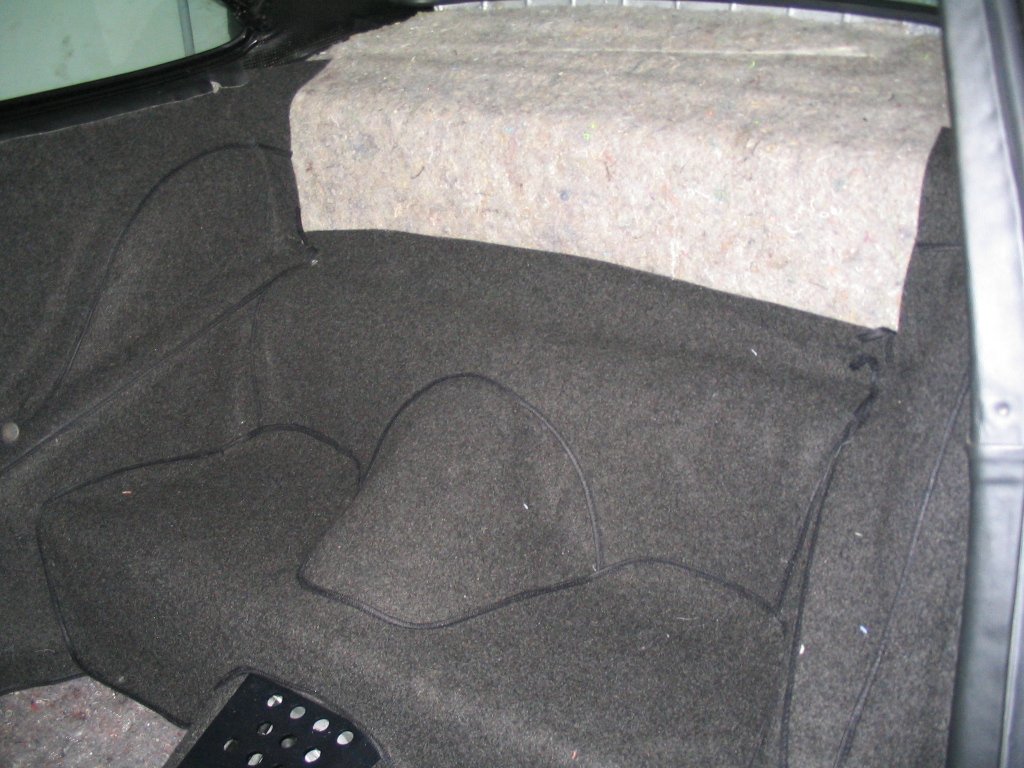
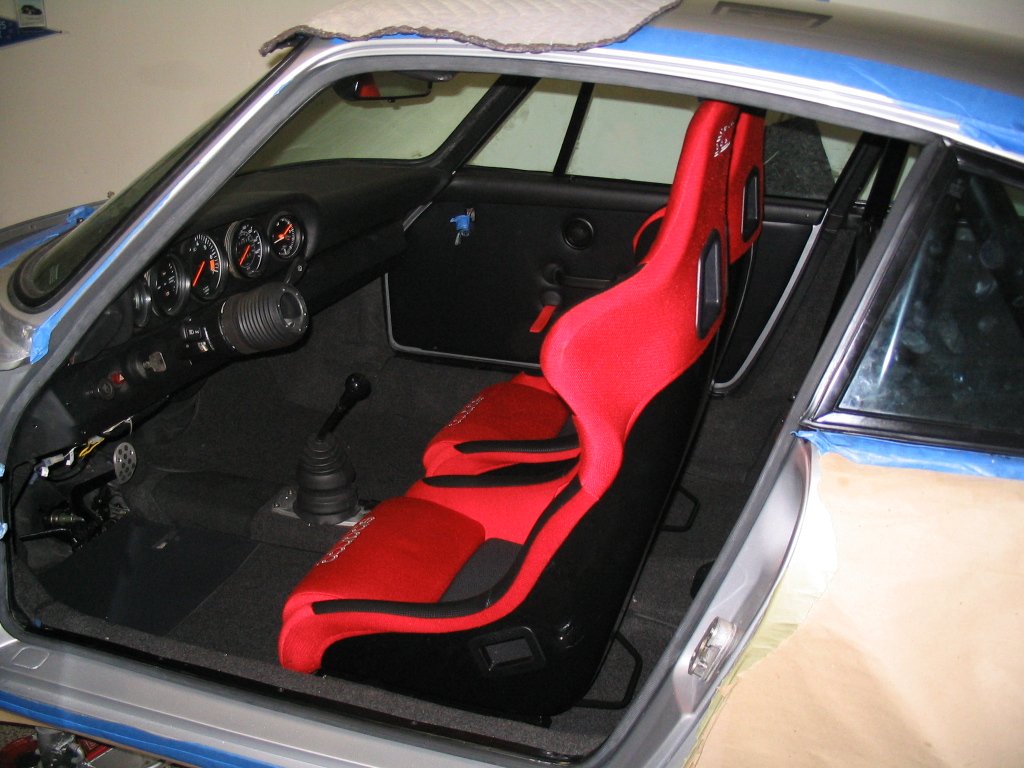
Installing the RS style carpet was a challenge. It's a bit trickier than it looks, thanks to appbiz for putting out a good installation guide.
The sparco seats were an unexpected difficult installation as well. I had my eye on a set of sparco seats on ebay and made sure I was the high bidder of the auction. The seats were essentially new and had only been used in a shoot for the movie "the fast and the furious: Tokyo drift".
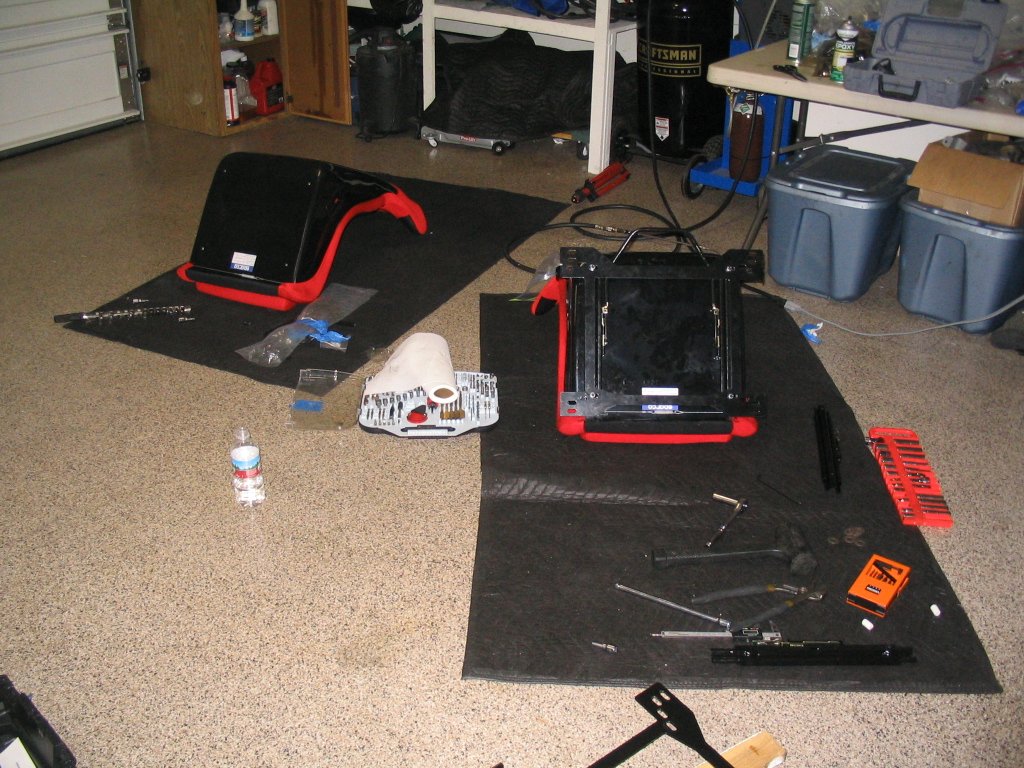
I went through sparco to buy the sliders and seat bases for my year car. The bases worked out great, the problem was the seats had a lip at the front that didn't allow full travel backward. I called Sparco and they said "Oh yeah, that's a known problem with those seats", what the hell!! Their advice was to rotate the sliders to have the release mechanism on the back. "Will this fix my problem?" I asked, "No" they replied, what the hell once again!! I was already committed to making these seats work so I drilled the bases and cut the tips of the sliders and was able to mount them in a decent location. It was a headache I didn't need, after shelling out some good money for the right hardware only to find out you still had problems was very annoying.
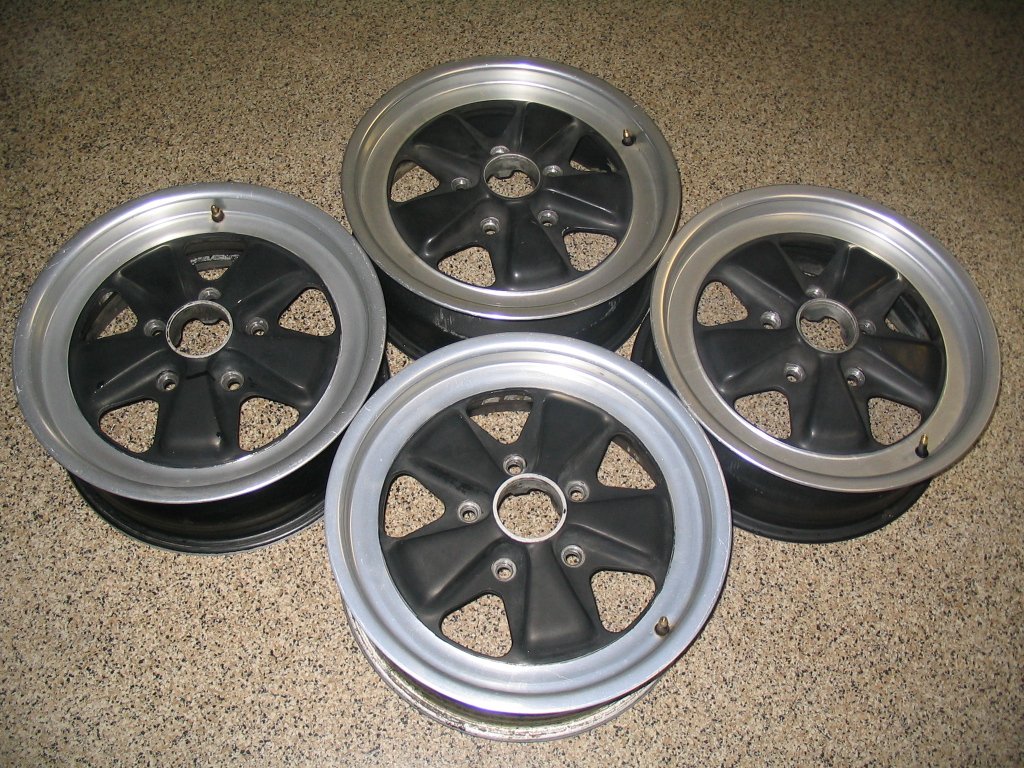
Figuring out the backspacing/offset of the wheels was a bit intimidating. There's no going back if the wheels rub against the fender if you've already cut/rolled the lips. Mike Lindsey had some good numbers for the rear wheels but my concern was the fronts. I was using 930 hubs which have a one inch built-in spacer and the other concern was the tire clearing the coil-over springs. Doug loaned me two of his wheels to test and see if I could come up with some good numbers. The front tires were definitely too close for comfort to the springs. Along with this information and Lindsey's advice, we came up with a good set of numbers for the front wheels. If I remember correctly, he added Ľ inch of backspacing compared to his numbers for 930 customers.
The Lindsey wheels require donor 16X6 wheels for the centers. When I called to get more information they suggested I provide the donor wheels since they could no longer get them. I went to a local independent shop to see if they had 4 16X6 wheels. Luckily they did in fact have 4 mismatched 16X6's to sell me. However, after washing and inspecting them carefully, two of them had scrapes and gouges by the lug nut holes. So they took the bad ones back and now I had to look for 2 more. A local posting on craigslist a week or so later had an ad for a set of 16X6 and 16X7 fuchs for sale. As you can imagine, they weren't willing to just sell the 6s so I had to buy all 4 in order to pick up the two that I needed. Luckily these had the original anodizing and had average normal wear. I sold the 7s on pelican and recouped some money from the deal, so everything worked out OK.
Come to find out there's no more chroming places in San Diego. I visited the shop next door to the now closed chrome shop and they told me it had been closed for a while. But the guy behind the counter gave a phone number of a person that could help. I called the person and we agreed to meet in the parking lot of a local shopping center. He explained, he takes these parts from people and shops and drives them to Tijuana for chroming and then brings them back. It sounded logical and apparently was my only choice. The only part that needed chroming was my front strut bar and we agreed on a price of $100 and he took the strut bar with him. Sure enough, he called a couple weeks later, met at the same parking lot and exchanged my part for his money. At one point, the thought of never seen the strut bar did cross my mind, I was glad everything worked out OK.
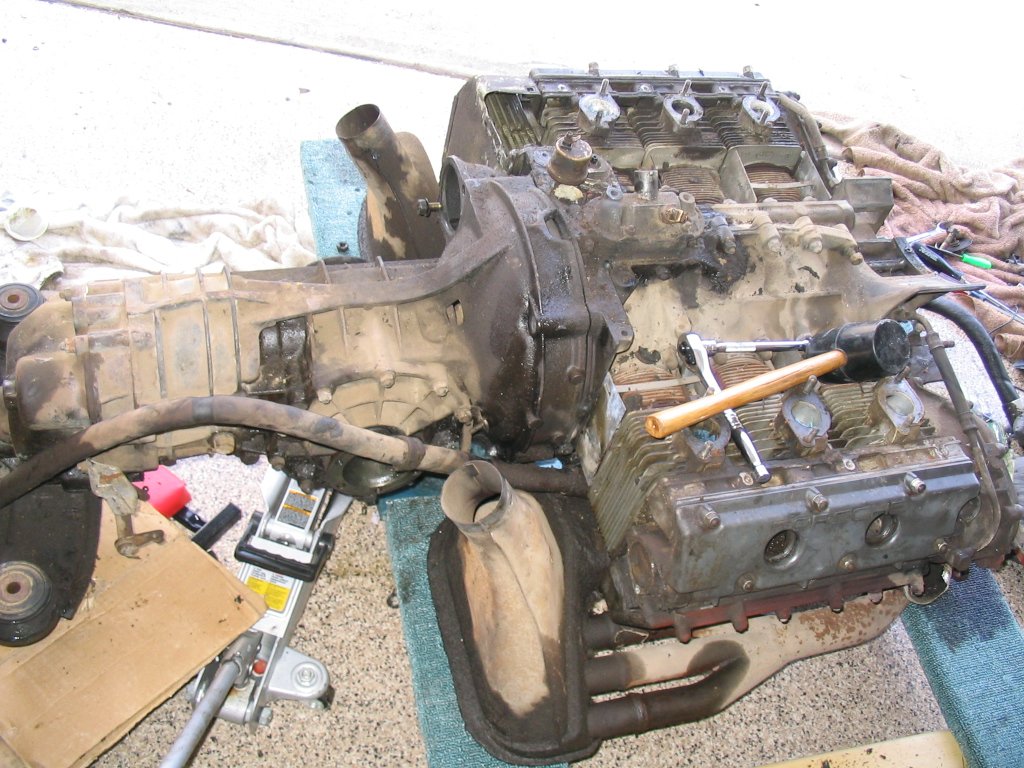
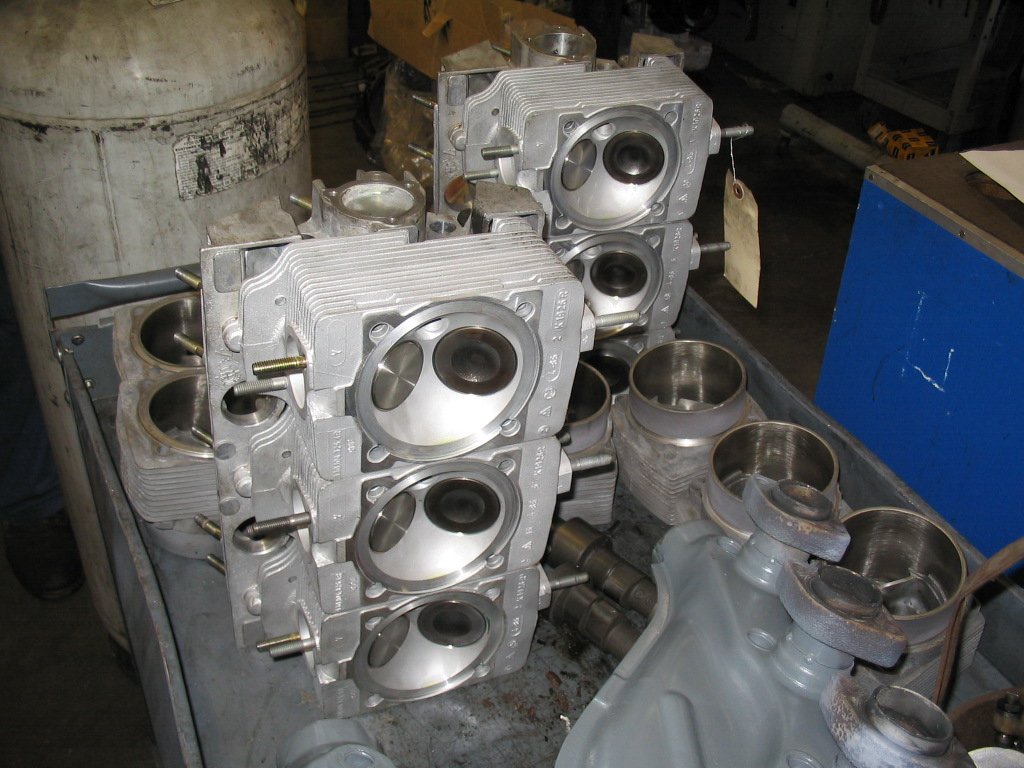
I followed thru with my original plan to get a top-end rebuild on the engine. A local shop was recommended by a fellow Porsche owner and how I met him is an interesting story. Near my house, about 5 minutes away was a 1965 corvette sitting on a driveway, being the car guy that I am, I would drive by from time to time to see if I could talk to the owner - as if I needed another project!. One day I drove further than the usual and made a turn on the nearest street to make a wide U-turn. At the end of the street I noticed an open garage door and the rear end of a 911 on jack stands. I stopped and introduced myself to the person tinkering in the garage. His name is Skip, he's a retired fire-fighter who was in the middle of an engine and transmission rebuild on his 1983 SC. We chatted for a while and the next time I visited, I brought Wayne Dempsey's 101 projects for your 911. His eyes widened as he flipped through the pages and said WOW! He admitted he was behind the curve when it came to computers and hadn't heard of the book or the pelican forum. He kept my book until his own copy arrived. And that's how Skip and I became friends.
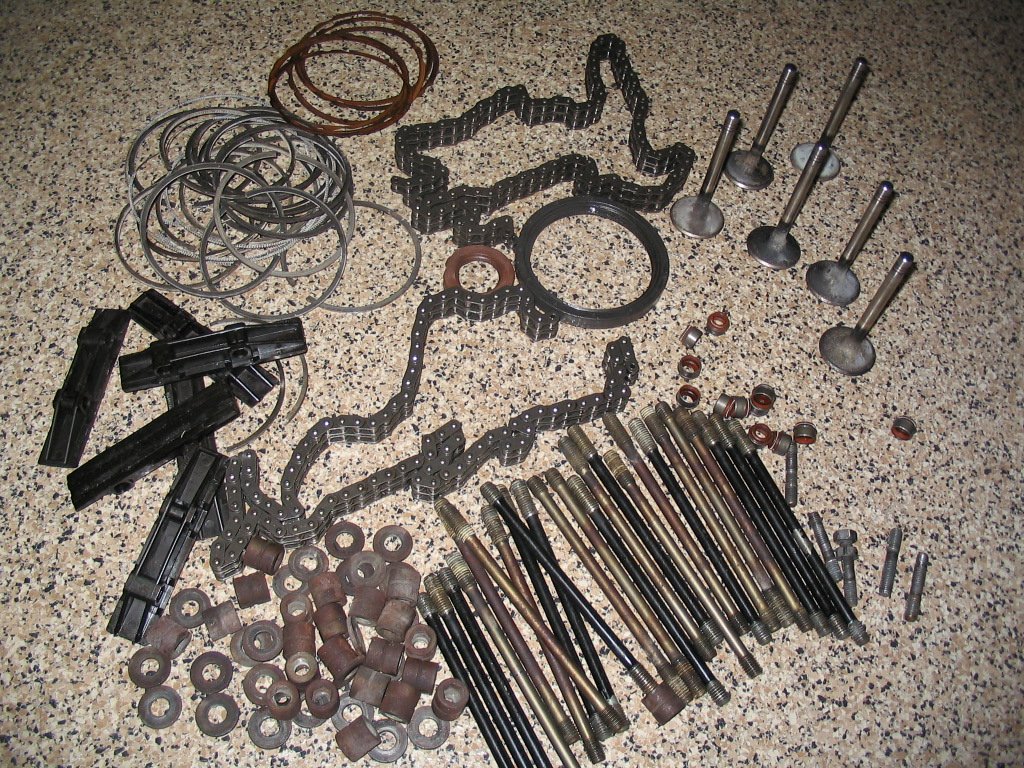
The machine shop changed all head-studs and replaced them with supertec ones, all valve guides, exhaust valves, timing chains, rings, etc. They were surprisingly fast; I didn't need the engine right away but got it back in about 4 weeks. Slowly but surely I started adding all the external components, intake, exhaust, etc.

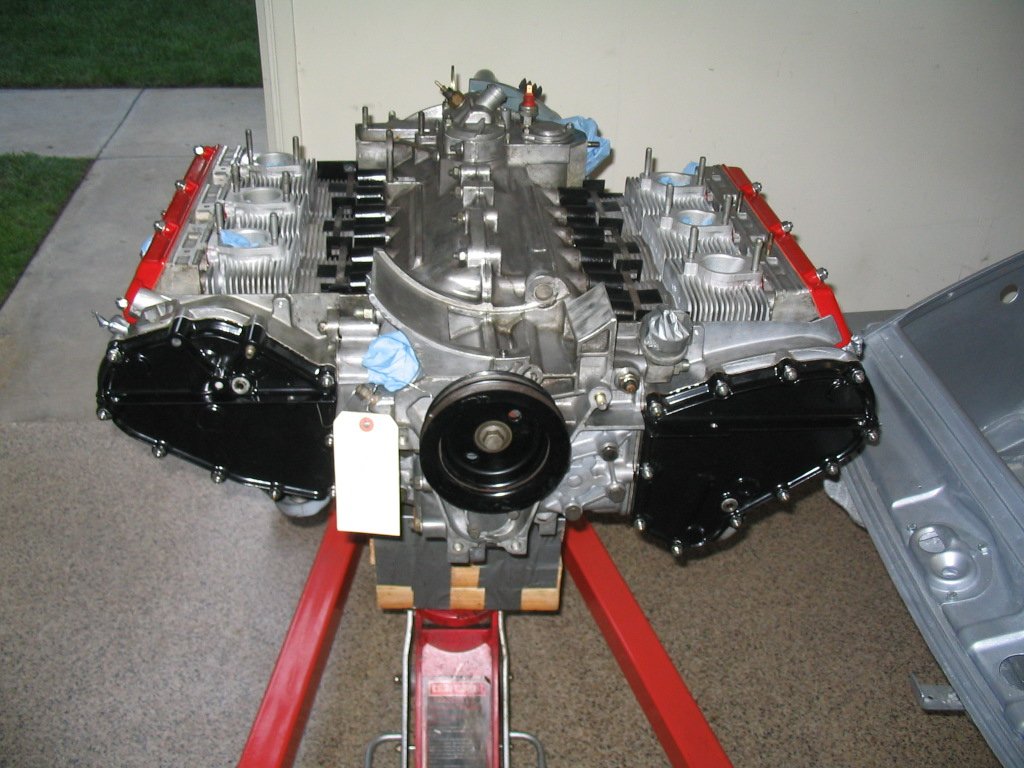
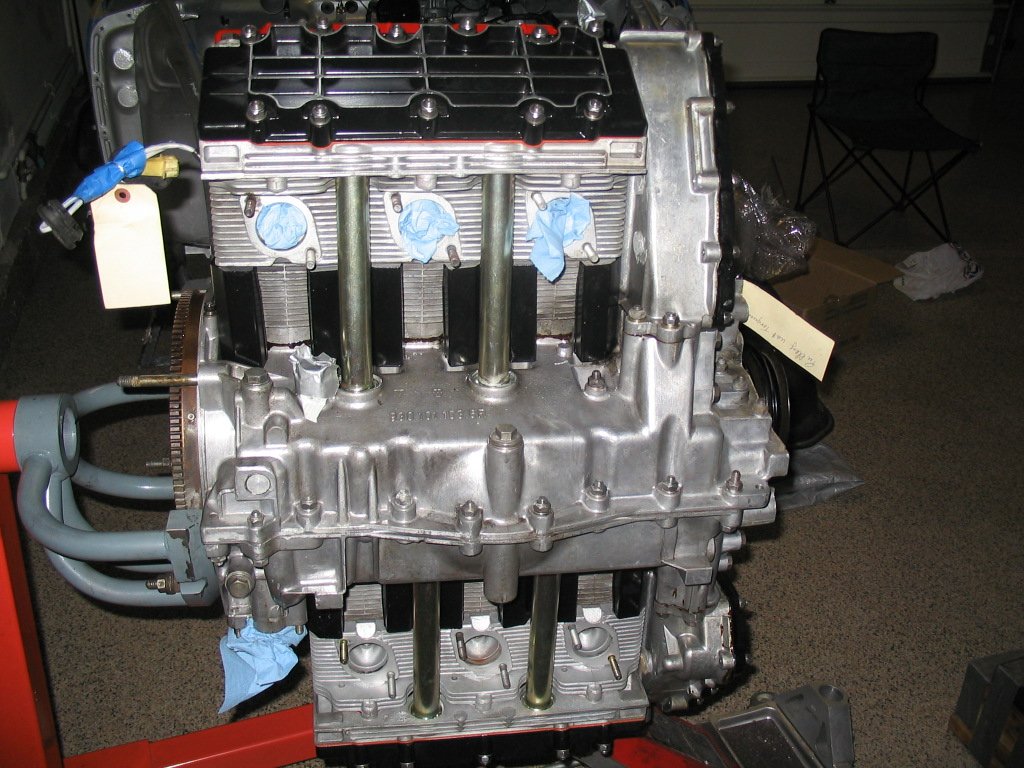
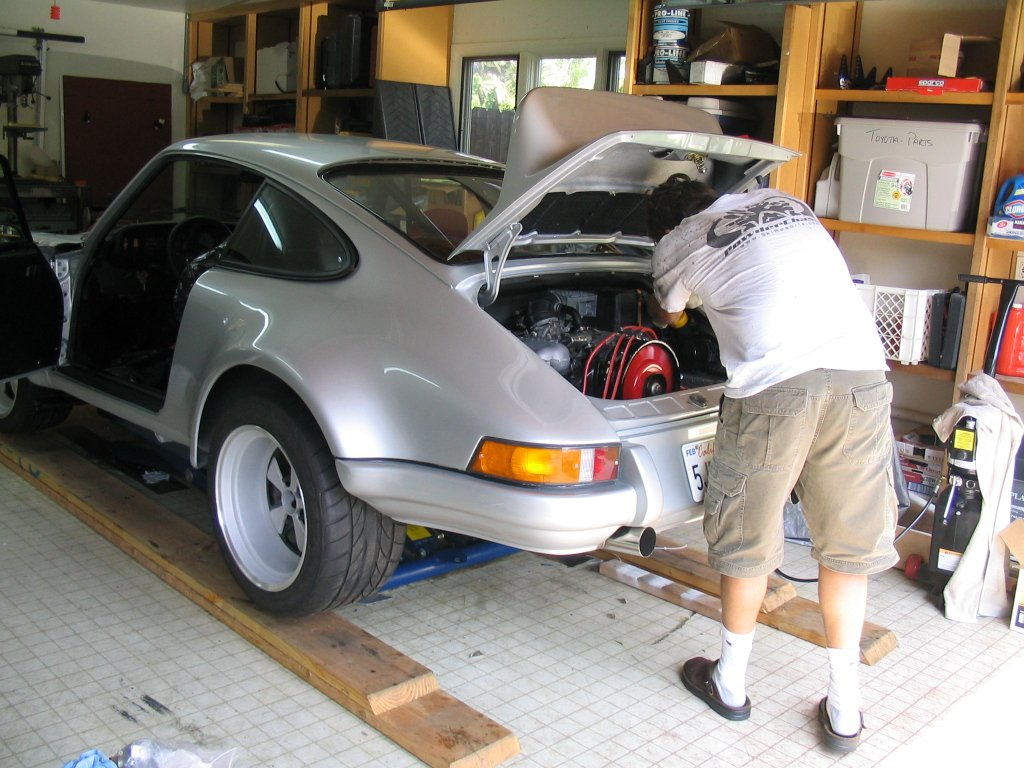
Skip came by to check out my progress and he offered to help should I need a hand. And a great help he was, at times he had more energy than me to keep going and do more! I have to say, without his help, it would've taken a lot longer and his attention to detail probably saved me from making some silly and expensive mistakes! He was integral in building my oil lines, installing a new clutch and overall installation of the engine.
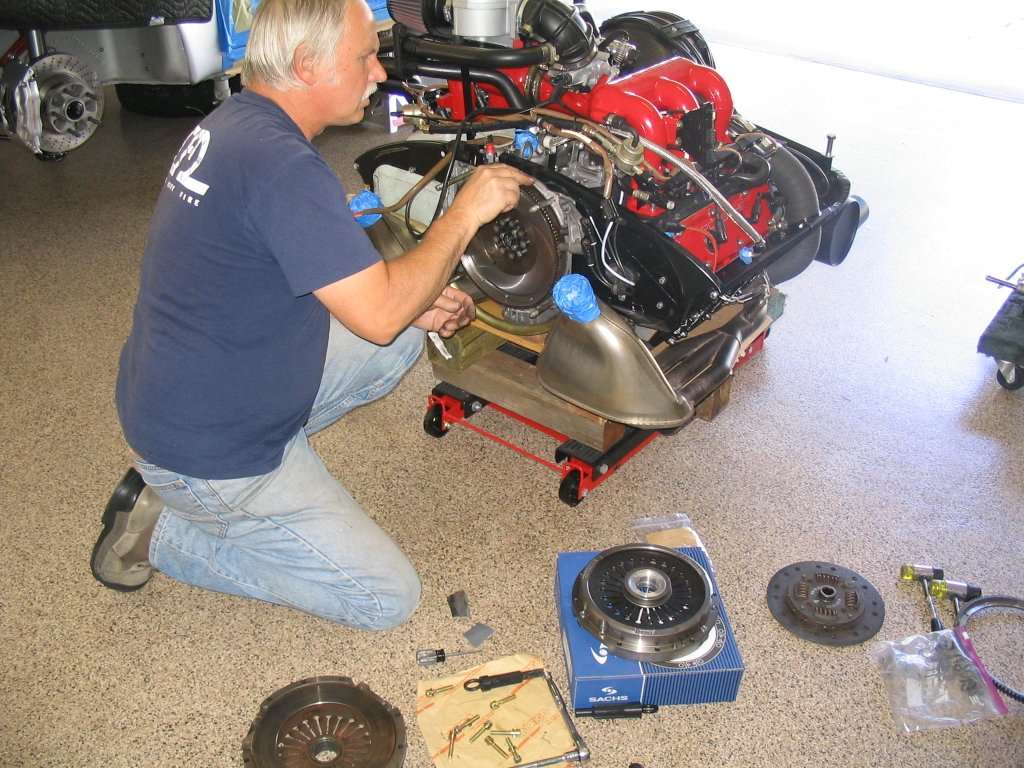
When we started the engine for the first time we couldn't believe it. We must've done a LOT of things right because it fired right up after building fuel and oil pressure. We were amazed! I was concerned for my neighbors because it was around 9 PM at night and the exhaust sounded like a freight train! But nonetheless a sweet sound for anyone who starts their engine for the first time after a rebuild. It was indeed a joyous day all around.
So the car is now drivable and DISASTER strikes! After several weeks of city driving, it was time to get on the freeway. Well, no more than 1/4 mile from the freeway on-ramp, the engine started to make a loud knocking noise and started losing power. What the hell! I pulled over to the emergency lane, opened the rear deck lid and sure enough the engine was shaking somewhat violently. I looked underneath only to find oil spewing out of the passenger side of the engine. I was dumbfounded, nothing more to do then shut the engine off and call for a tow truck. My first ride on the freeway was a complete let down. Once at home, I took the right side lower valve cover only to find a rocker arm and hardware at the bottom of it. It had completely worked its way out of the shaft. There were no broken pieces, the shaft, nut and rocker arm were all in one piece.
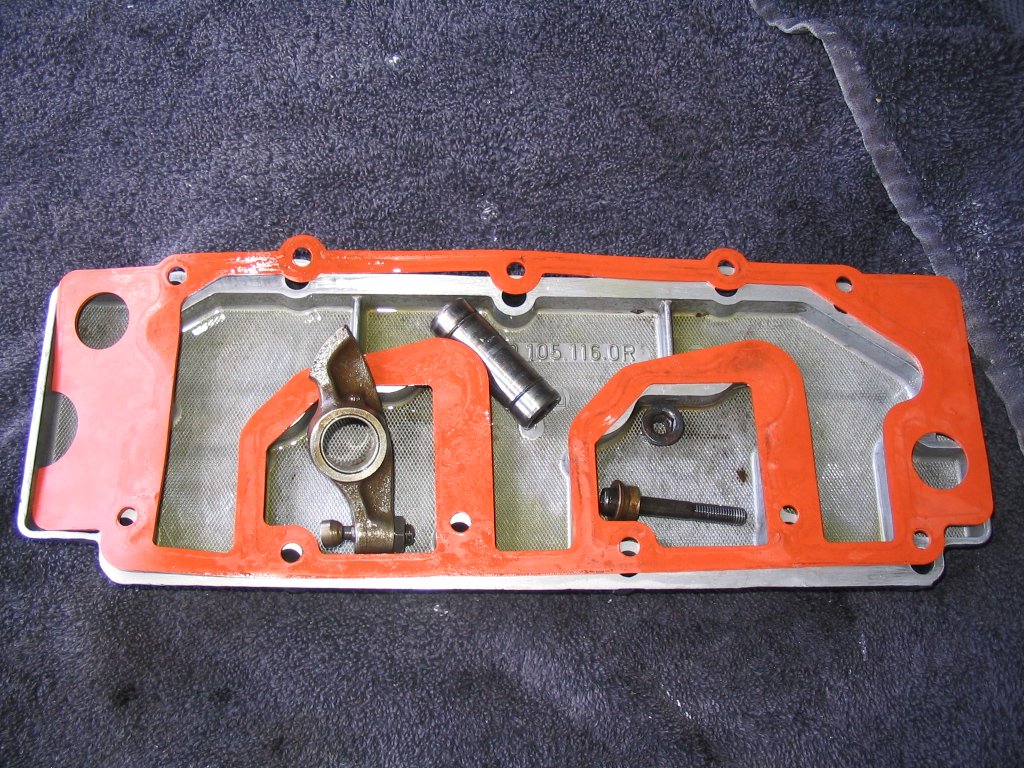
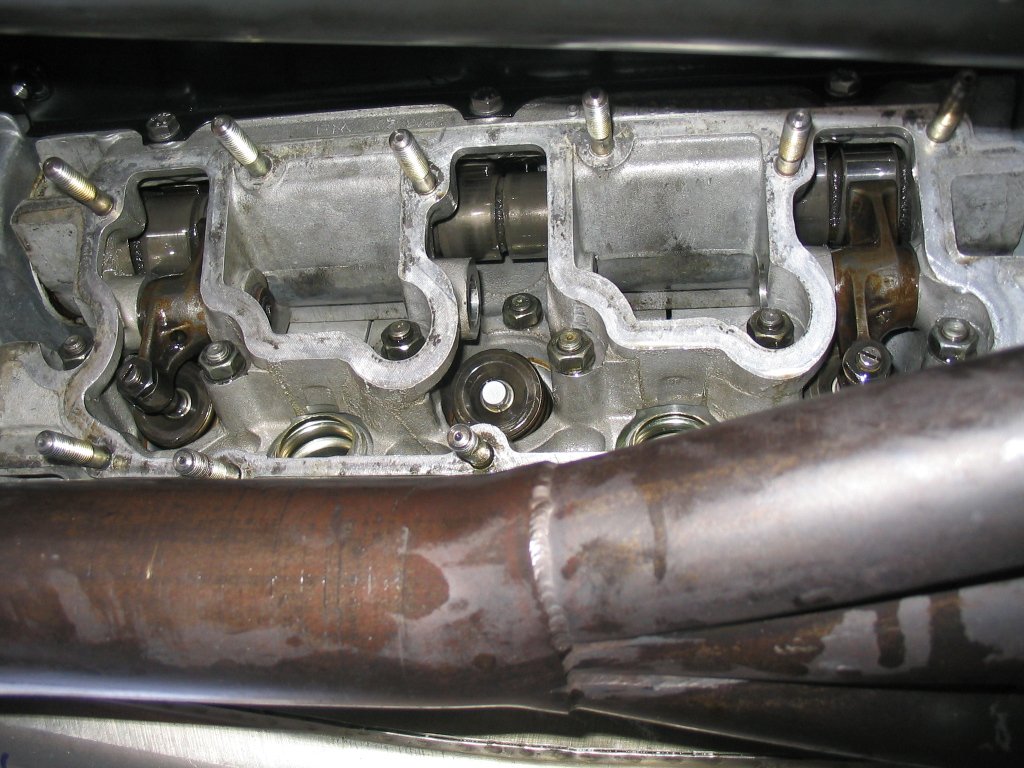
I called the machine shop first thing monday morning and towed the car to them. Luckily they accepted all responsibility with no fuss. No major damage had been done, had I not stopped right away it probably would've been a different story. My car was ready the same day. The rocker arm was back in its place with a new bushing. All remaining rocker arms were checked for proper torque and a quick valve adjustment as well. The only explanation was improper torque on that particular rocker arm. Although an unpleasant event, the shop "Motor Works" in National City CA stood by their warranty and took care of the situation in a professional manner. Thank you.
Although the car appeared to be running fine after the big scare, I felt there was still more power to be had, so I took it to a local Porsche shop for an overall inspection. One of the chain tensioners was loose and several of the injectors had fuel delivery problems. Even though I had the injectors cleaned, that proved to be money down the drain. We decided to install 6 new injectors and WOW! what a difference. The car had a lot more power and I was finally getting a taste of what a "chipped" 3.2 could do on a lightweight car.
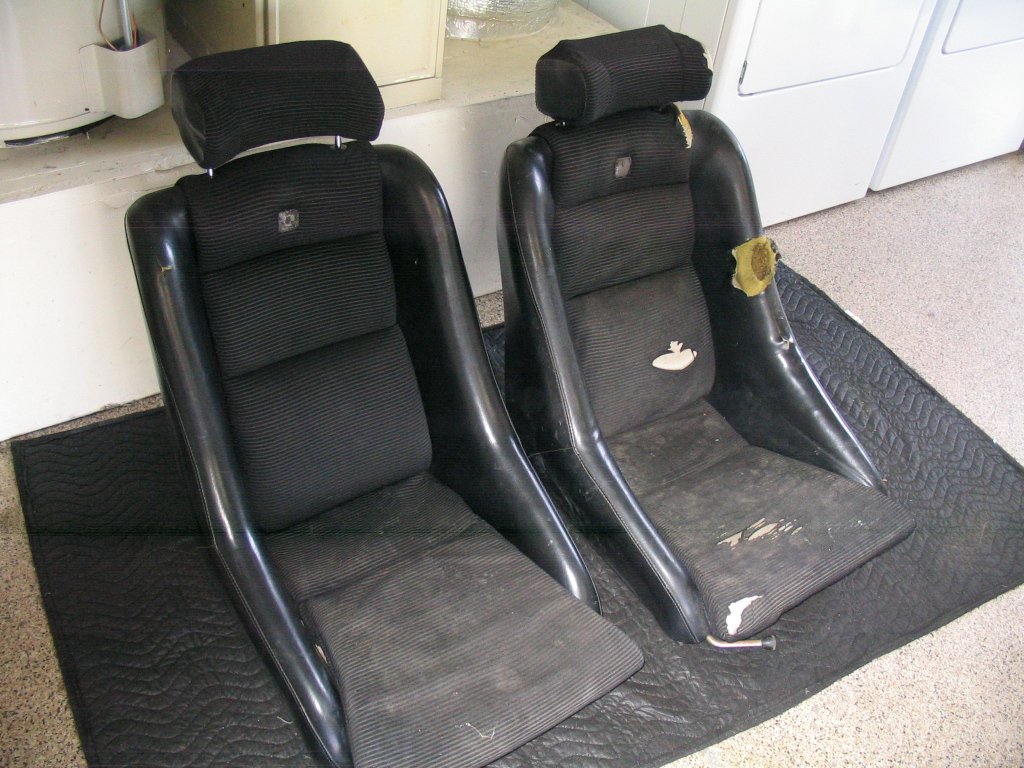
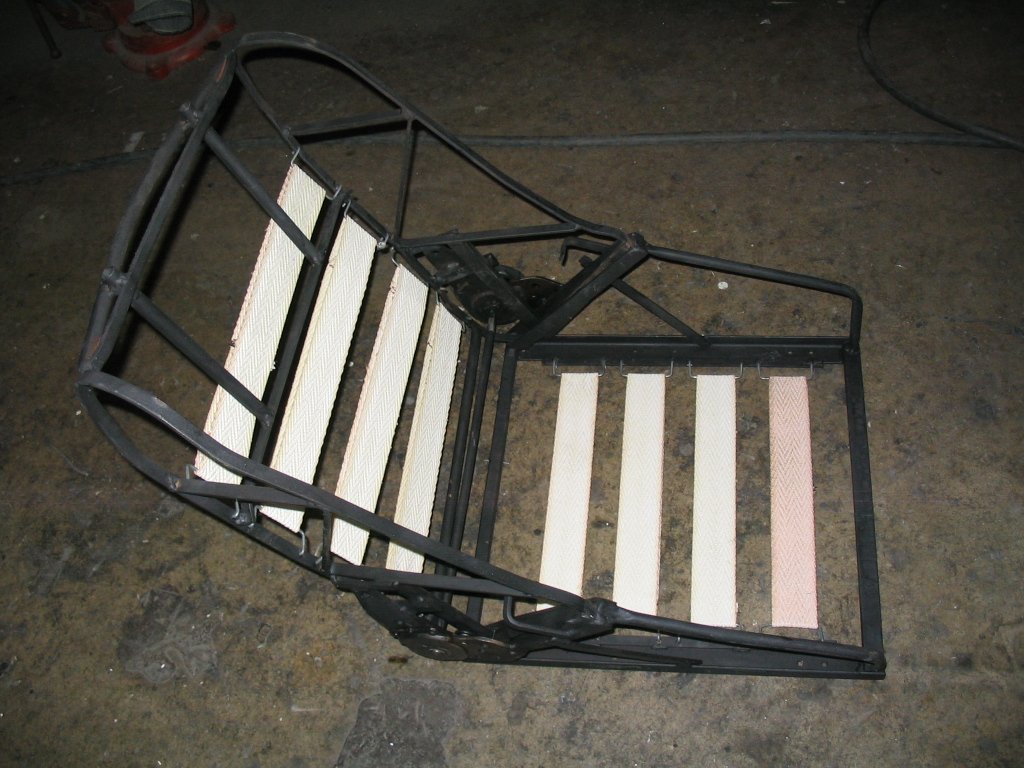
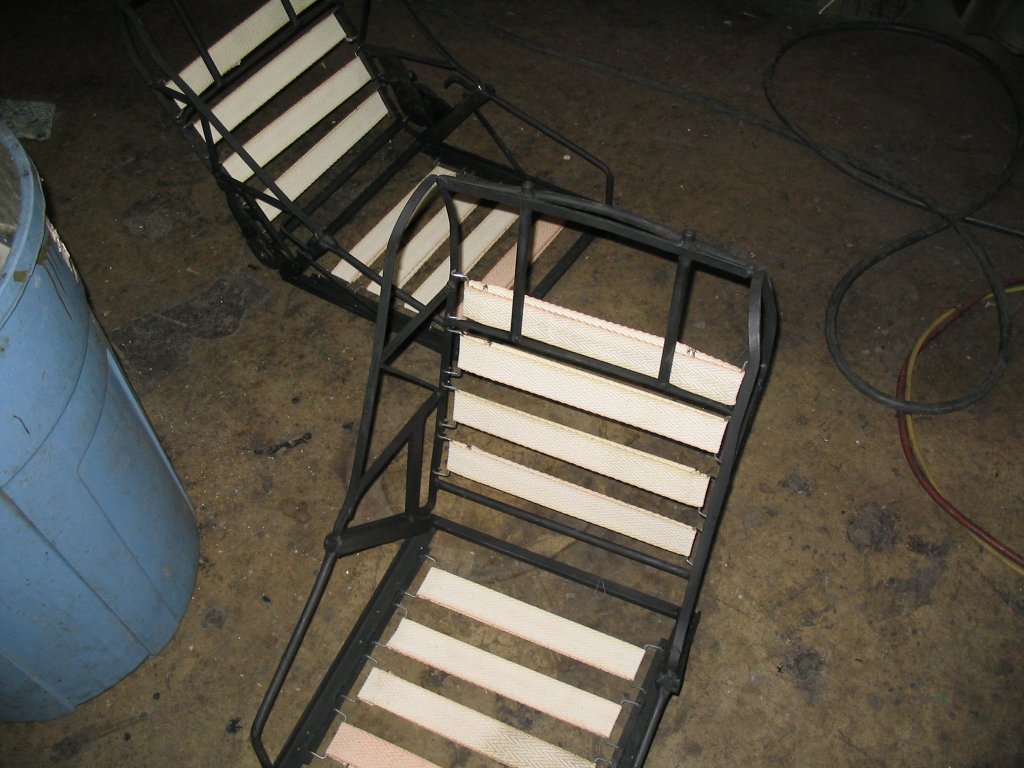
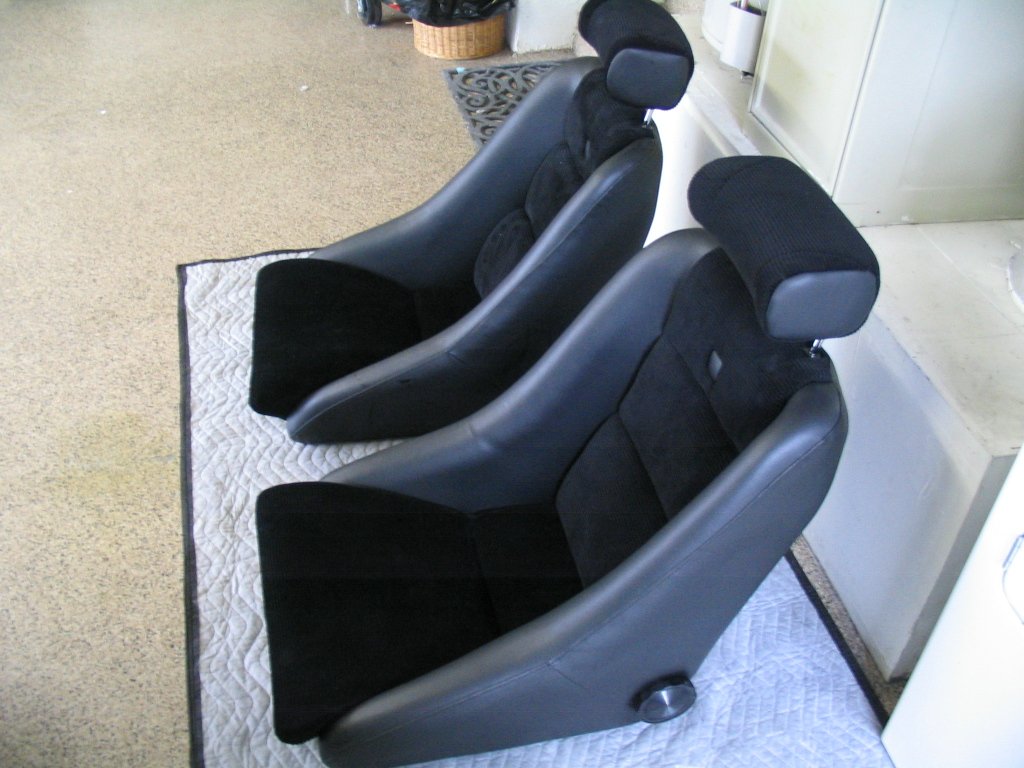
So what more is there to do? Thanks to the early 911s registry and a thread called "show your seats", I developed a taste and a craving for vintage style seats. The sparcos were fine but ultimately did not fit the look of the car, and were red in color so they stood out quite a bit. Price for early sport seats is out of this world and sport seat replicas are not entirely cheap either. So after what seemed like 6 months of searching, I asked my friend Mark if he or his dad had any vintage seats in the shop for sale. His dad has been in the Porsche business for decades. "I think we have some scheel buckets in storage...ask my dad" he said. His dad wasn't there at the time, so I visited the shop a few days later only to be told, he didn't know what seats I was talking about. Called Mark a few days later and explained what happened. "Come over and we'll go look for them", sure enough, he found a pair of scheels in the attic tucked away in the corner. The upholstery was in bad shape but the frames looked straight. So I asked how much?... "ask my dad what he wants for them". Again, came back to the shop a day or so later and asked for a price. That's when his dad told me he wasn't interested in selling. Talk about frustration!! Regardless, I was polite and thanked him for his time, although I felt I had just wasted a whole lot of time... I was so close. Unbeknowns to me, Mark convinced his dad to sell and I got a call a few days later, we agreed on a price and picked up the seats within 30 minutes from the time he called. Alright, the last major piece was coming together… all I needed was some bases to mount them. Not more than a week later, I found a pair of bases at a local BMW shop and I now had all the hardware to mount the seats. Within three weeks, the seats were newly upholstered and all the hardware was powder-coated and ready. Just last weekend I installed them and they feel and look great. Thanks Mark!

In closing, the stories above are the more memorable and by no means encompass all the effort that it took to build this car. There were many frustrating moments but also many personal triumphs. If I may say so, this type of build is a true test of dedication and perseverance.
I am thankful to my friends Alonso, Skip, Doug and everyone who helped, including the pelican forum members, early 911 registry and others for their generosity and the wealth of information via the online archives.
Cheers!
- Fernando M. email