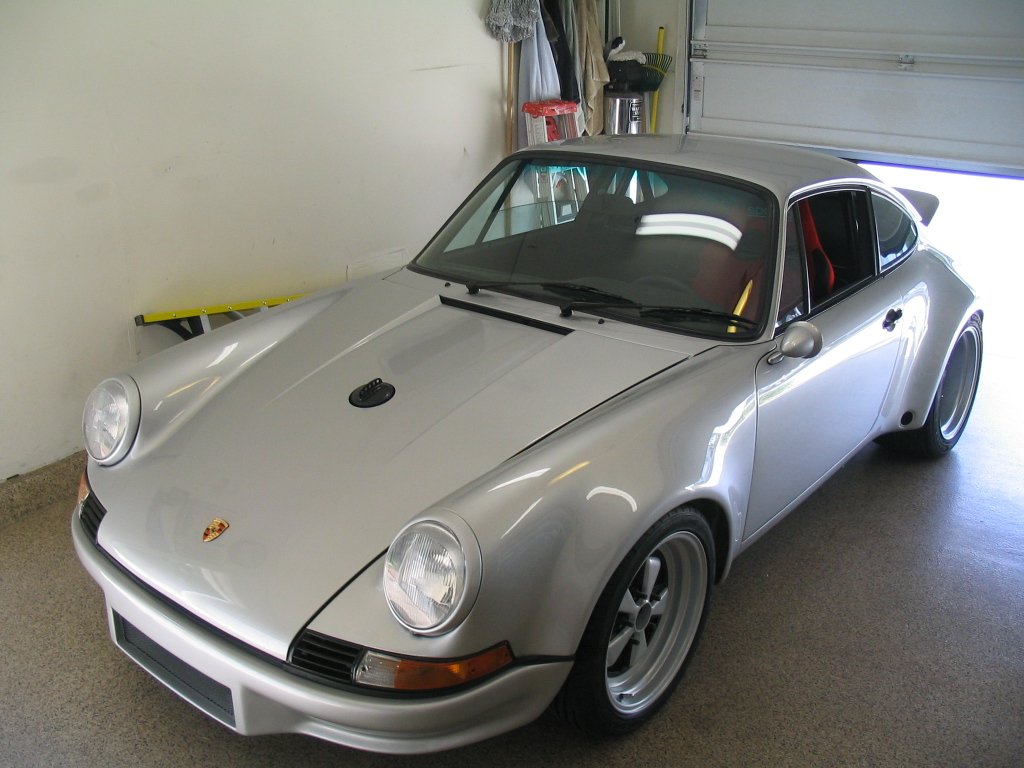
Porsche 911 RSR replica
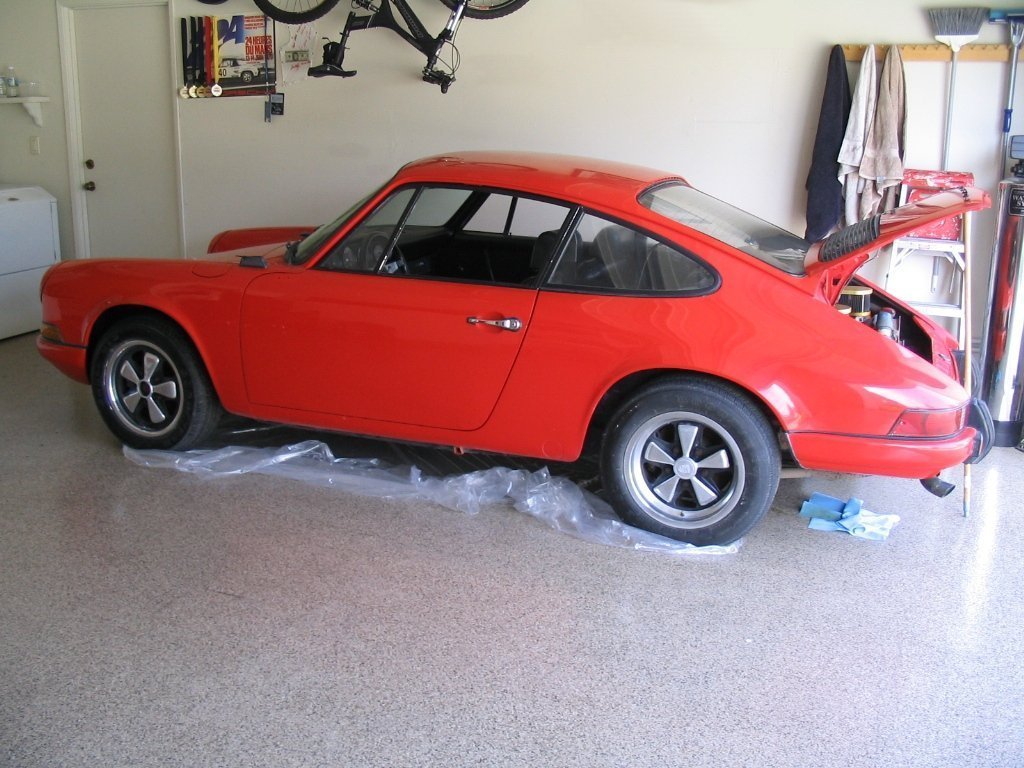
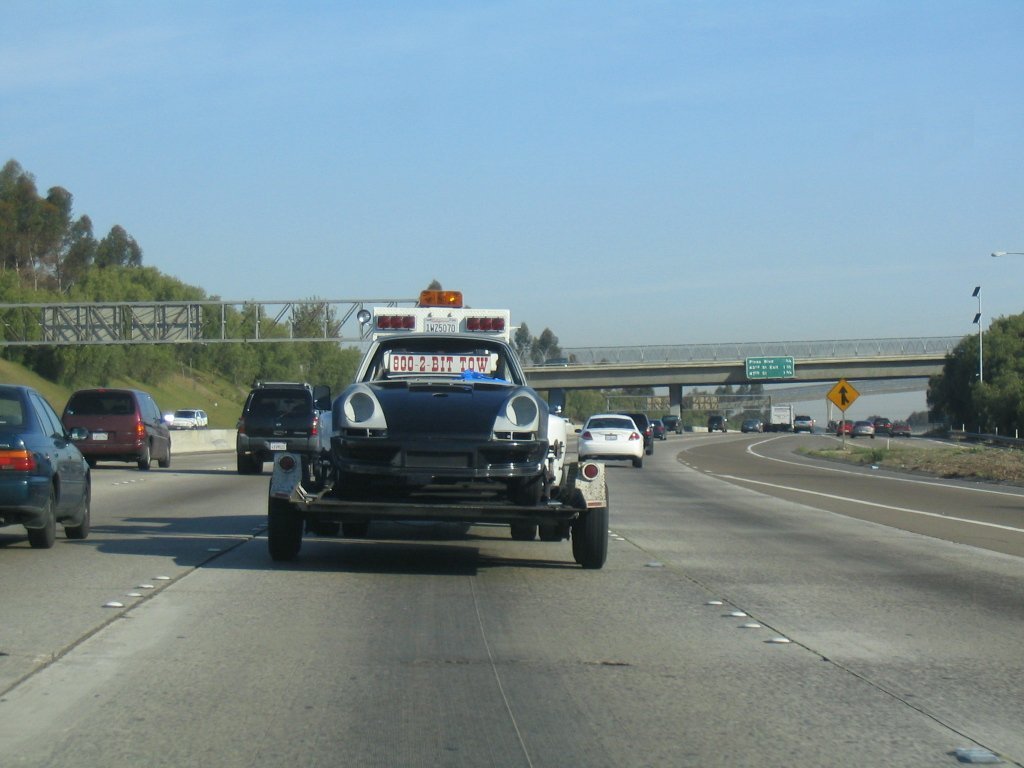
A friend told me about this 911 for sale that had been sitting for over 2 years in the outskirts of San Diego CA. I bought it a few weeks later.

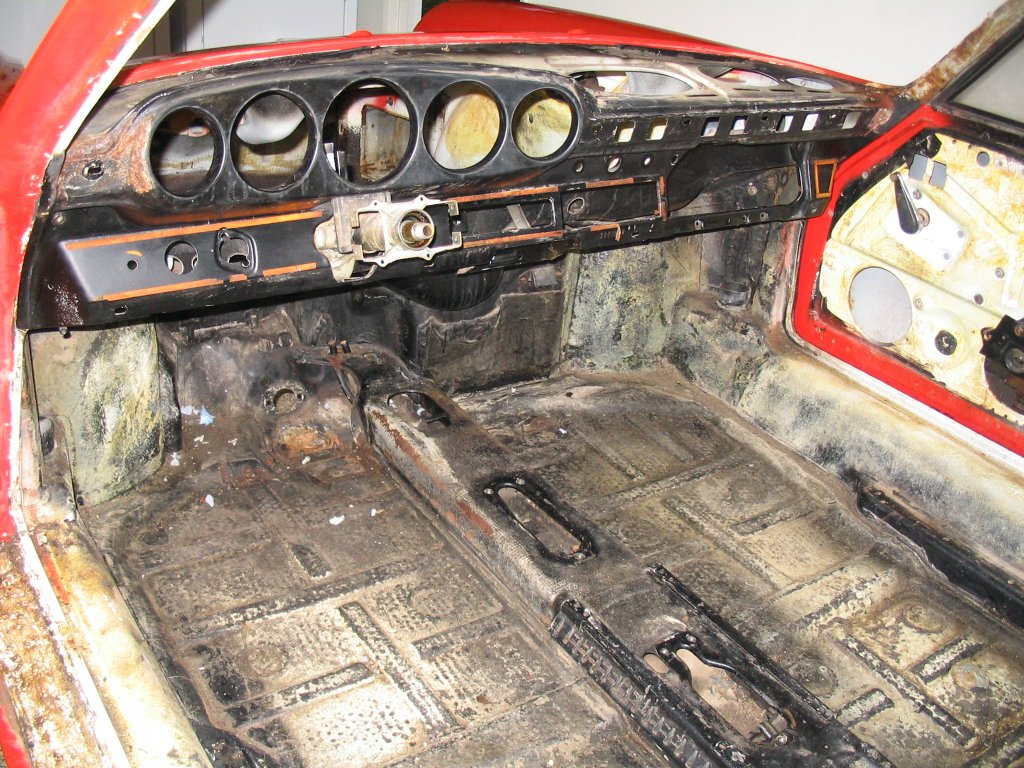
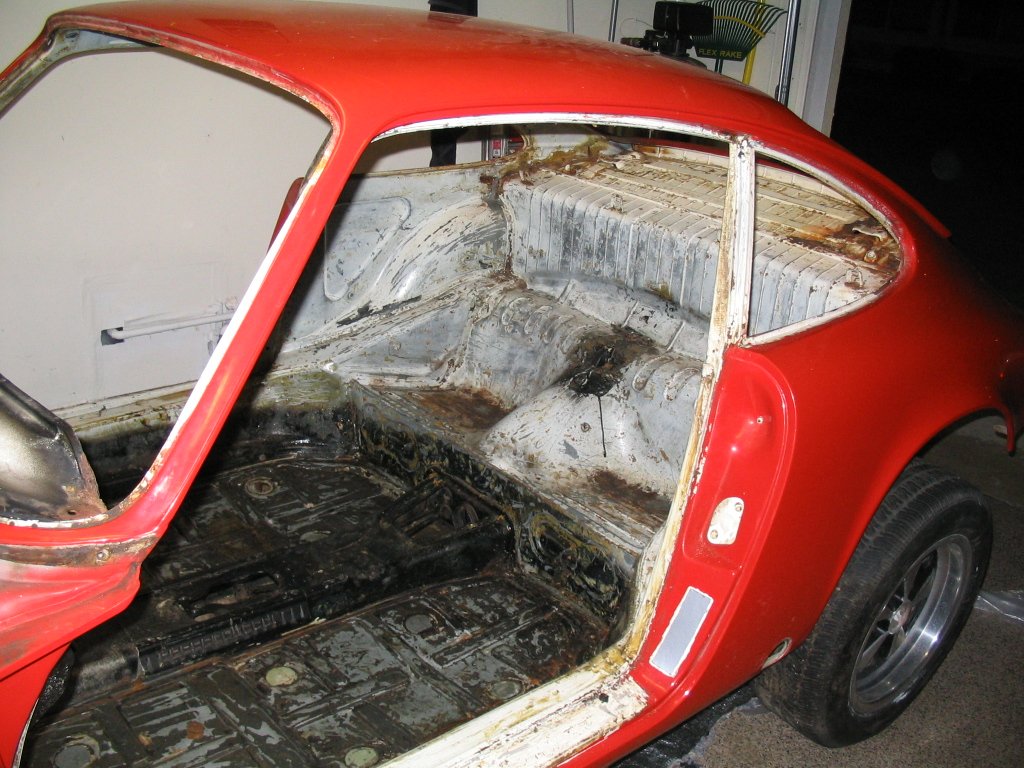
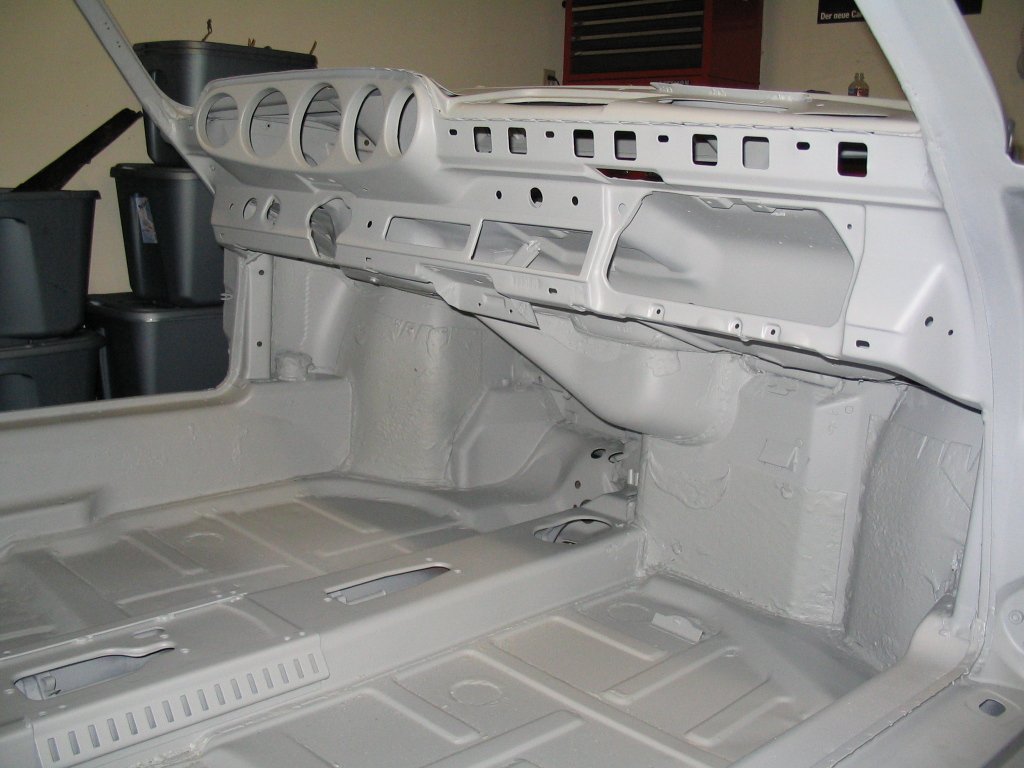
Interior was in decent shape - except for the seats and some holes in the carpet.
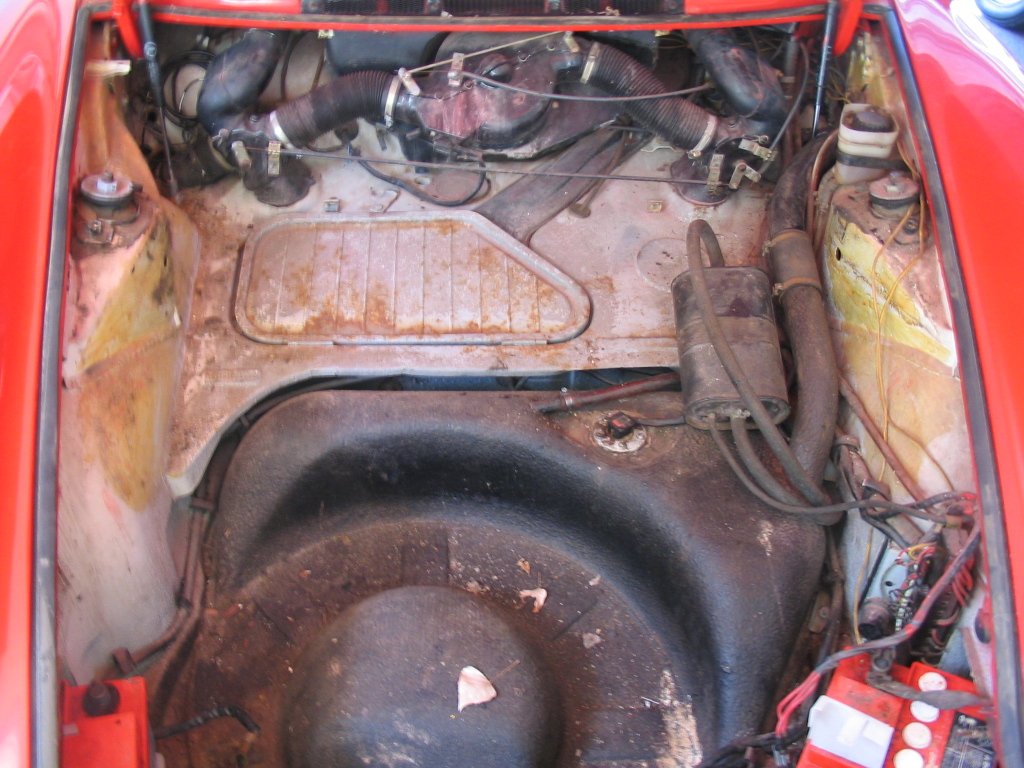
The reddish stuff was merely surface rust and some glue overspray.
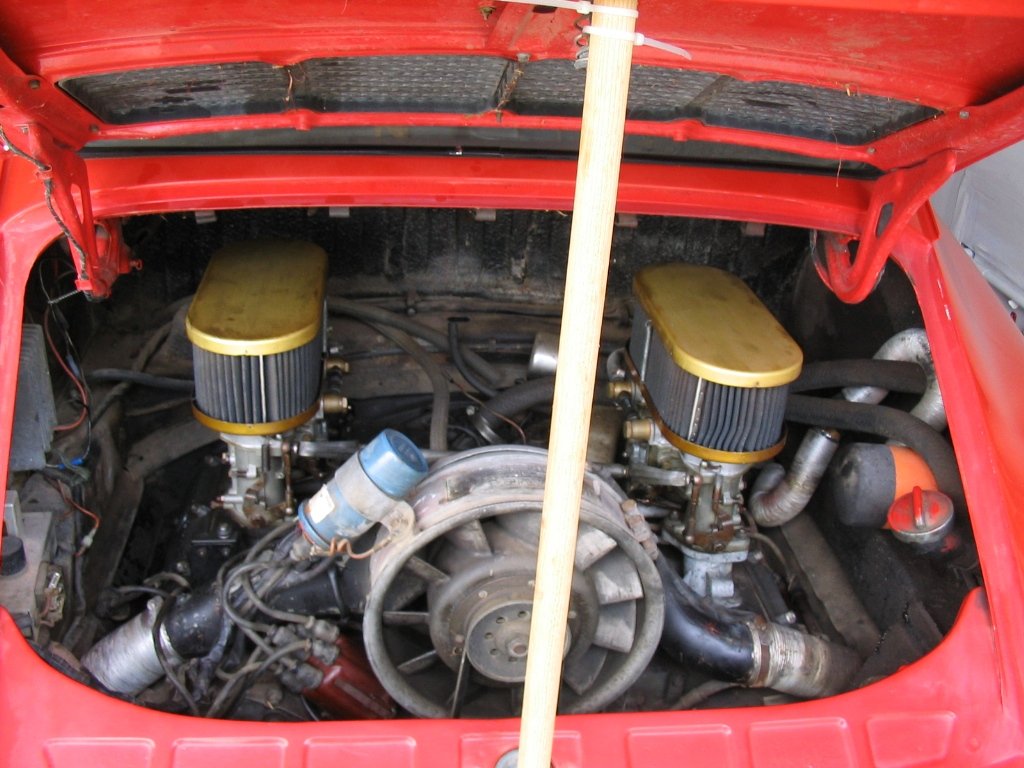
Here is a shot of the 2.2 liter engine. Rain water sipped through the air filters and into the carburetors seizing the engine.

It didn't take long before I started taking it apart!
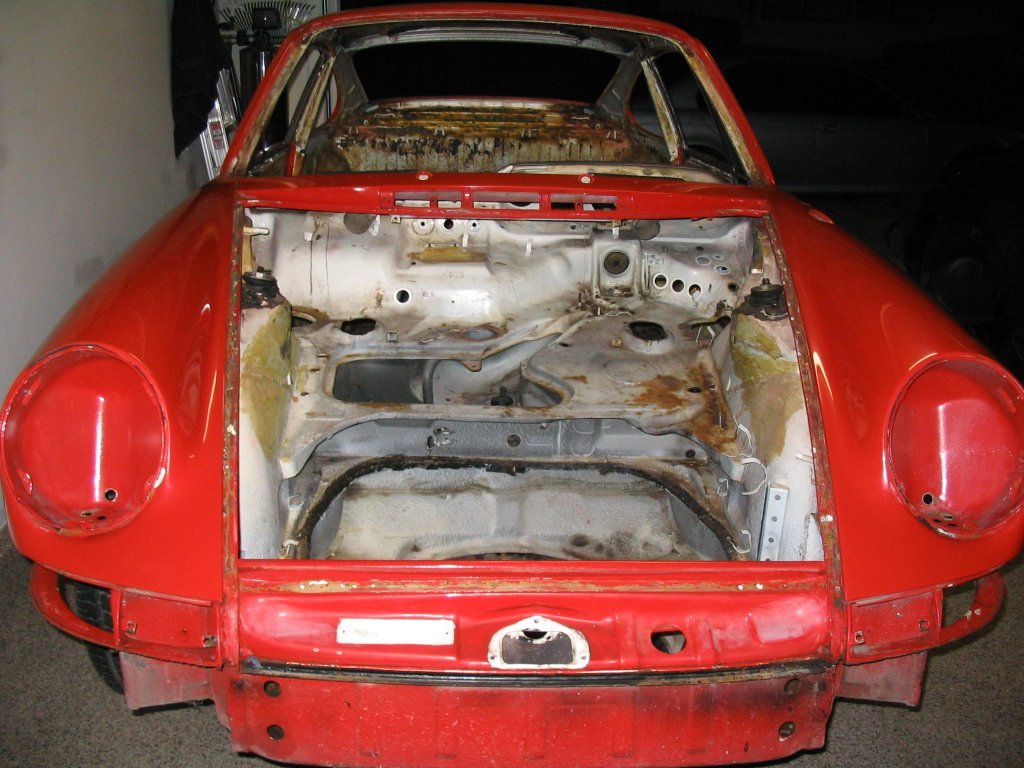
No more wiring or gas tank. As you can see, the original color was white.
Complete interior is also out. Those seats were heavy!
The engine is also out at this point. Look at what 35 years of grime, grease and dirt add up to.
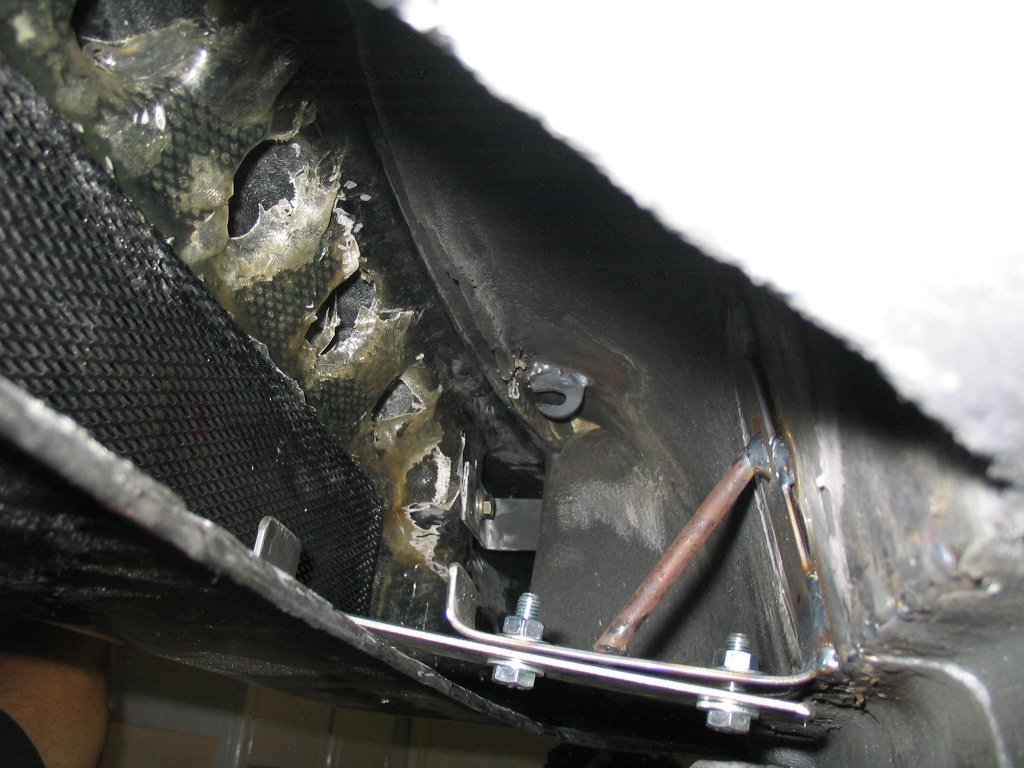
It was a lot easier to work on the car without the doors. All the floor's undercoating was taken out using a heat gun, grinders and putty knife.
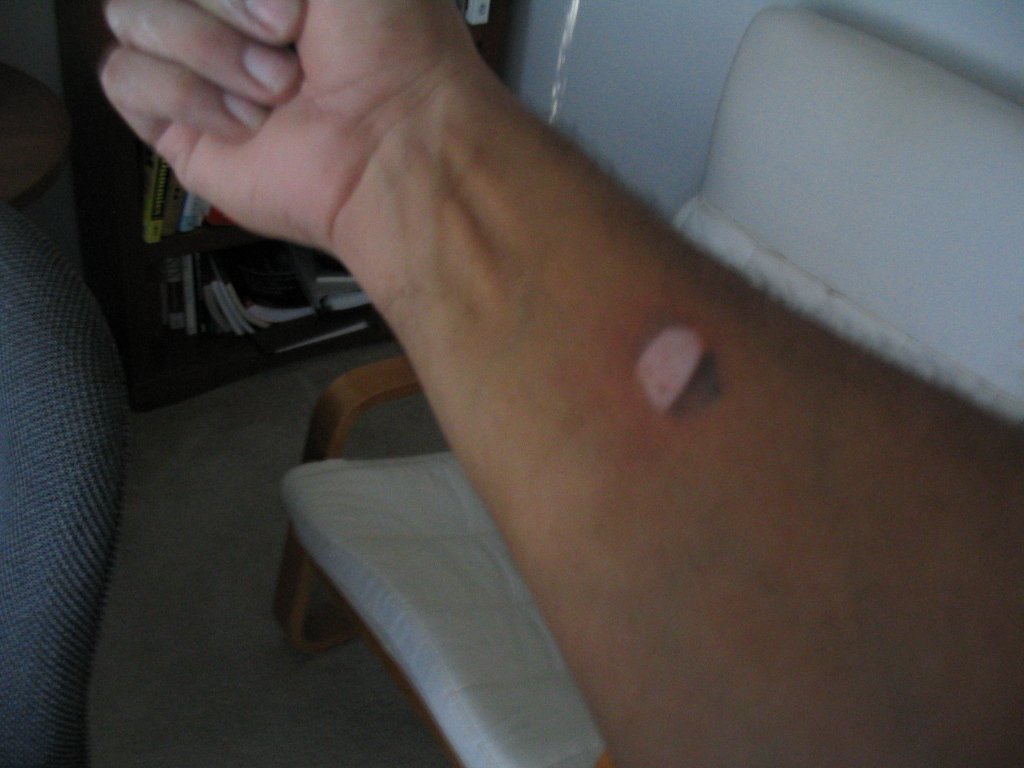
This is what happens when you don't pay attention to the heat gun.

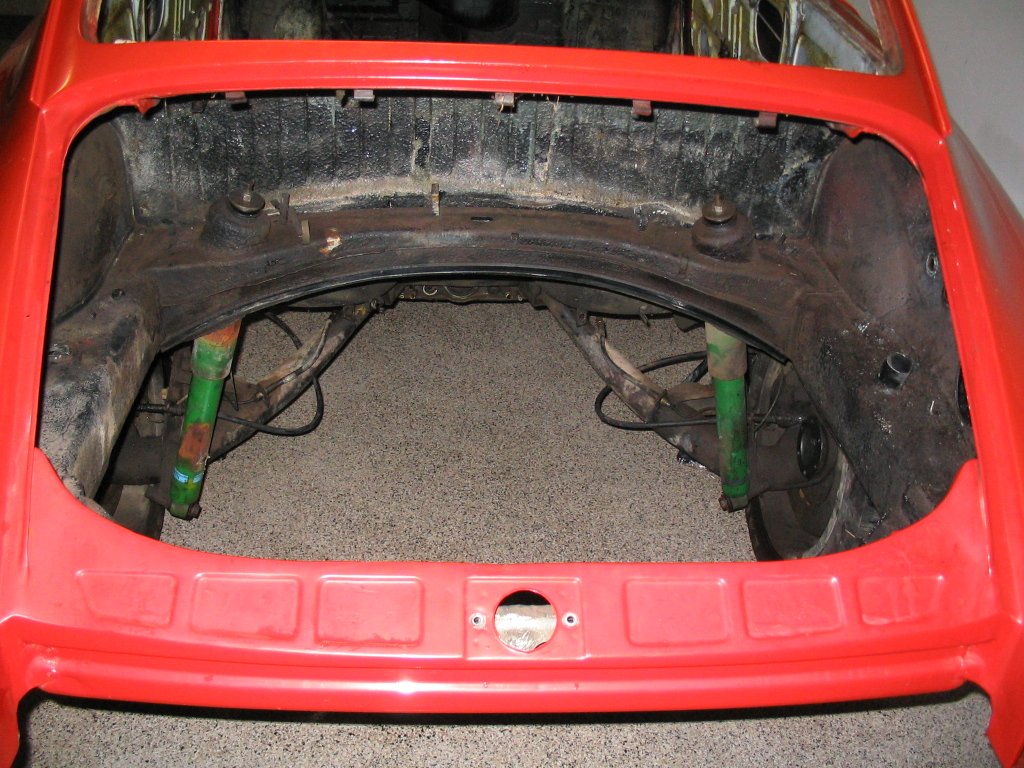
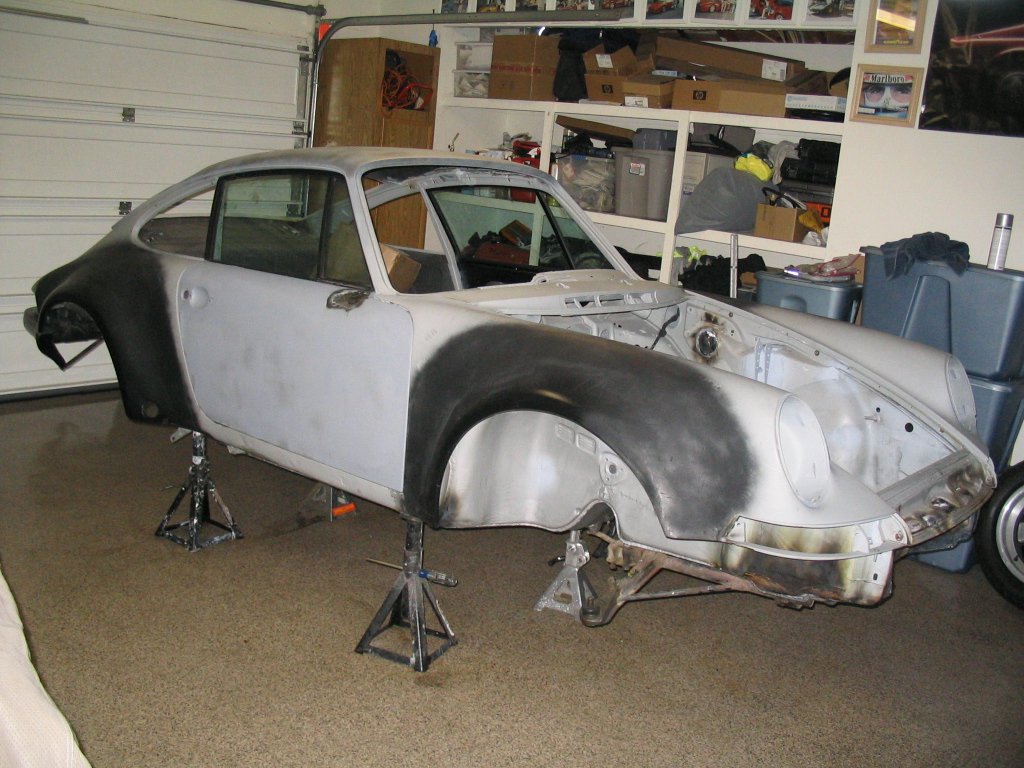
This picture is at the sandblasters. They were nice enough to let us take the suspension off at their location so we could roll it up a tow truck.
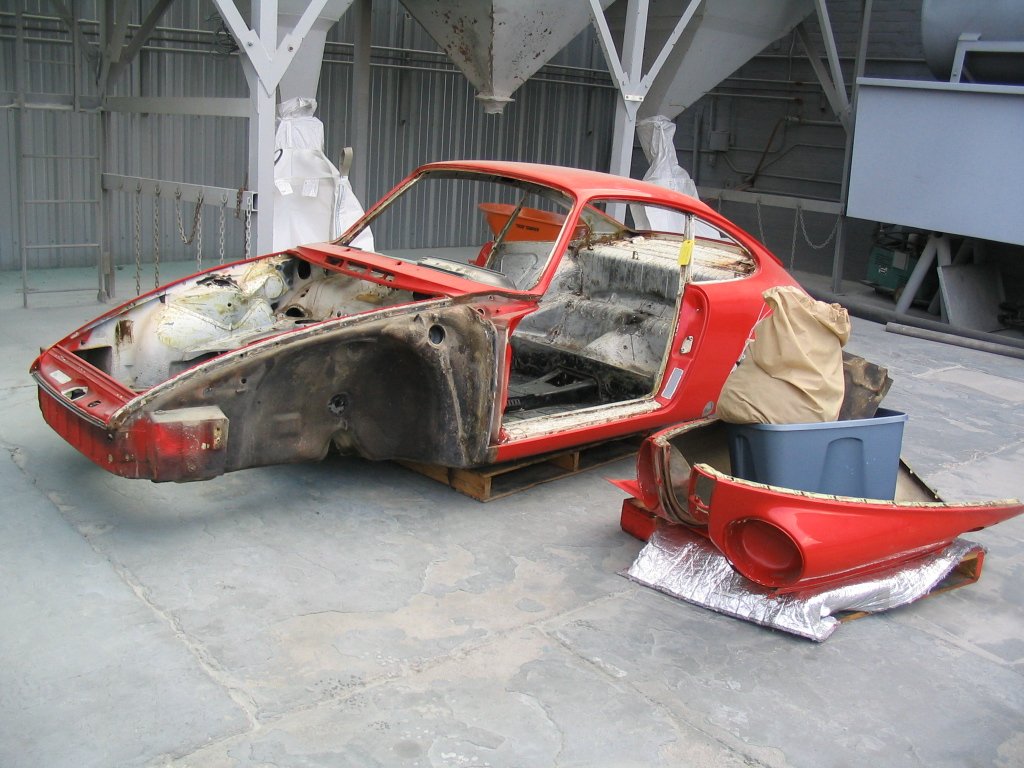
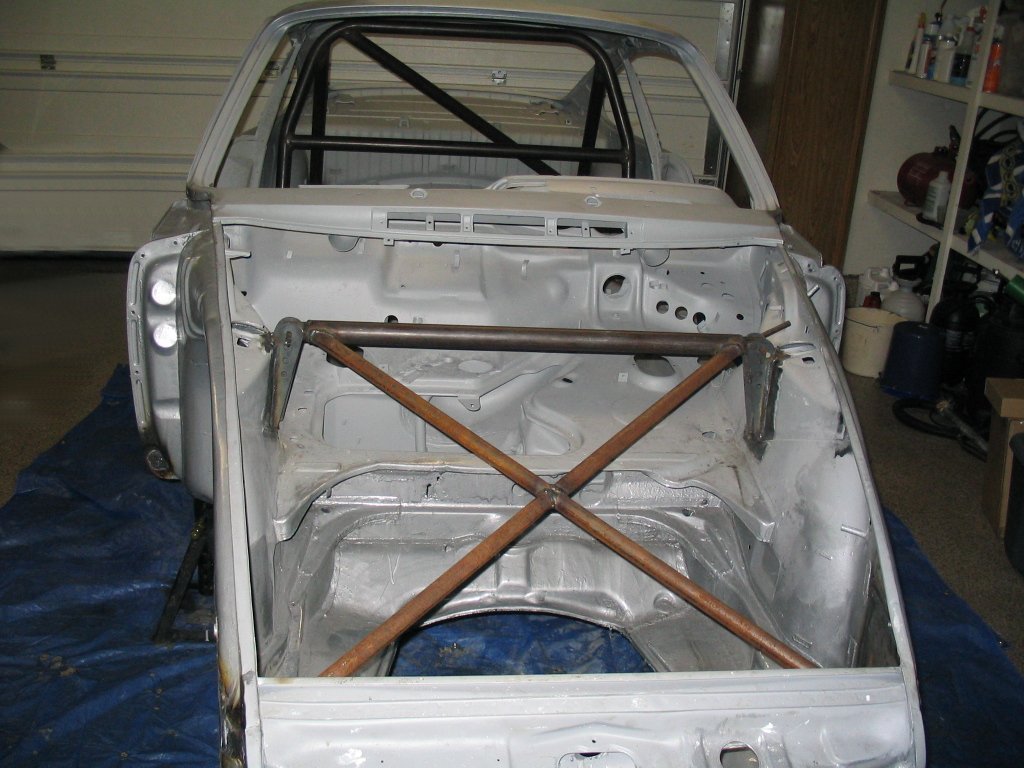
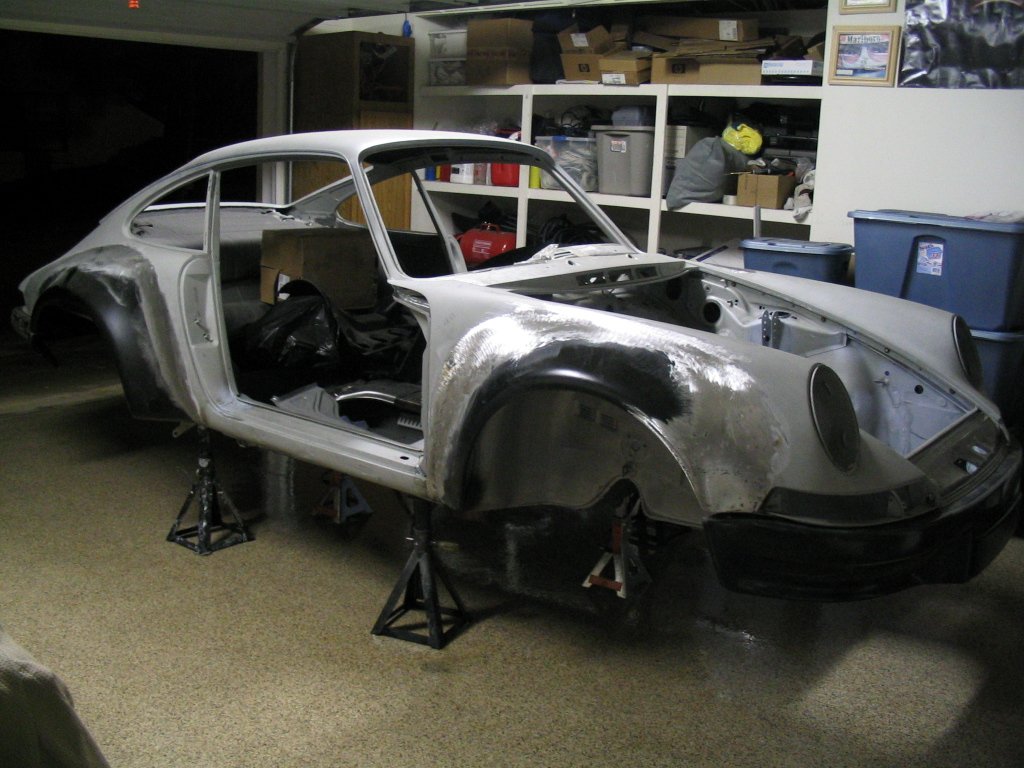
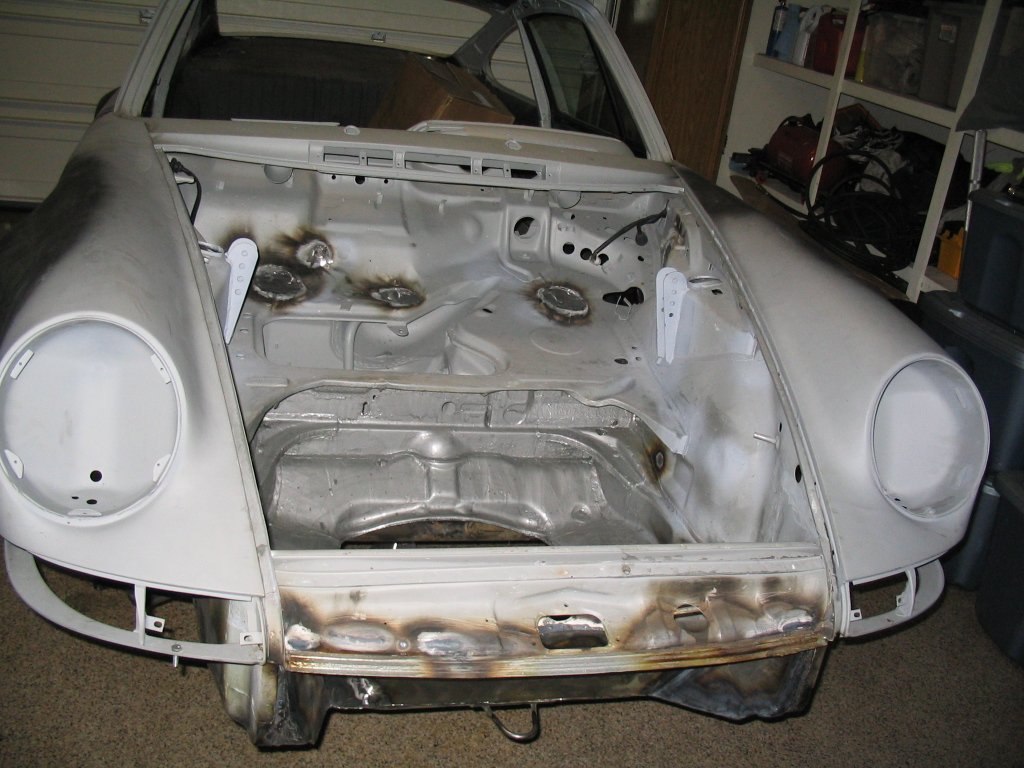
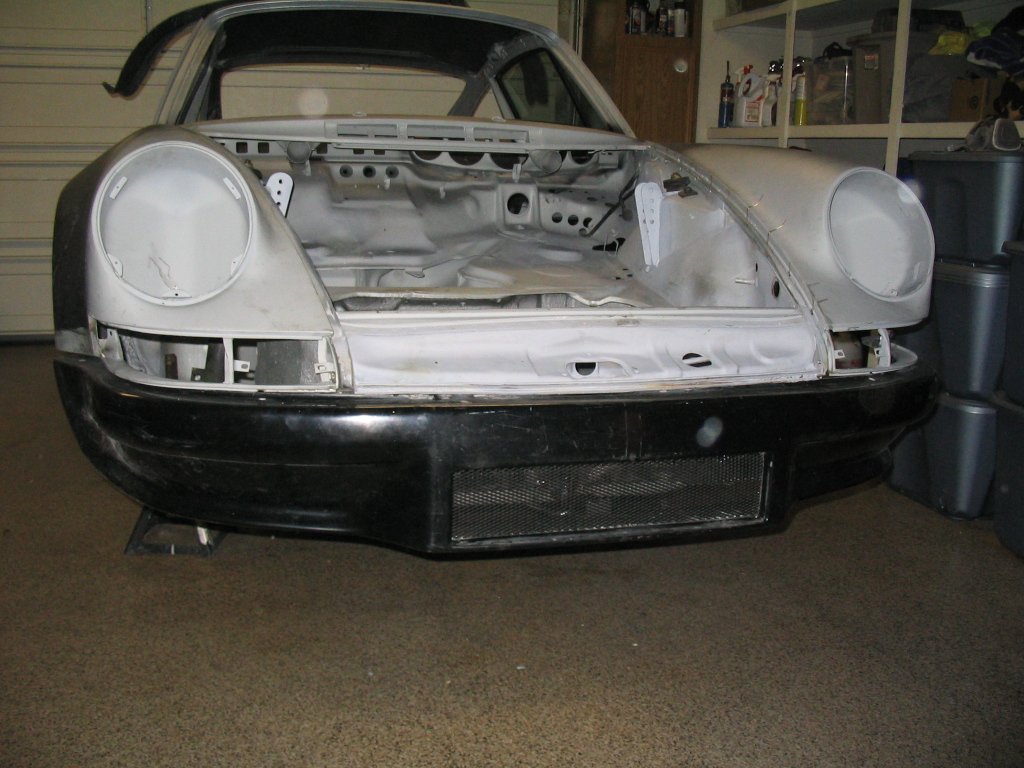
A better shot of the front. It was definitely a SHELL at this point.
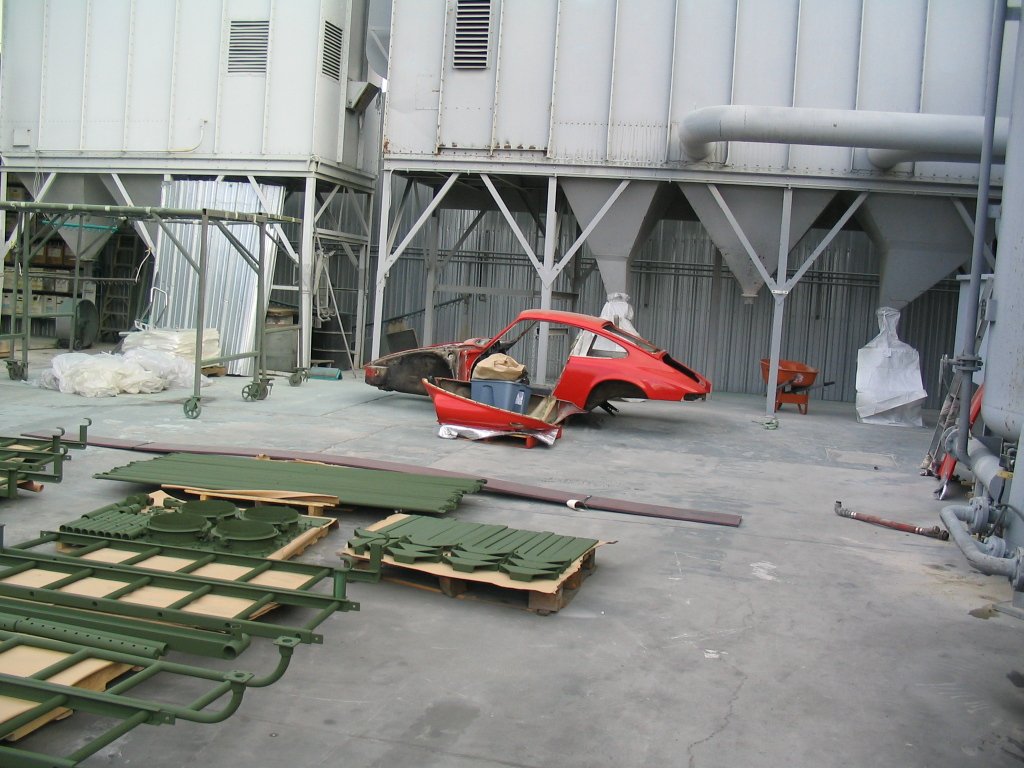
Good bye... with the shop's busy schedule, I wouldn't see the car for another 5 weeks.
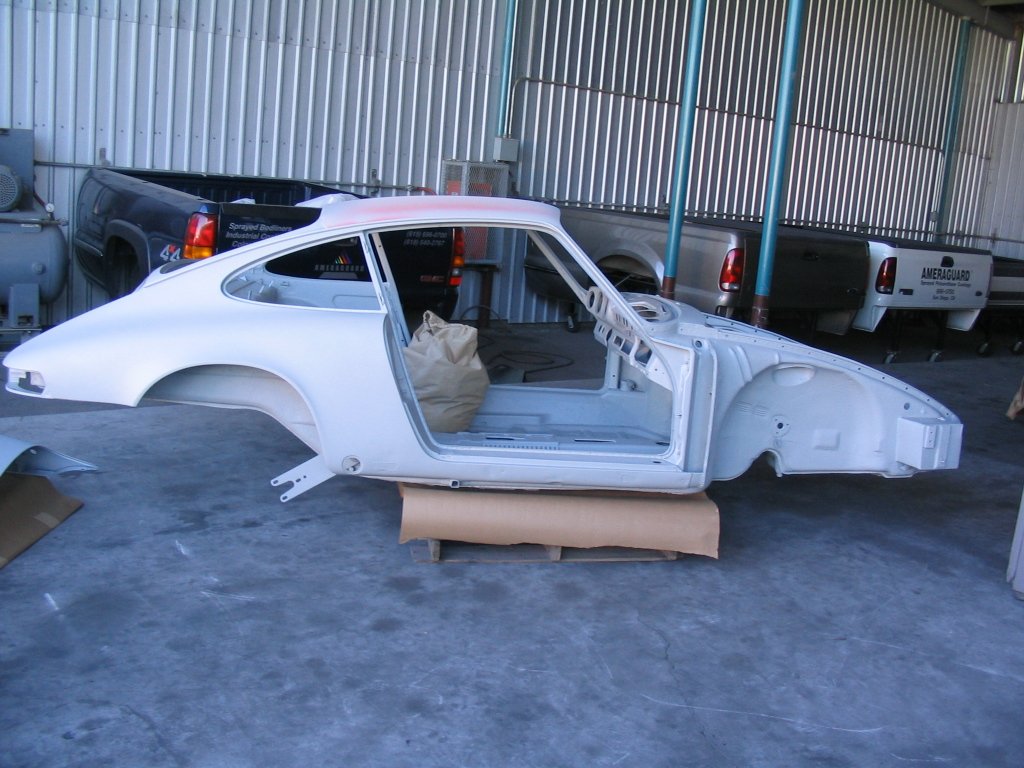
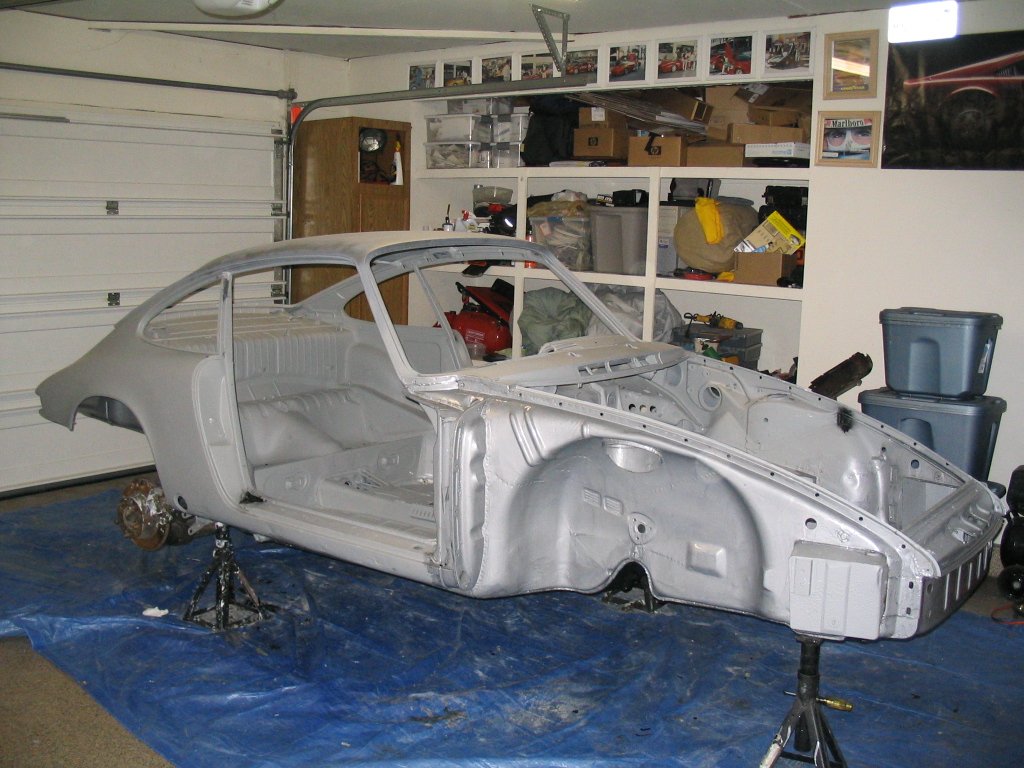
This is the end product. Notice the roof wasn't sandblasted, I was affraid it would warp.
Overall an excellent job and the epoxy primer really seals the body well.

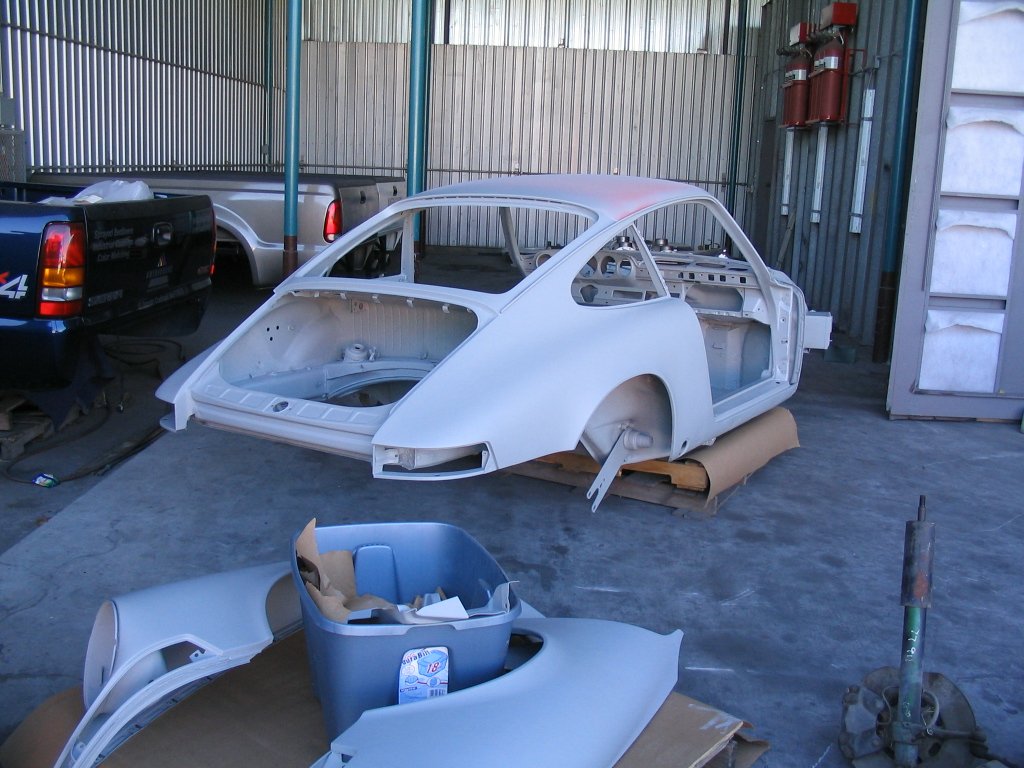
No more grease or dirt!
Excellent job in the cabin.
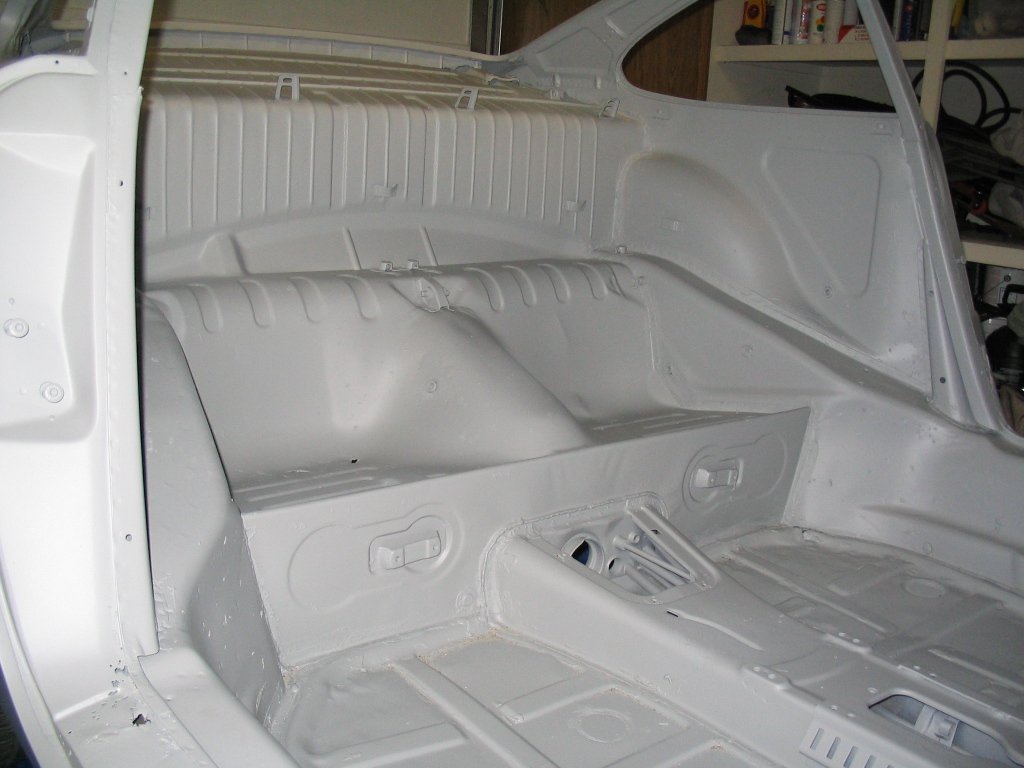
Compared to what it looked like originally, it was nice to finally work on a clean car.
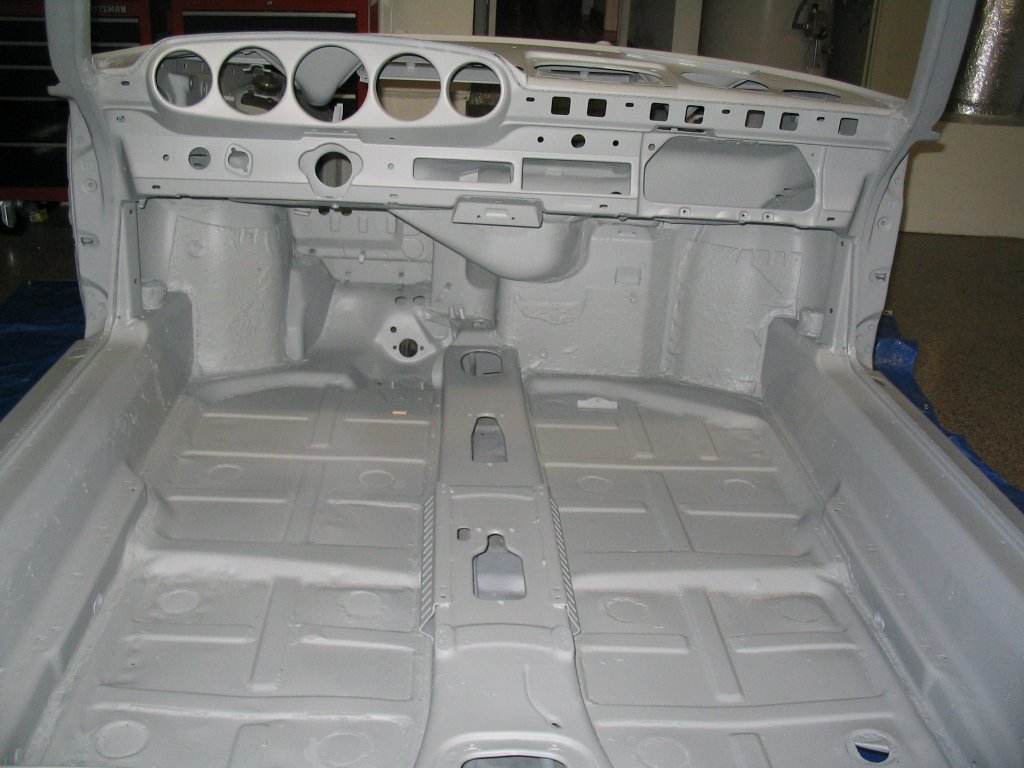
Epoxy-primer sealed interior.
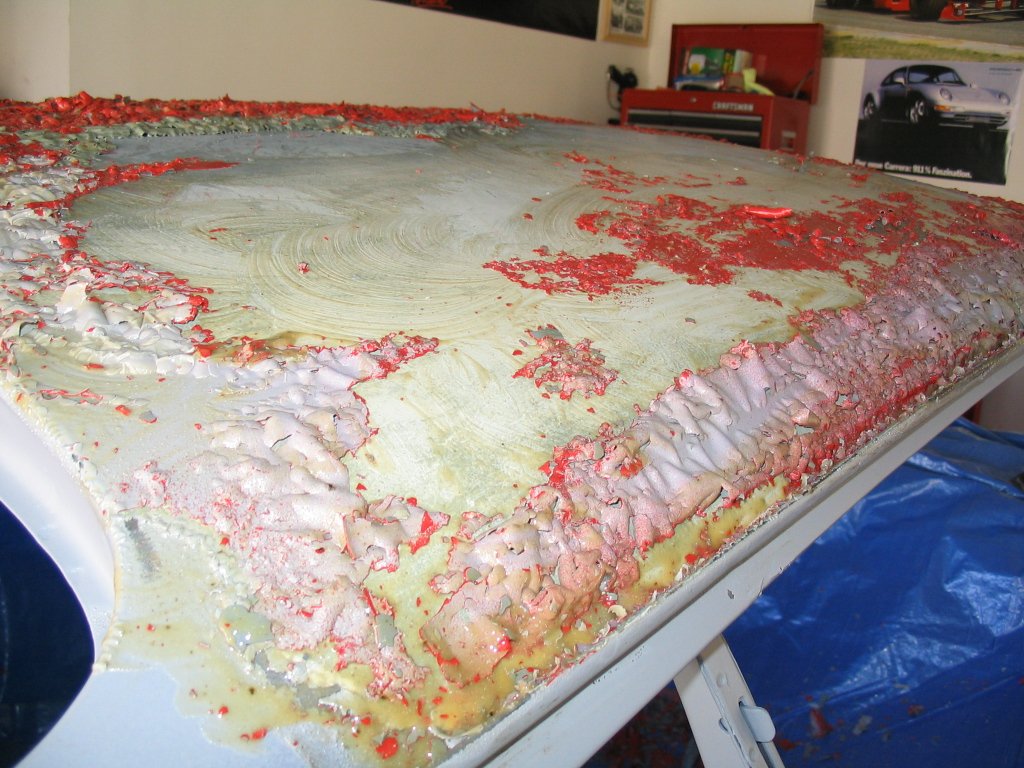
Since I didn't have the roof sandblasted, it was time to break-out the chemicals! This aircraft paint remover stuff is serious business.
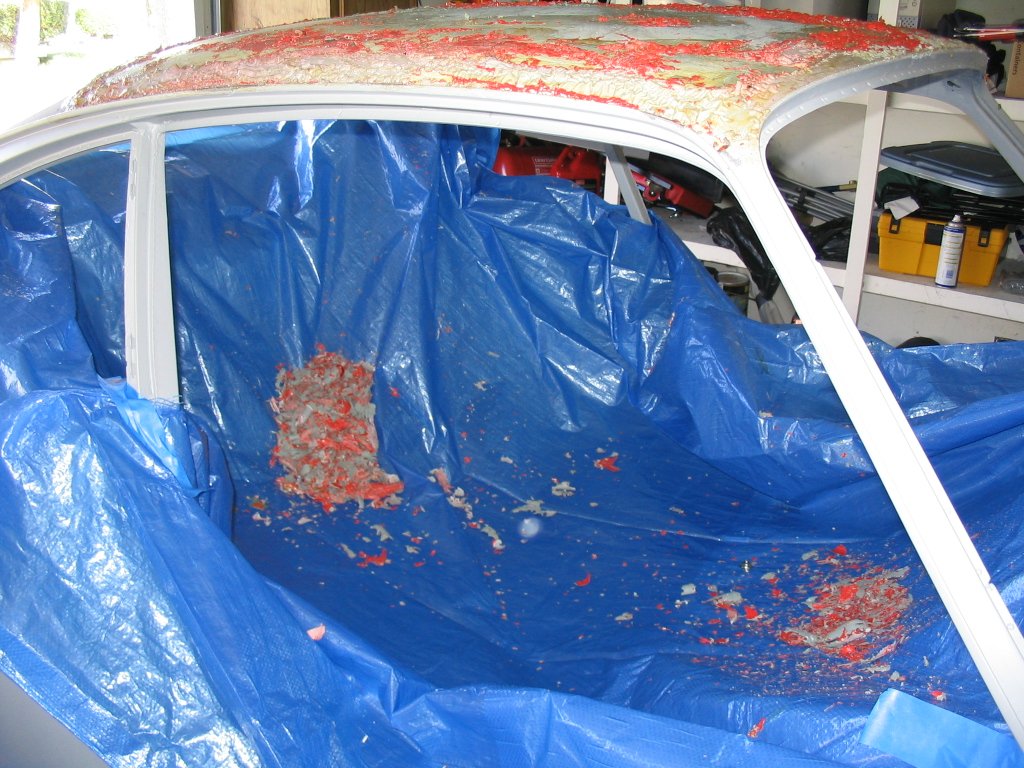
I used a tarp to catch all the paint ships.
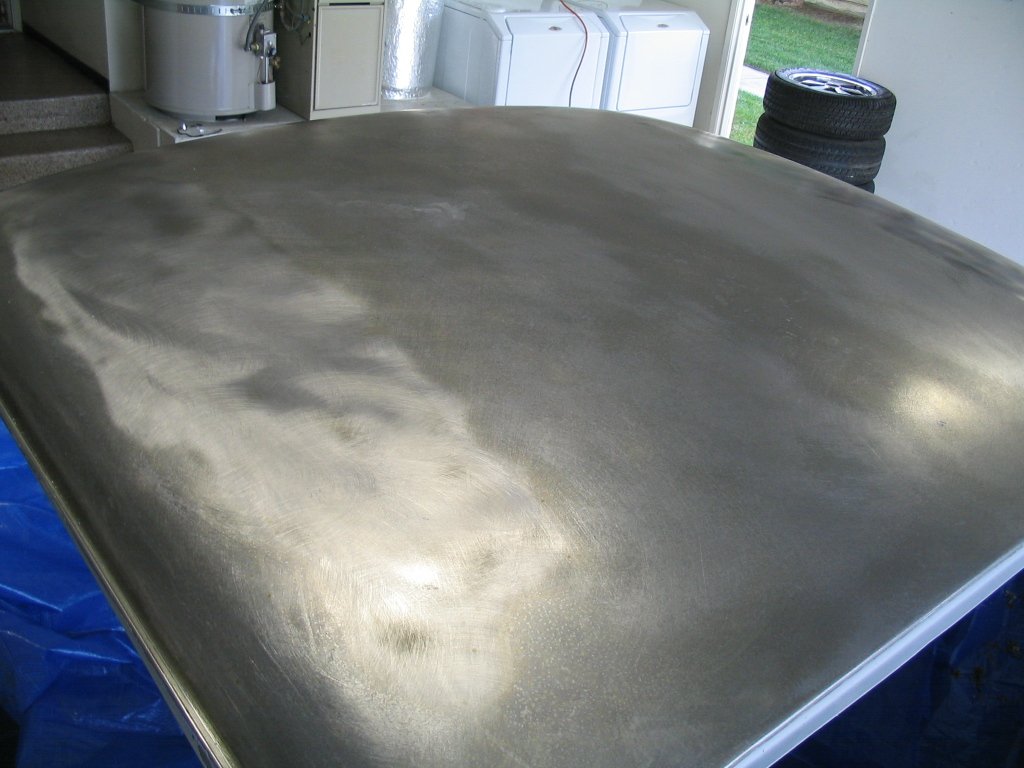
Nice and clean just like at the factory.
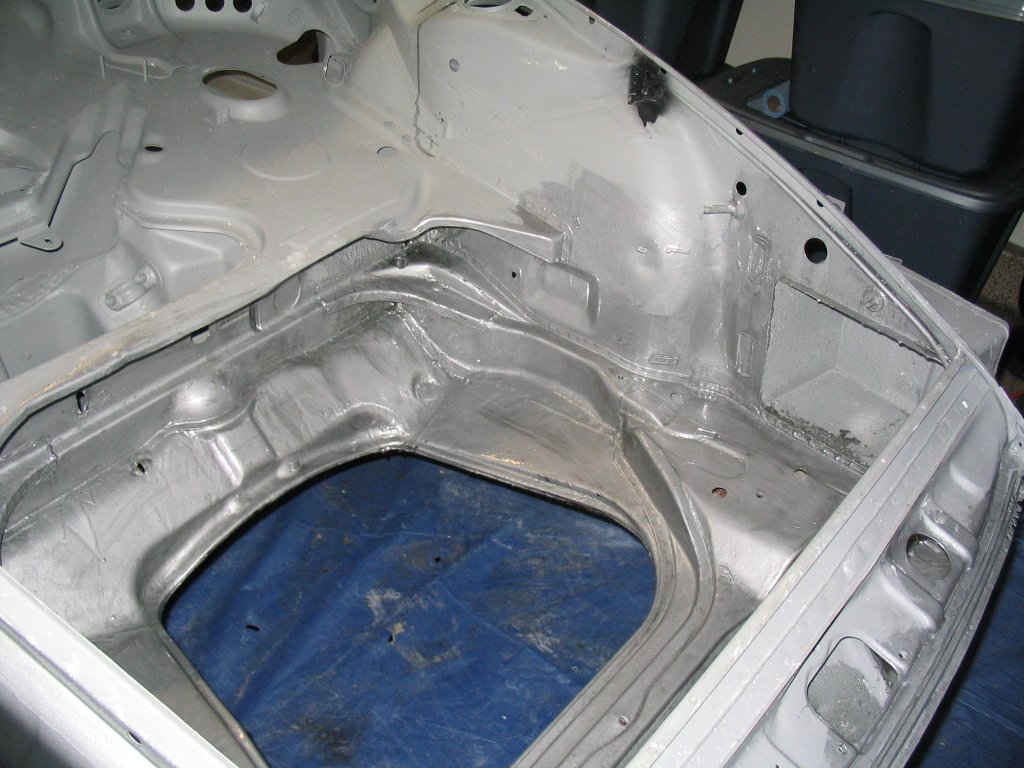
I took out some of the undercoating from the front trunk and used POR-15 to seal it.
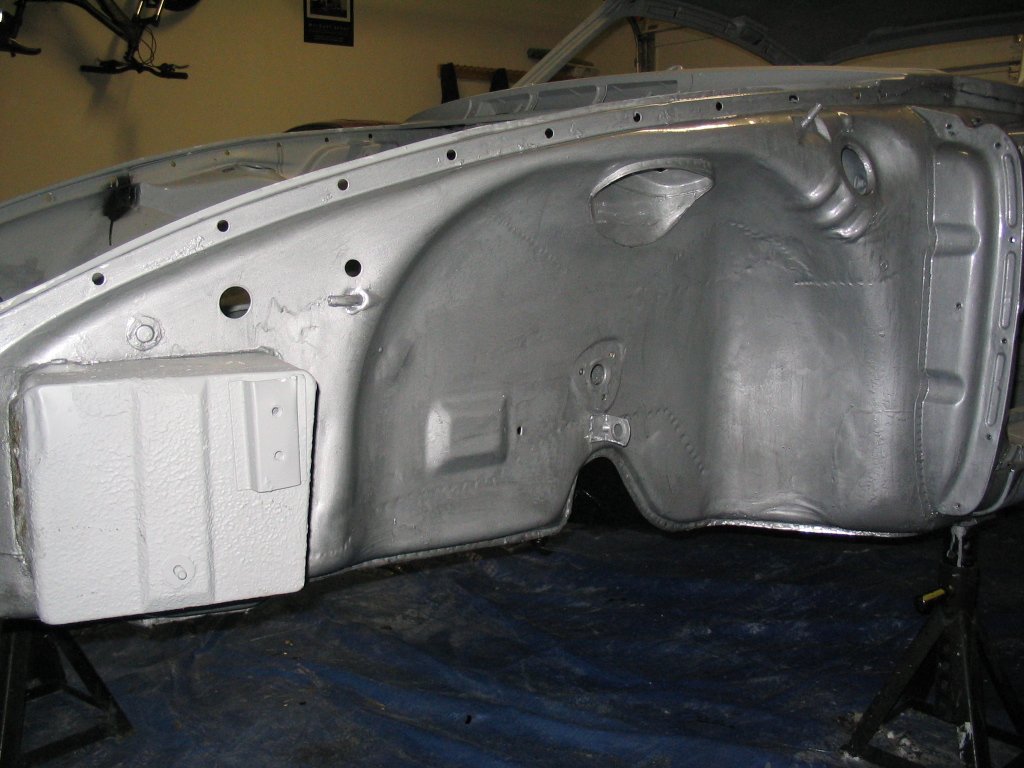
I also removed some more undercoating from the front fender wheel wells and sealed them with silver POR-15.
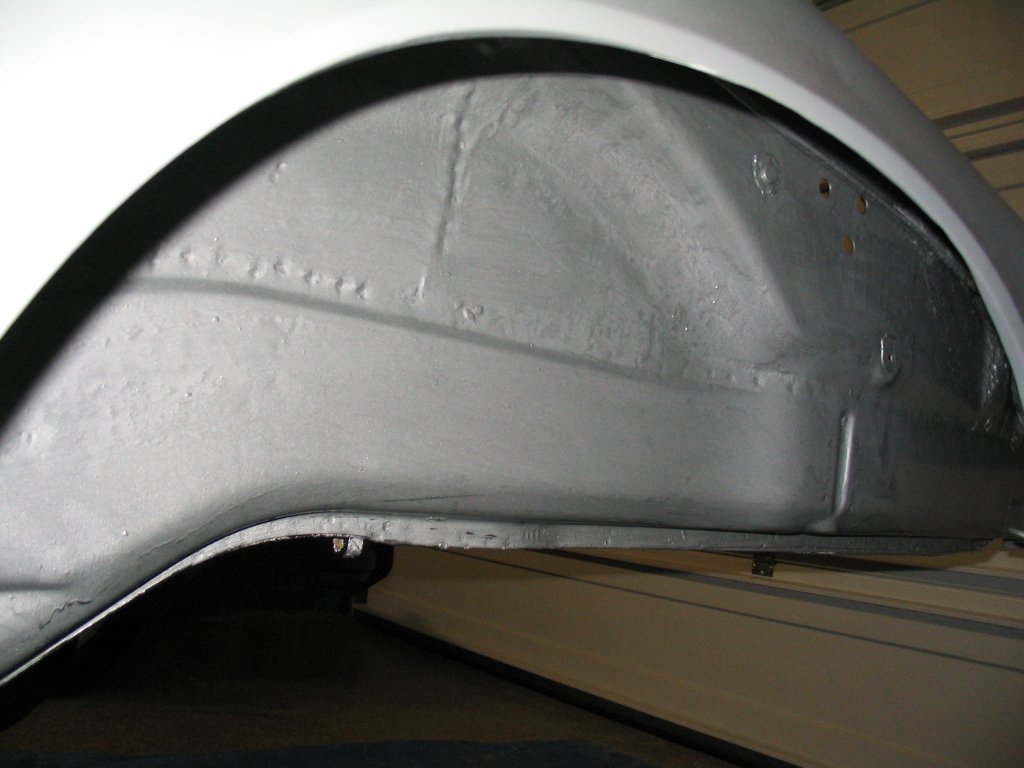
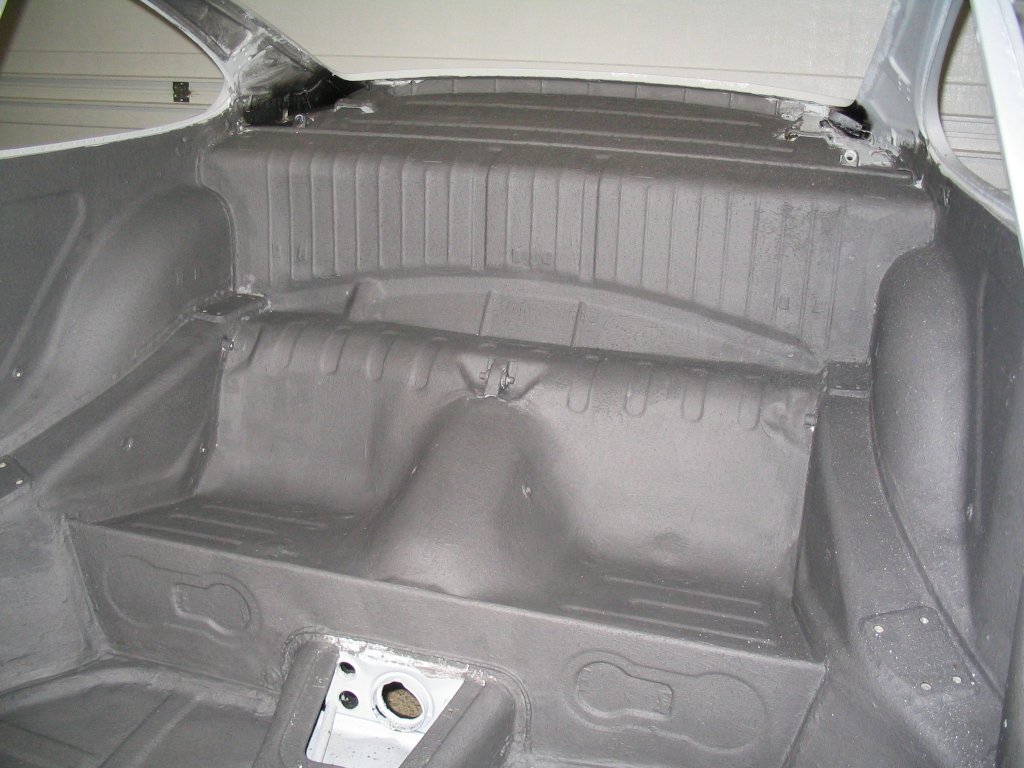
Same treatment on the rear wheel wells. Since the color of the car will be silver, the silver POR-15 was a nice touch.
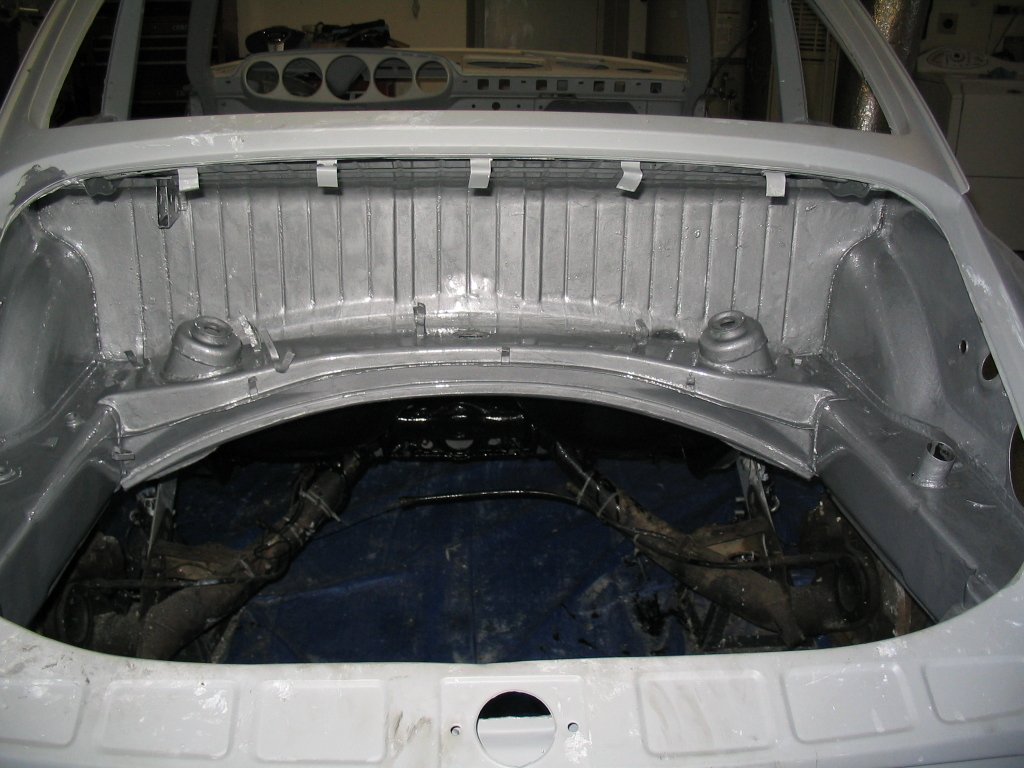
All the left-over undercoating from the engine bay was also removed and more silver POR-15.
Lots of work up to this point. I think I inhaled enough fumes and dust to cut my life expectancy in half!
A master welder and rollbar expert came to my house and custom made these... Sweet!!!
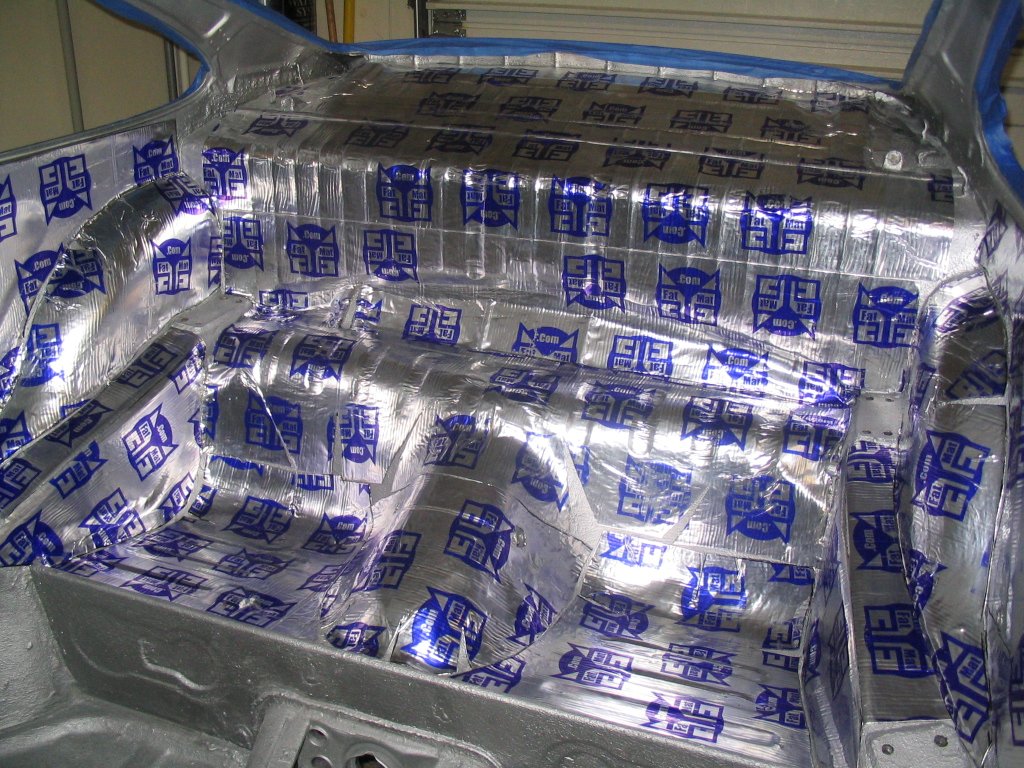
Since most of the original sound deadener was removed, I decided to add a few thin layers of new deadener on top of the epoxy primer.
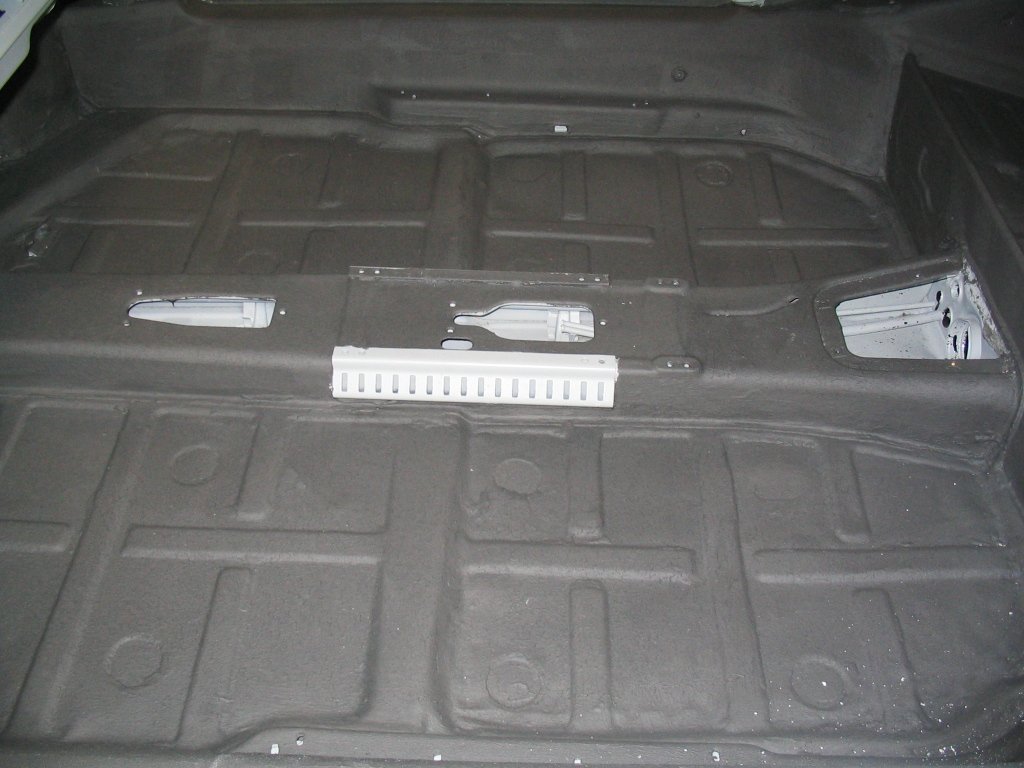
Nice and protected from the elements and a bit of sound protection.
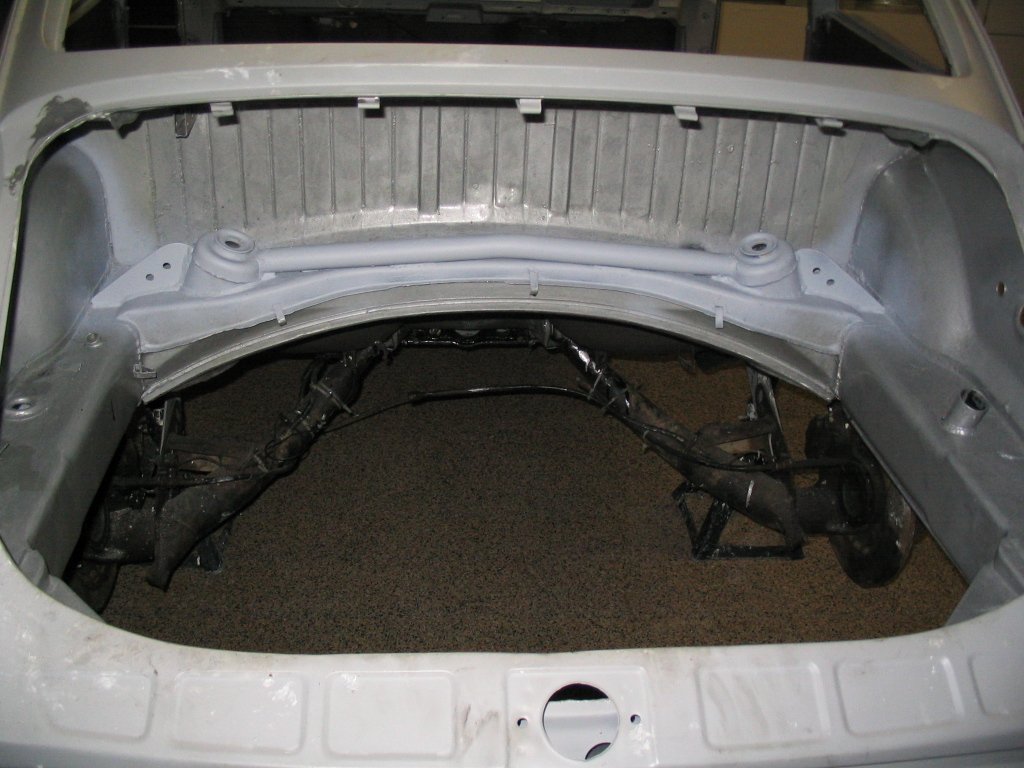
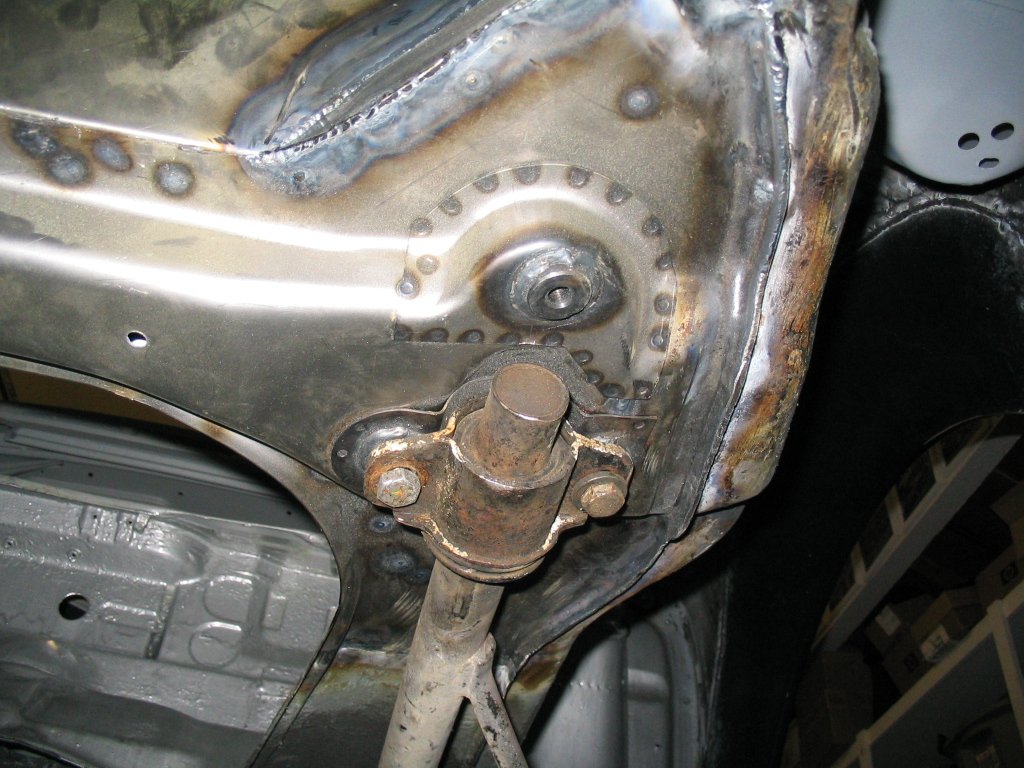
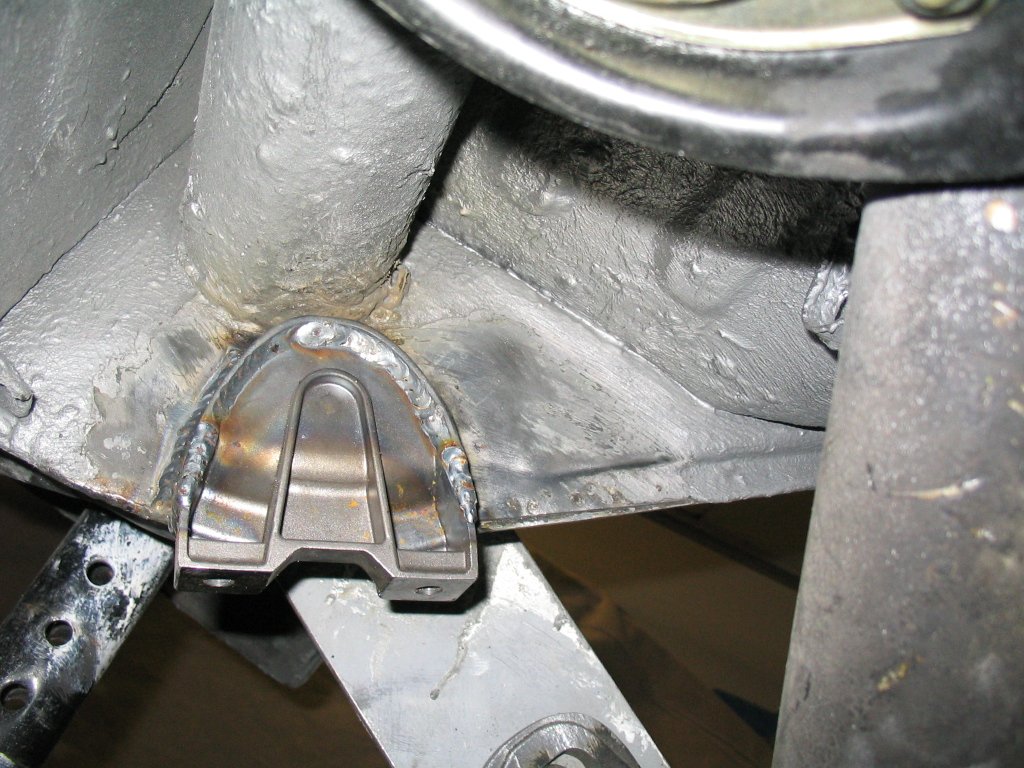
This is a common reinforcement to the rear shock towers to withstand coil-overs. Notice the gussets on the side.
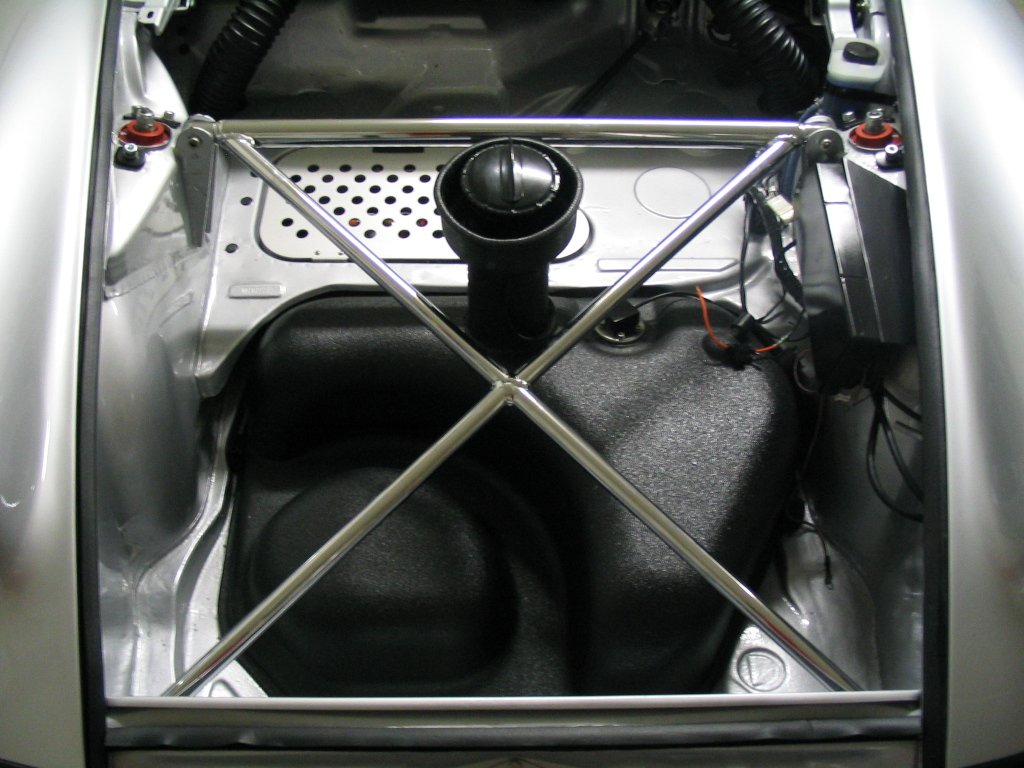
Battery boxes removed. The battery will be relocated to the smuggler's box
After many weeks looking for a sheetmetal expert, I found the right person for the job. He came down from Los Angeles.
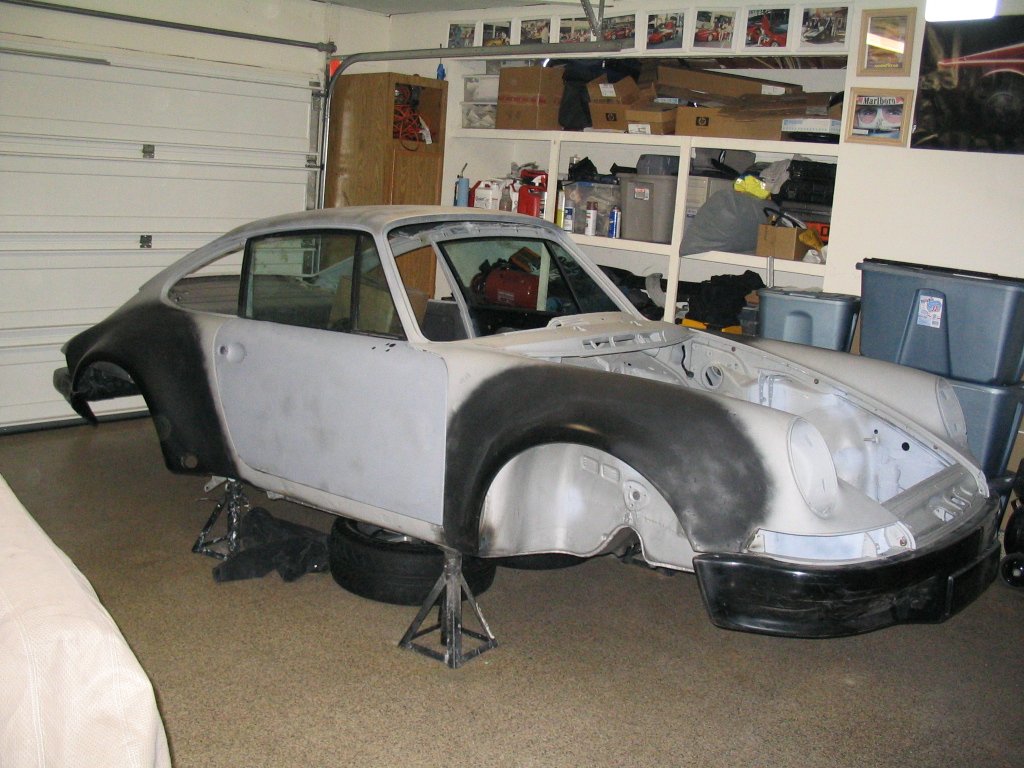
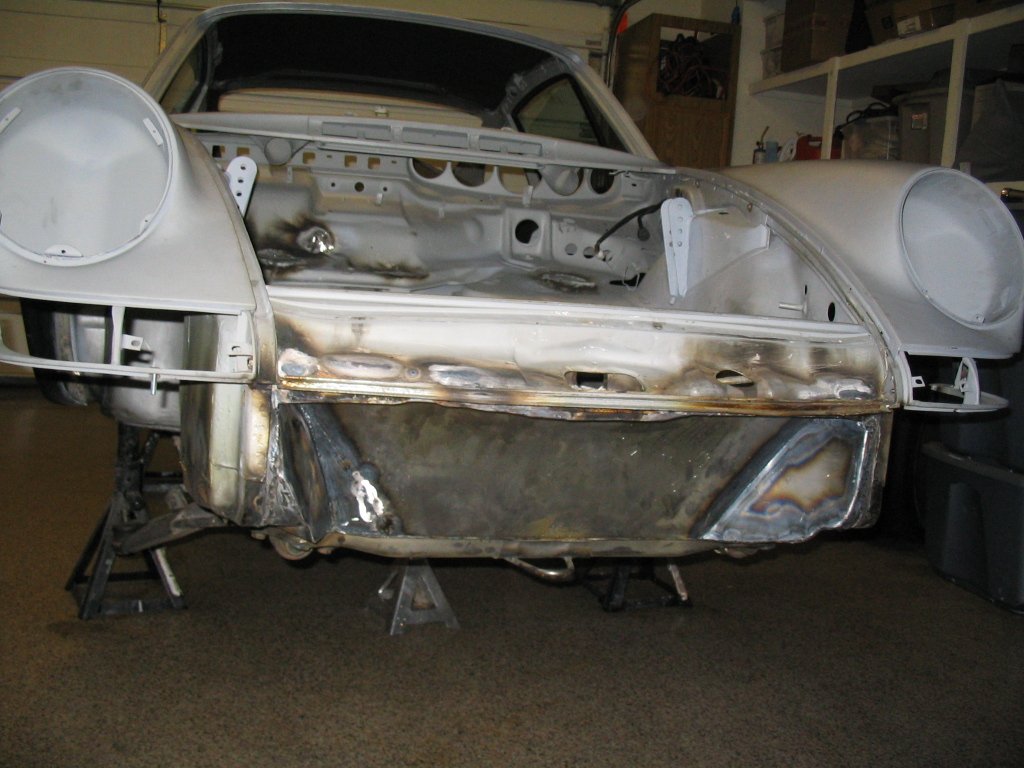
It was nice to see the car transform into the RSR body style.
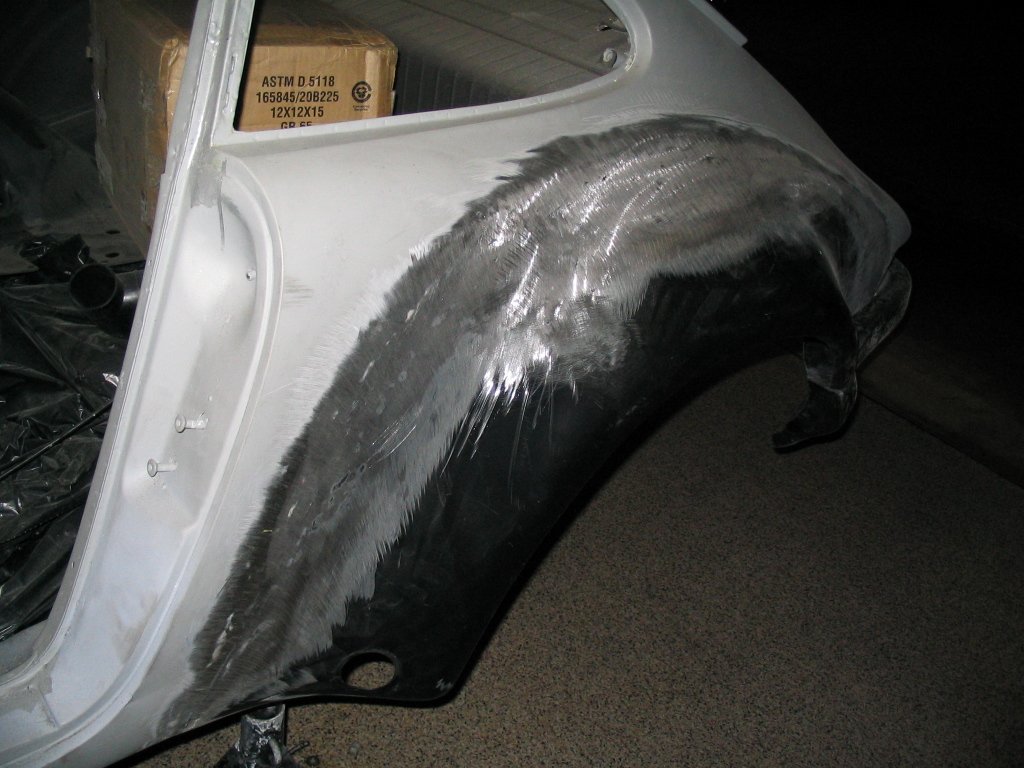
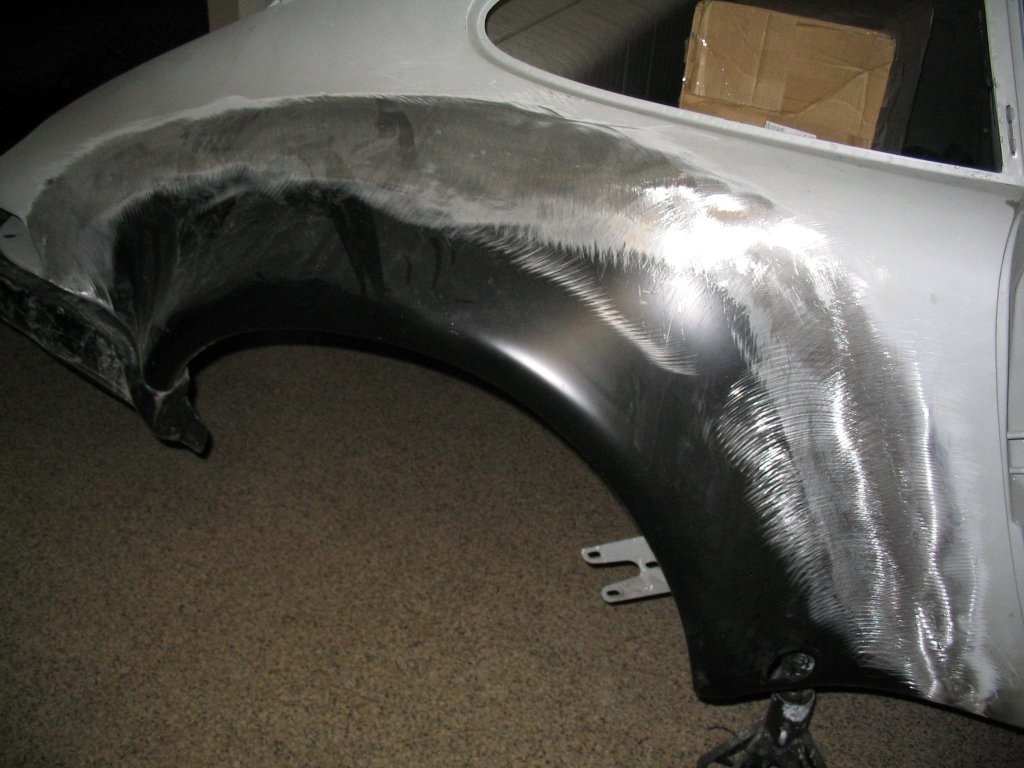
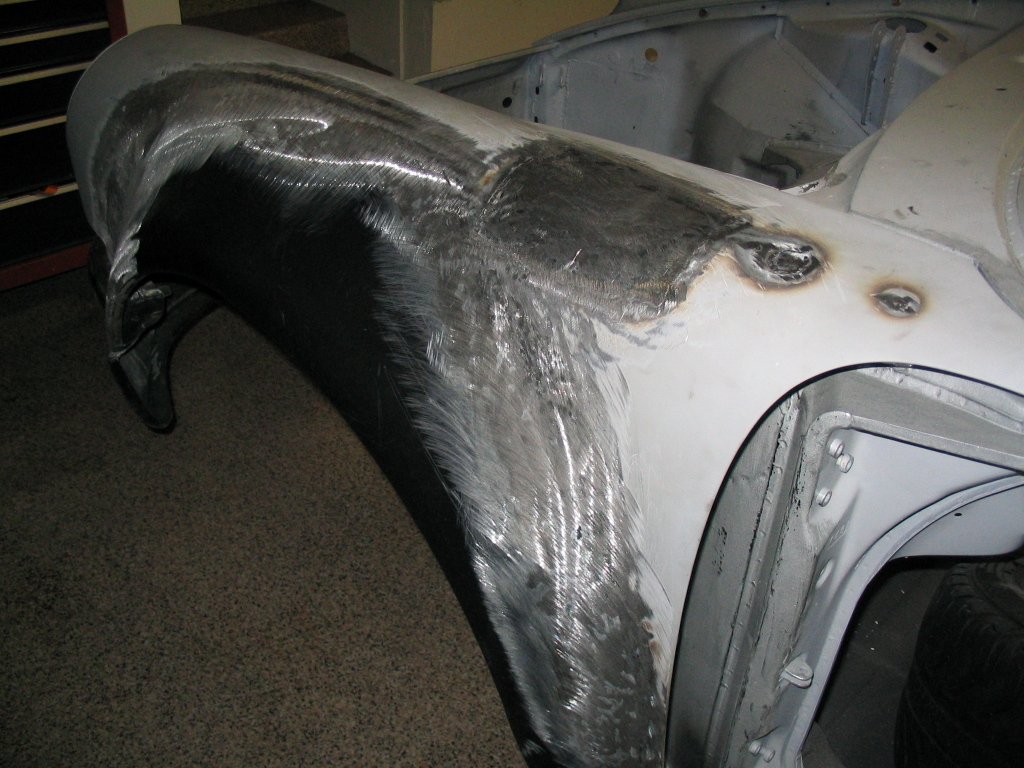
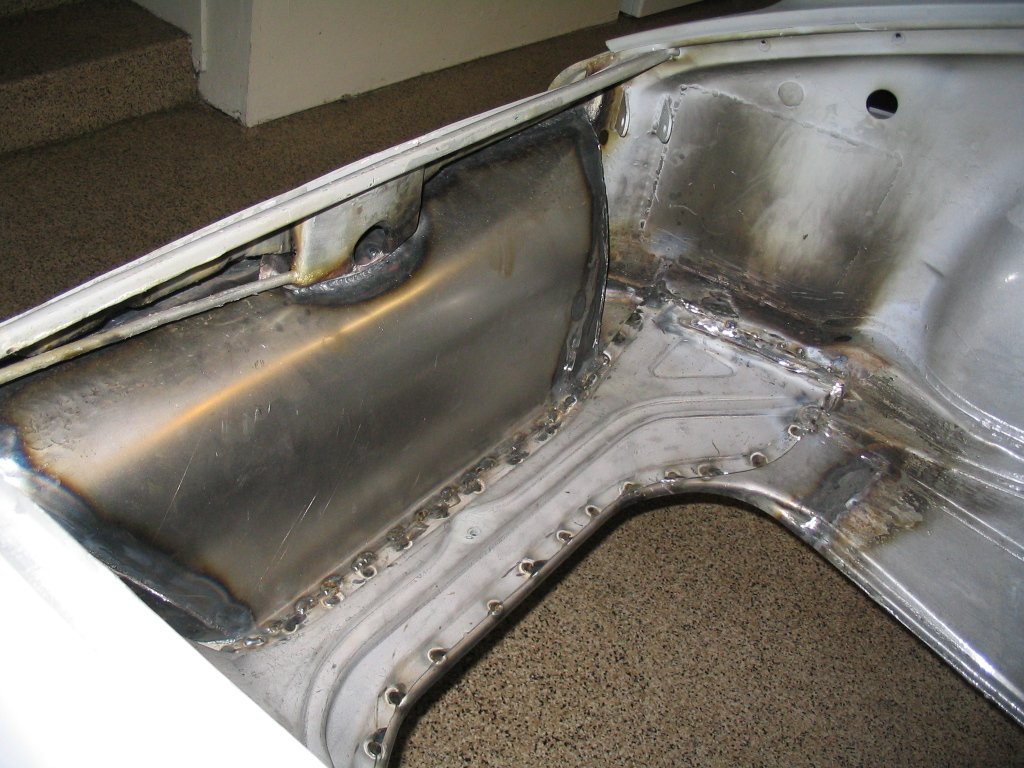
The flares were butt-welded. Notice how much work went into shaping the flare to the original body, very little filler would be needed.

Front RSR bumper installed to test the front flares.
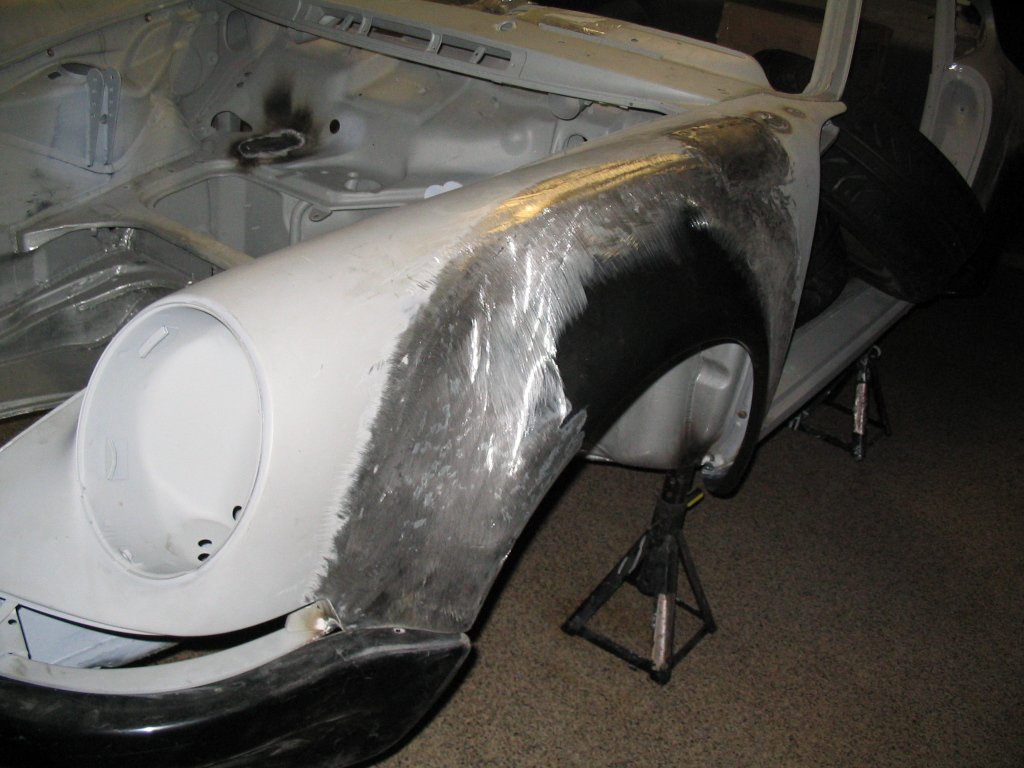
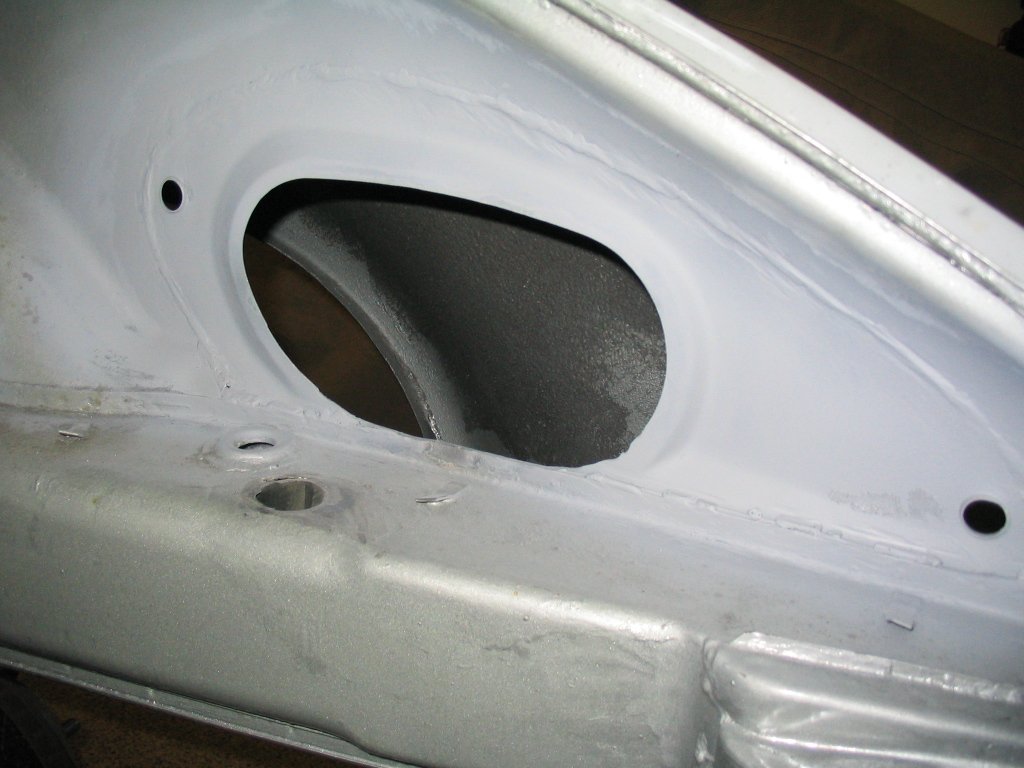
Driver side fender. Notice the fuel door and antenna was removed and welded shut. Top-fill tank was on the list of mods.

Rear bumper installed to test out the rear fender fit.
All 4 flares installed!!
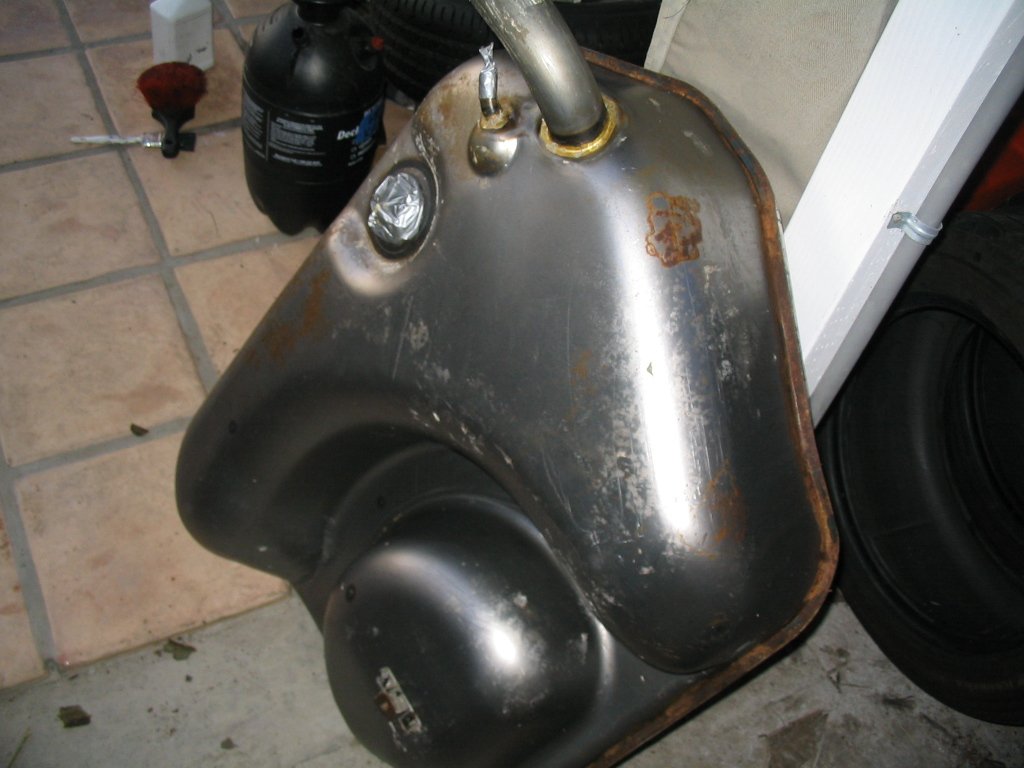
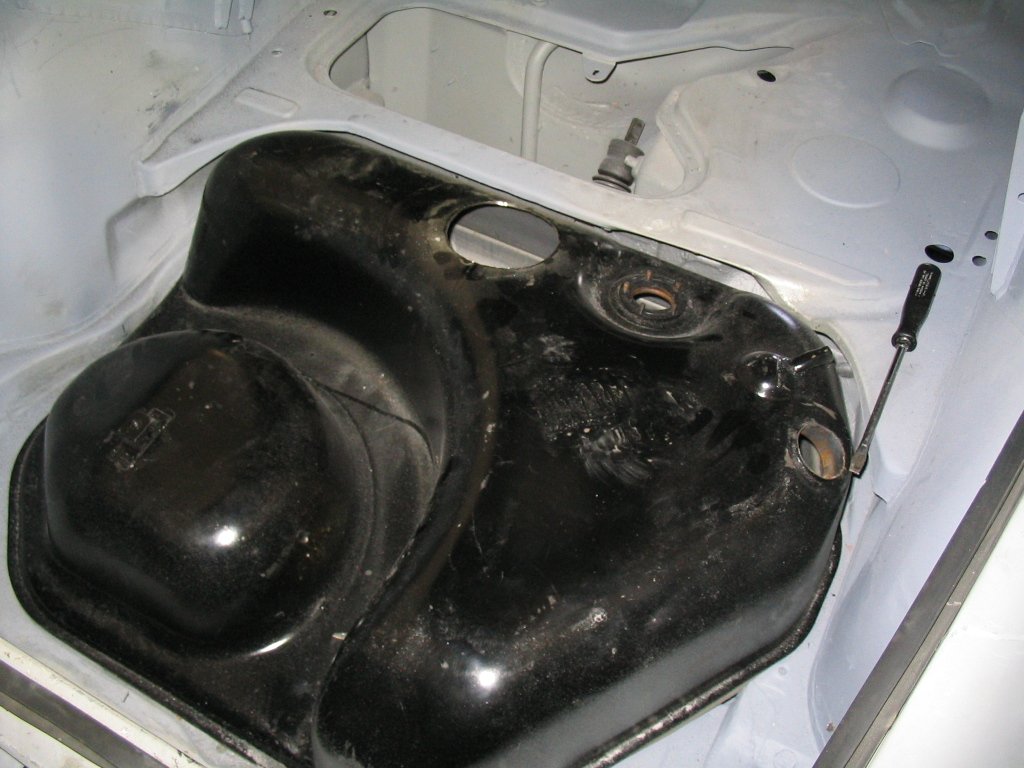
This is the gas tank from a '85 Carrera donor car.
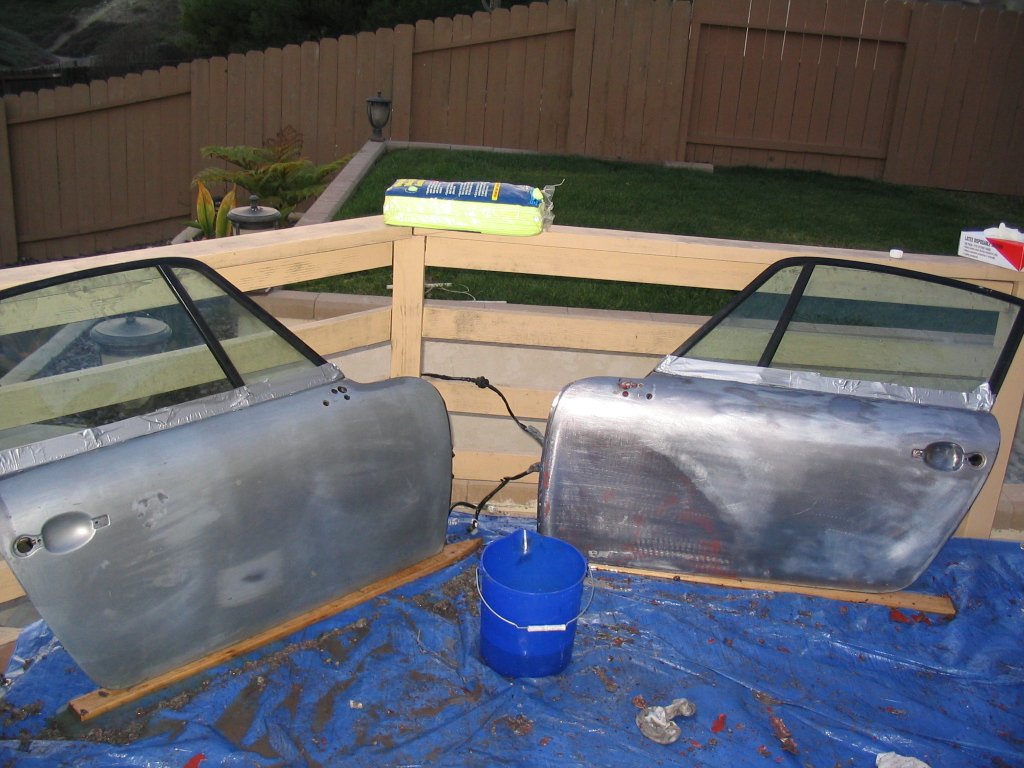
Late model doors with power windows and tinted glass. Down to bare metal.
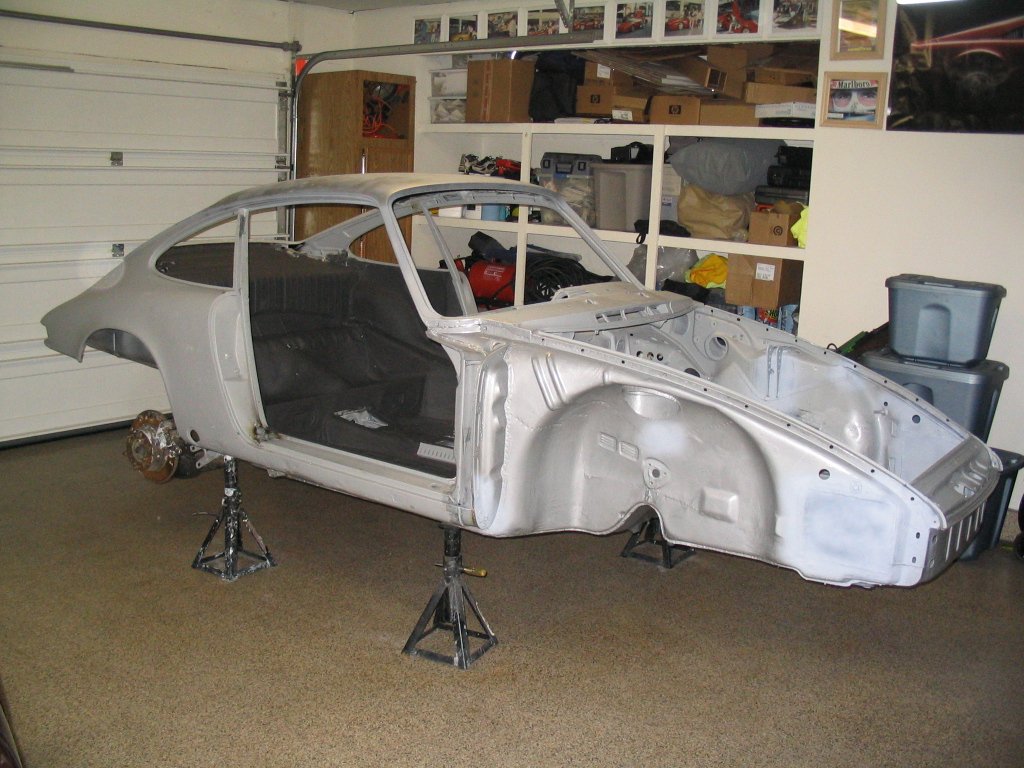
Doors were mounted to the chasis, it had been a while but the tub was looking more like a car.
After the sandblast, it was obvious there was enough rust on the front suspension pan, so it had to be replaced.
Brand new suspension pan with a-arms mounted to test fit.
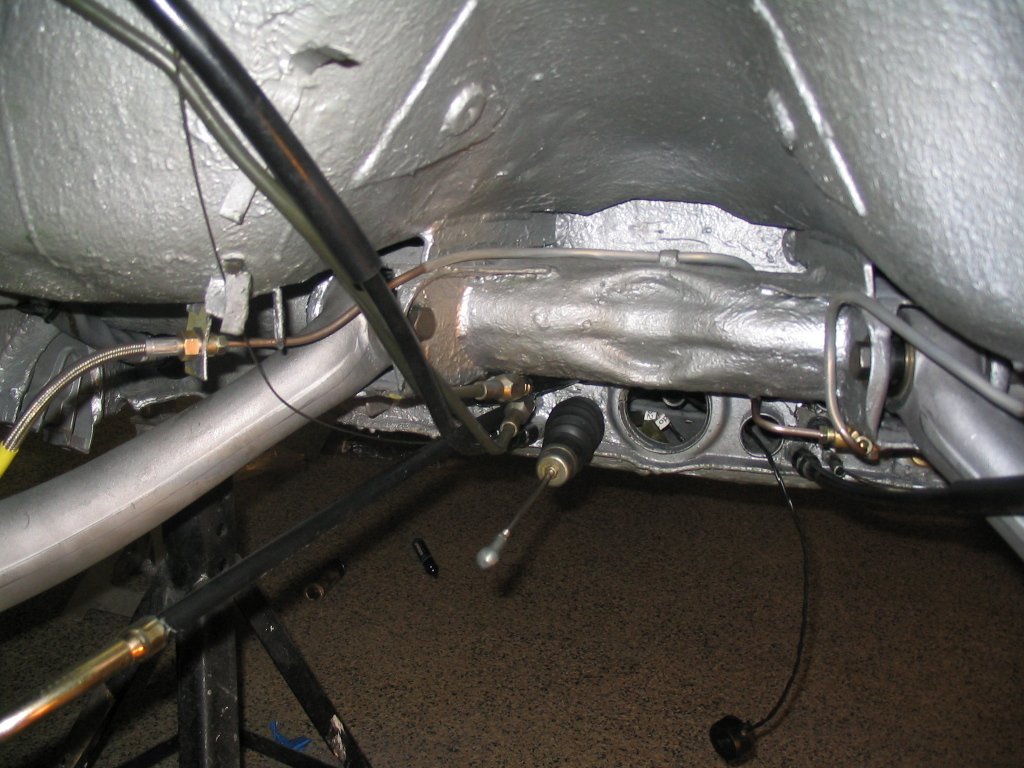
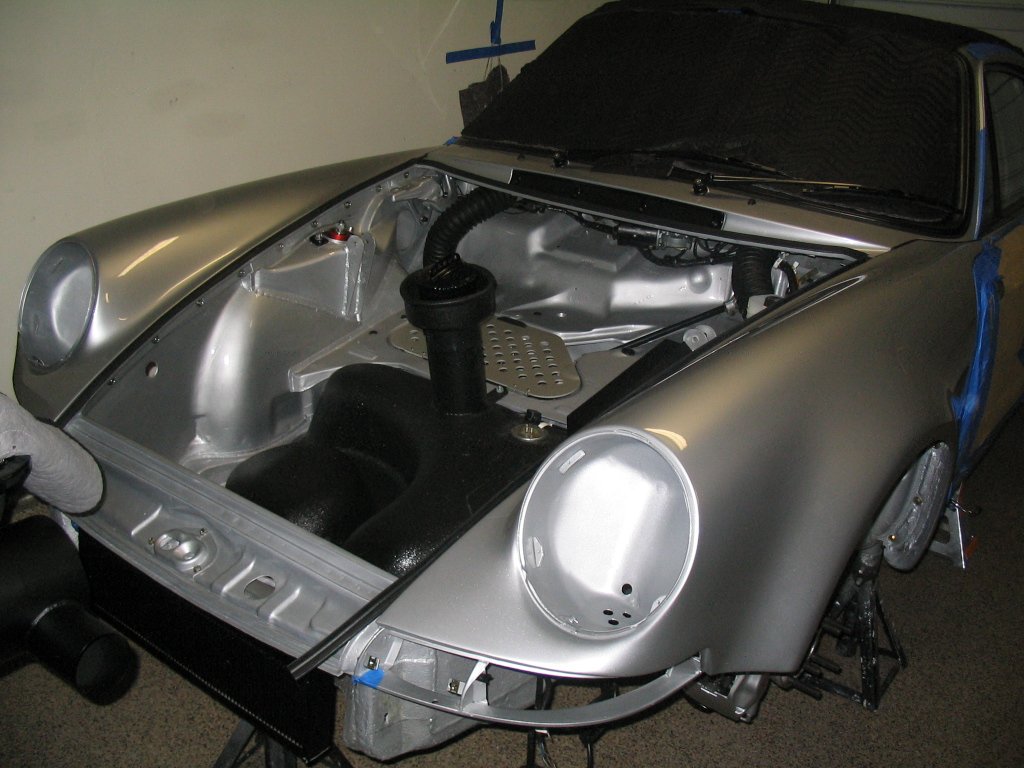
This is a common modification to allow for a front-mounted oil cooler similar to the '73 RSRs.
Wow! Oil pan mod was hand fabricated. Notice new front suspension pan cover also.
All major welding was done. Finally!!!.
Here is a shot of where the oil cooler will mount to.
Center grill was installed. Used lots of fiberglass resin to make sure it was sturdy.
Another common upgrade to the rear suspension is the WEVO sway bar mounts.
Since I was planning on using a 3.2 engine, I needed the newer oil tank which required some sheetmetal surgery.
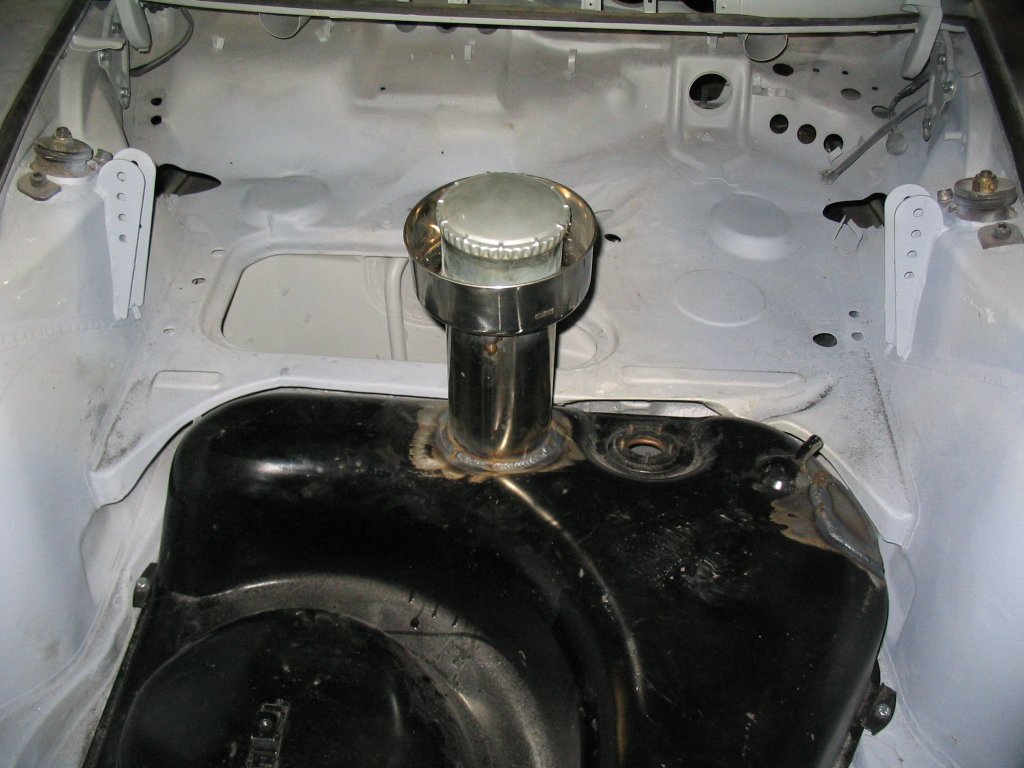
Here is the beginning of a center-filled gas tank.
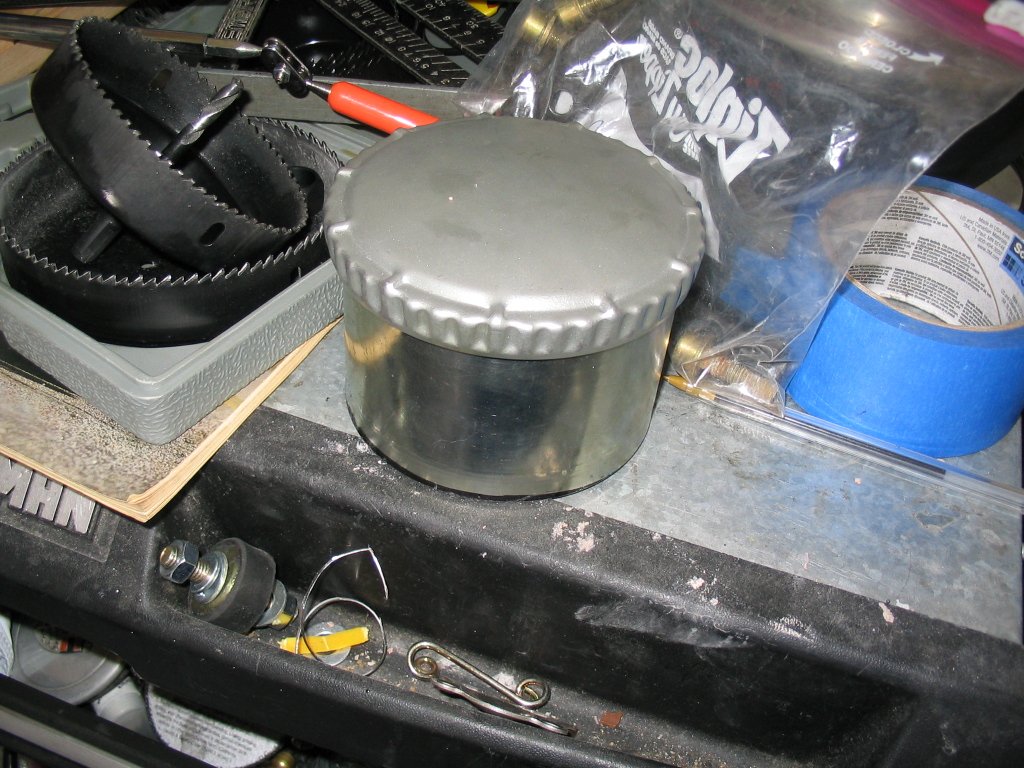
This is the filler neck and the 100 mm gas cap.
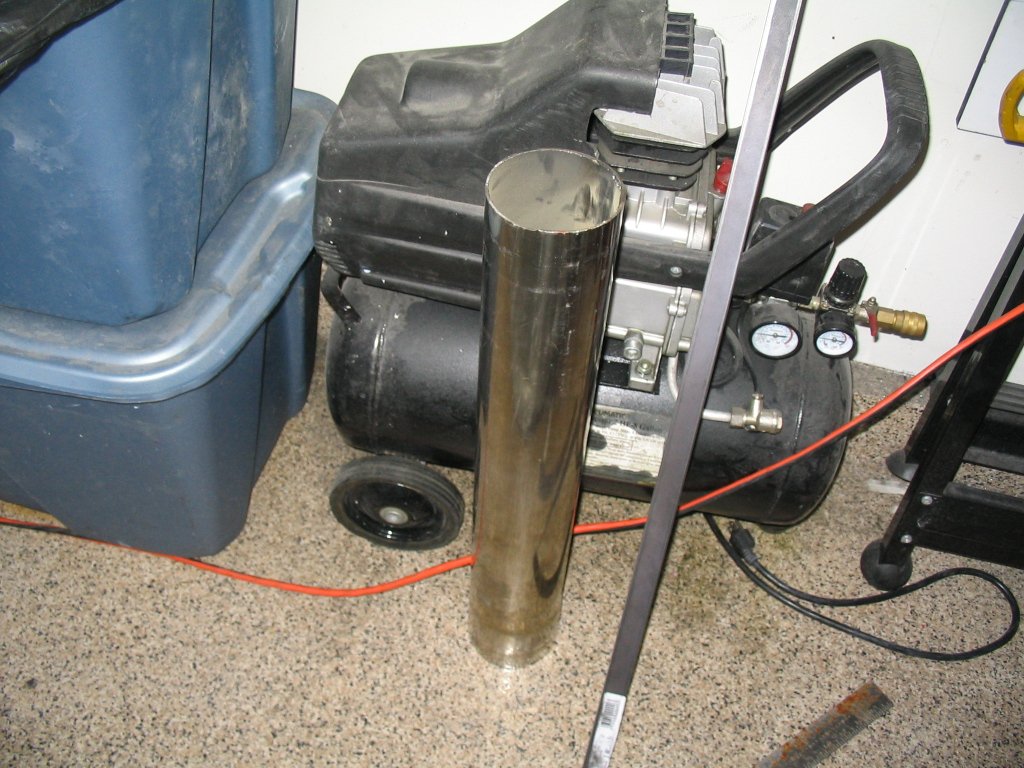
We decided to use a 4 inch exhaust tube as the neck for the tank.
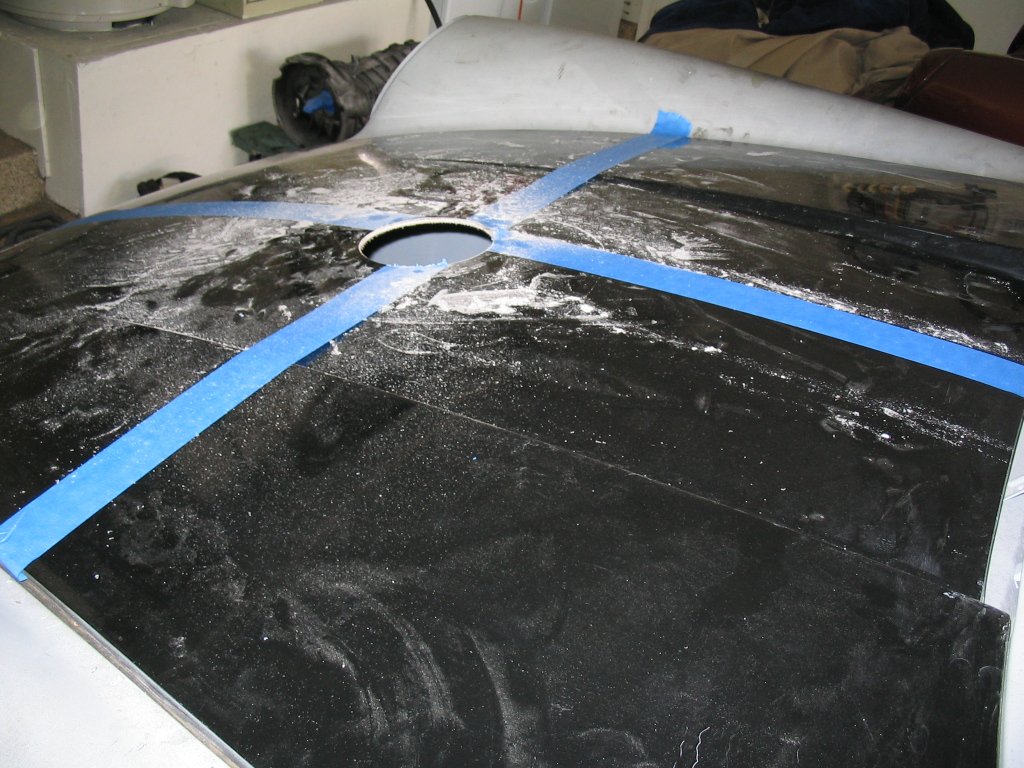
Ouch!!! Brand new fiberglass hood with a 5 inch cutout.
Here is the final product. The rim is a cooking pot from a department store.
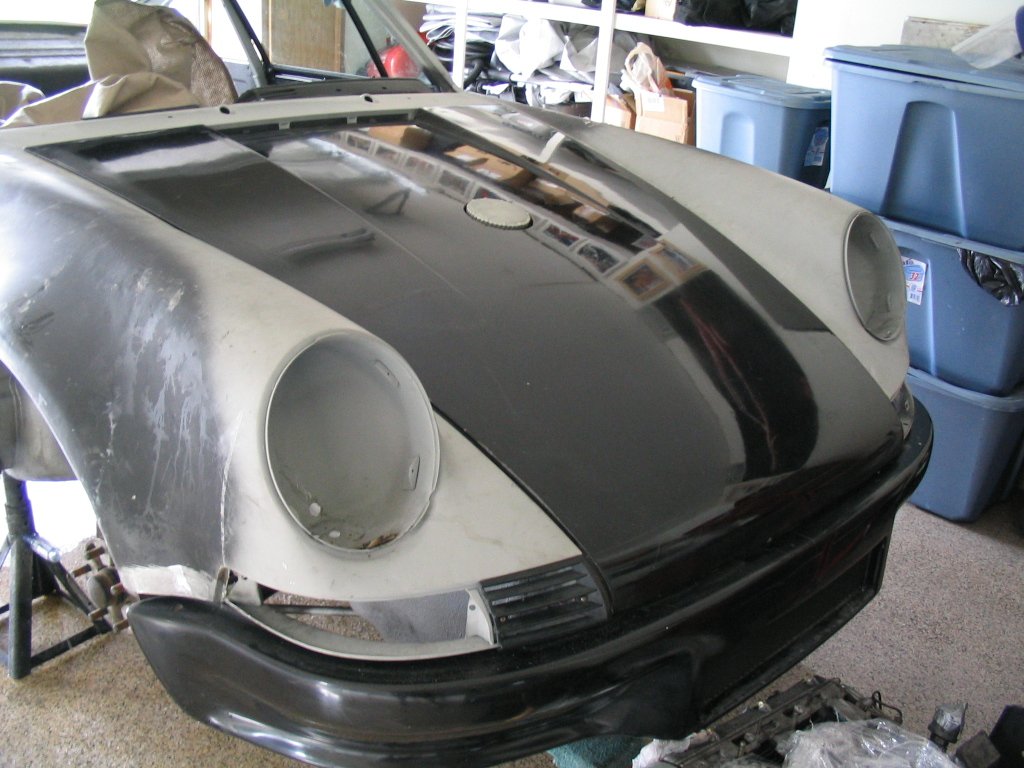
Notice the cap follows the same angle as the hood.

Ready to be taken to the body shop for body work and a new coat of paint.
This car had been a fixture in my garage for almost 8 months!!! It was nice to get a rest and leave it in someone else's hands.
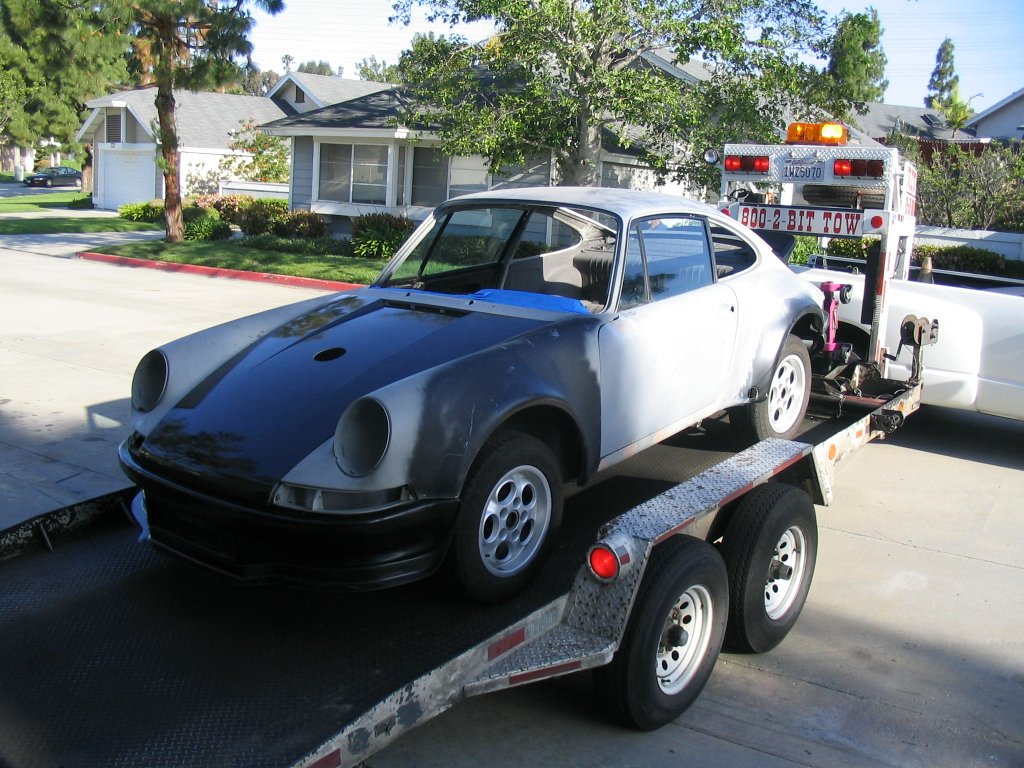
Road trip!!!.
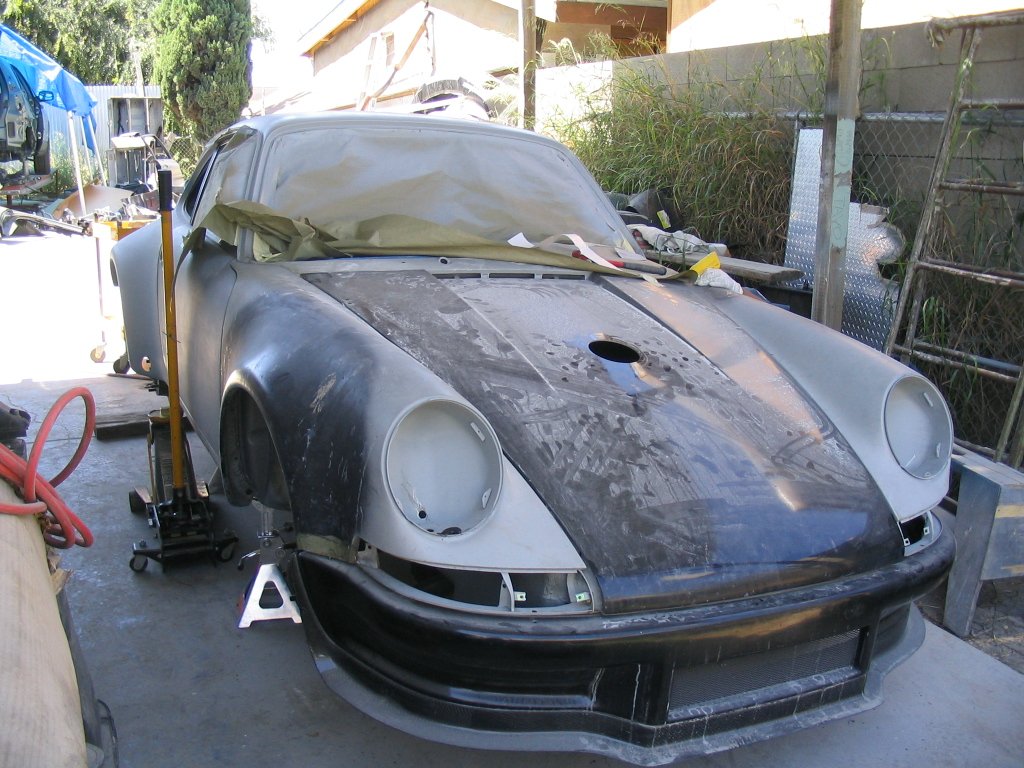
Its new home for the next 4 months! Notice the carbon fiber front splitter
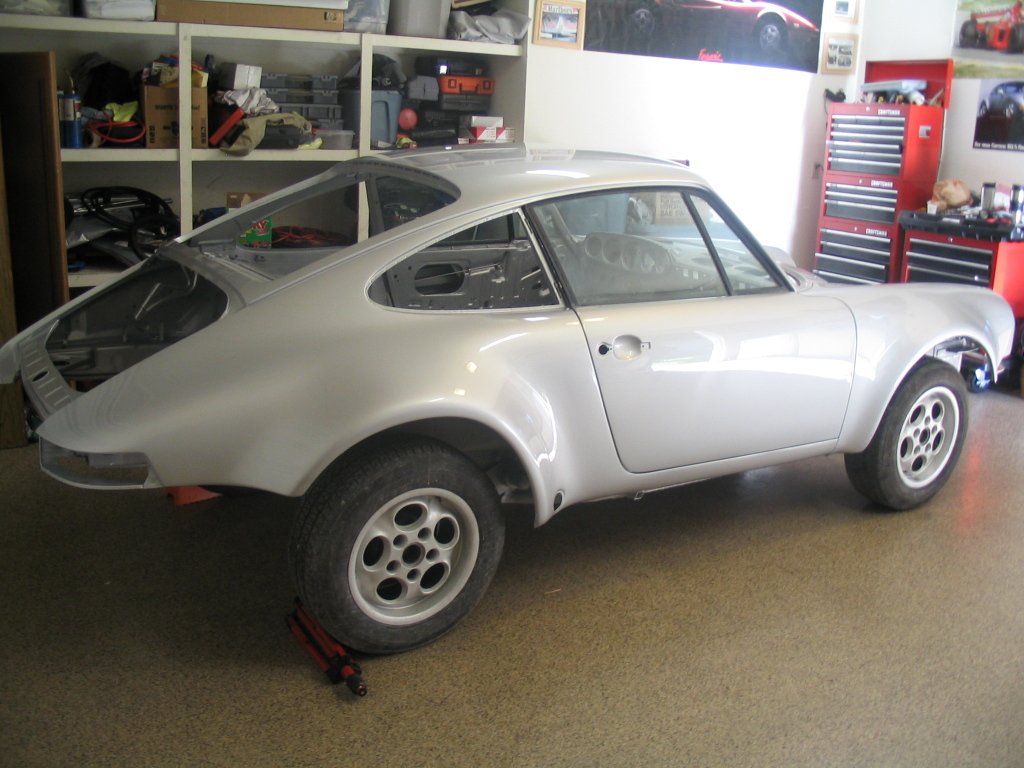
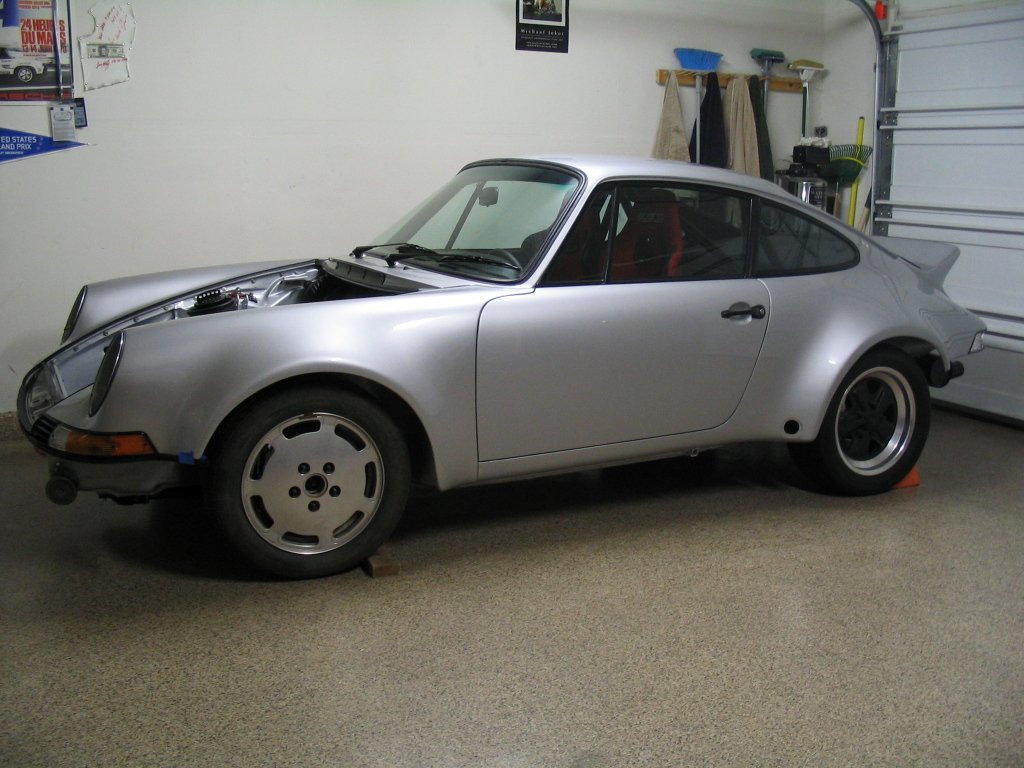
The transformation to single color and finally back home! just as I was enjoying my time-off :)
Duck tail and front bumper. The holes on the bottom of the bumper are for the splitter.

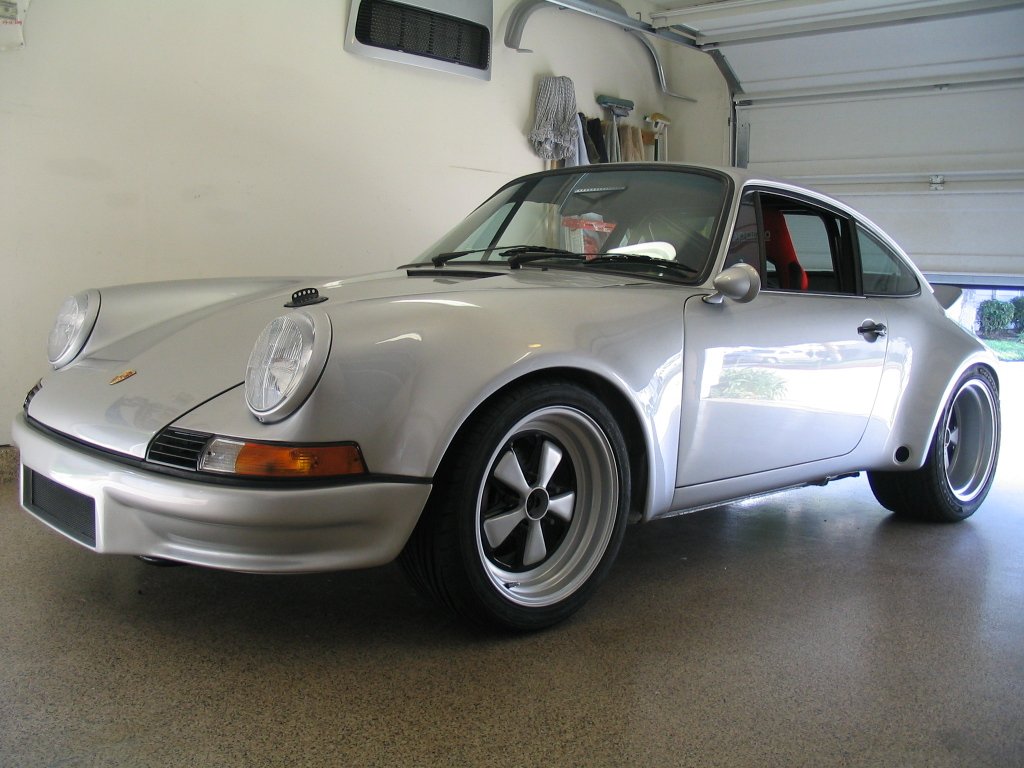
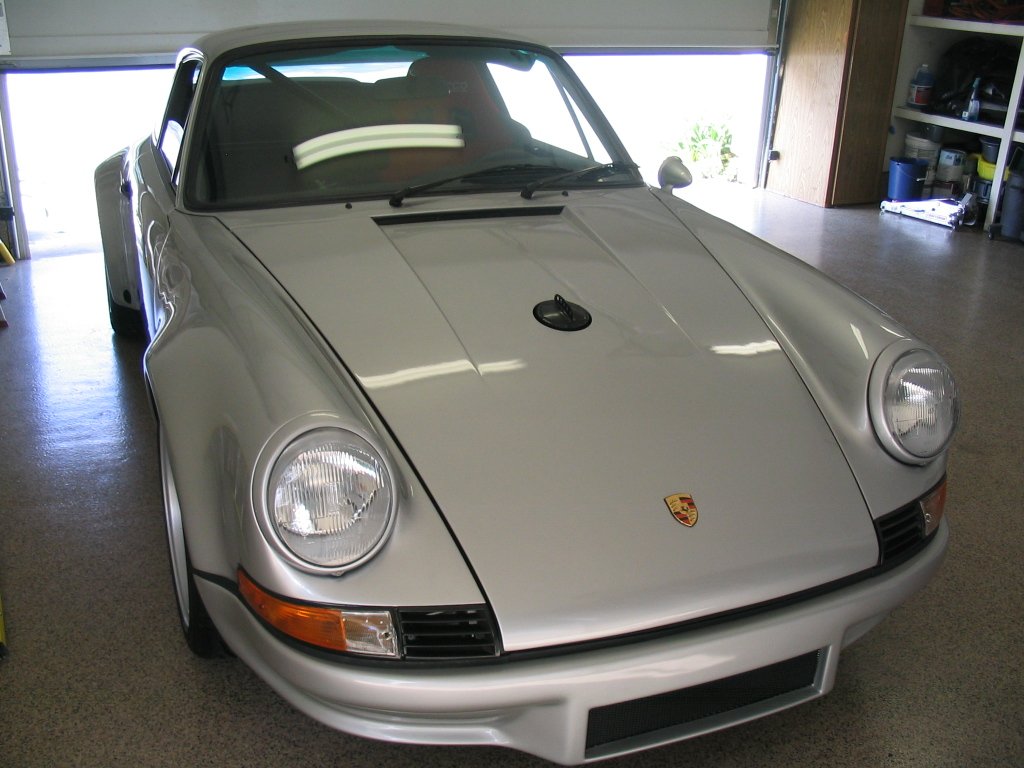
OH YEAH!!!!!
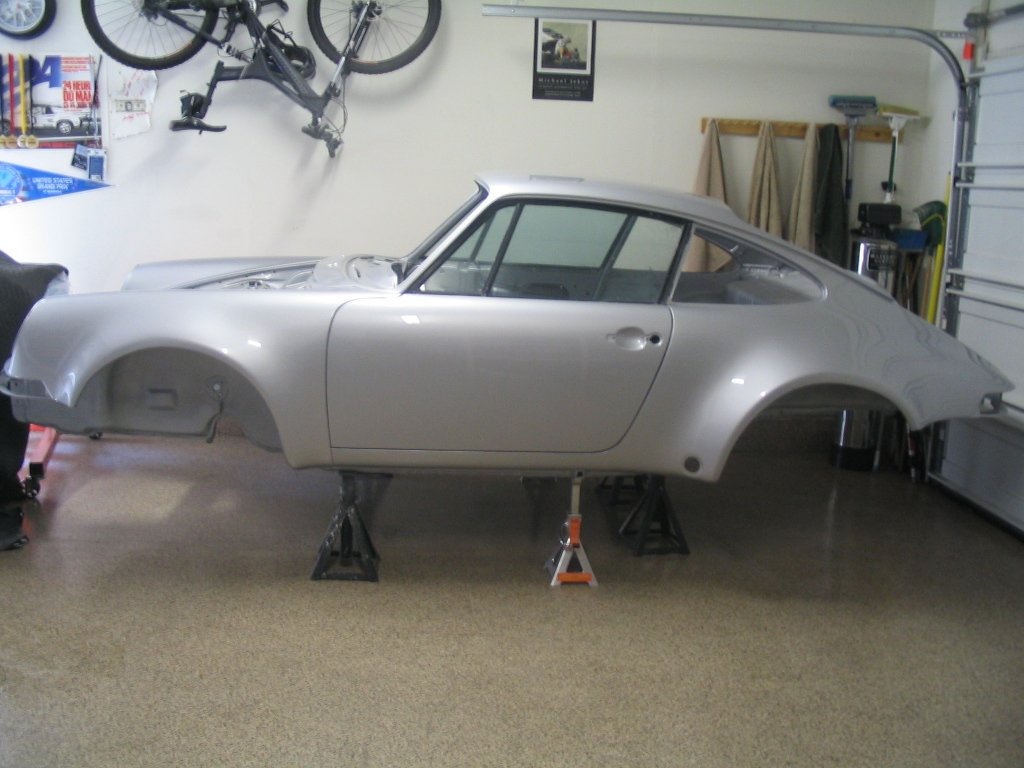
It's looking like a RSR!
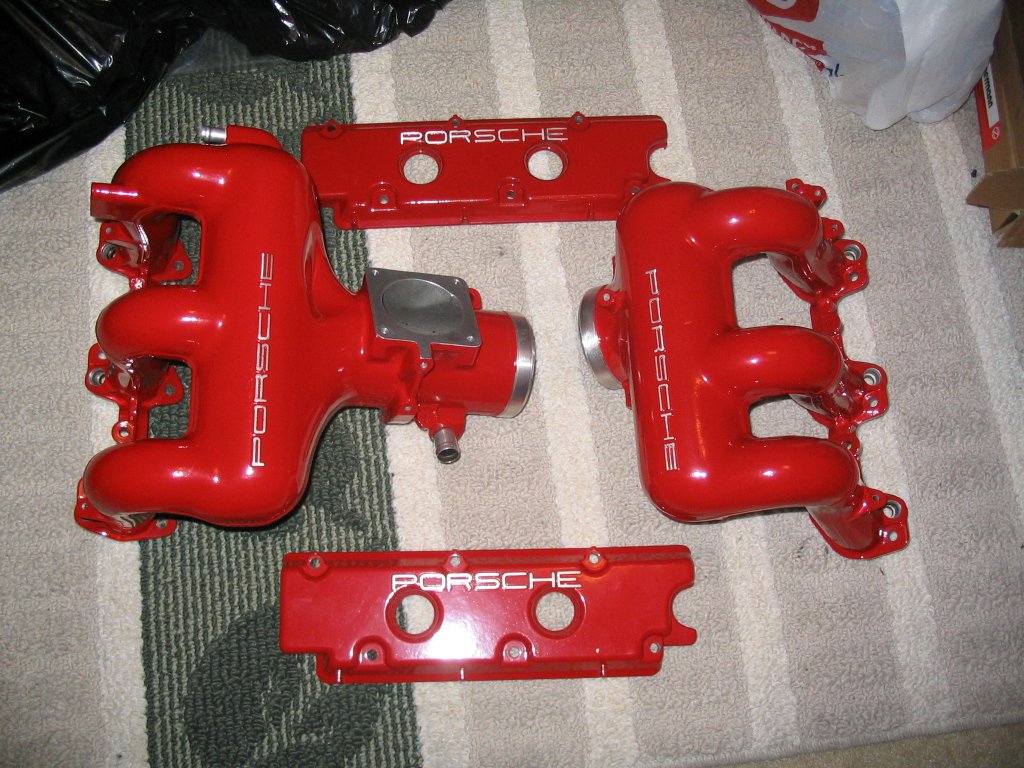
Lots of parts went out to the powder-coaters. Here is the 3.2 intake.
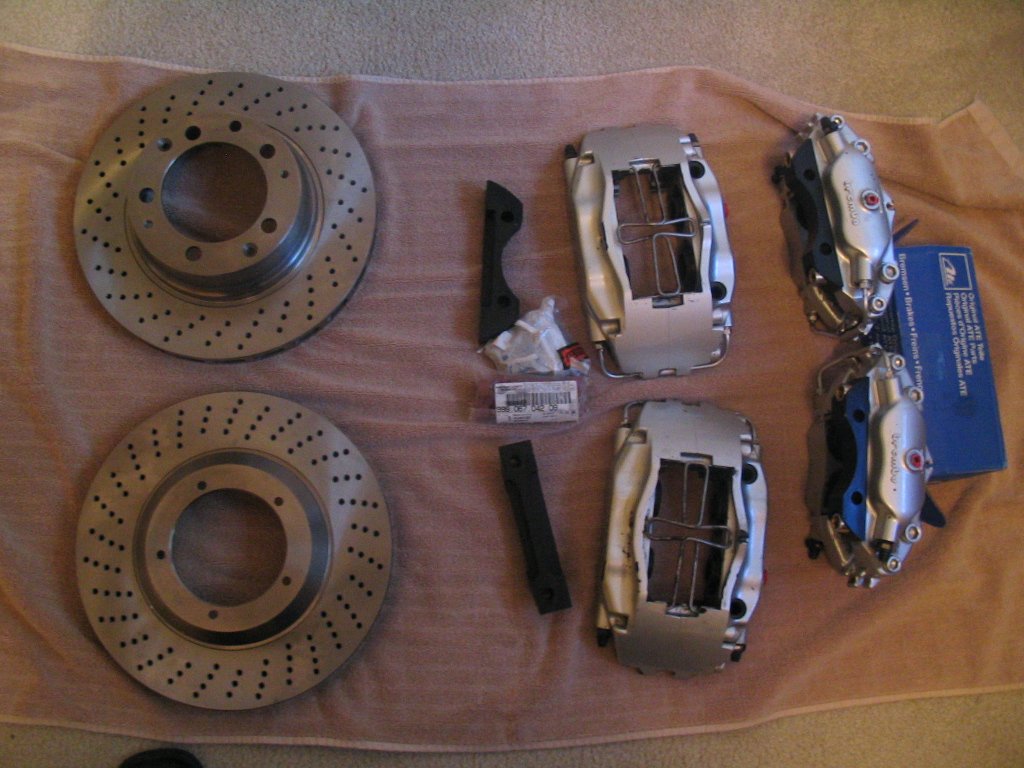
New shoes! These are 993 calipers modified to fit a 911. The rotors are 930 late one piece rotors.
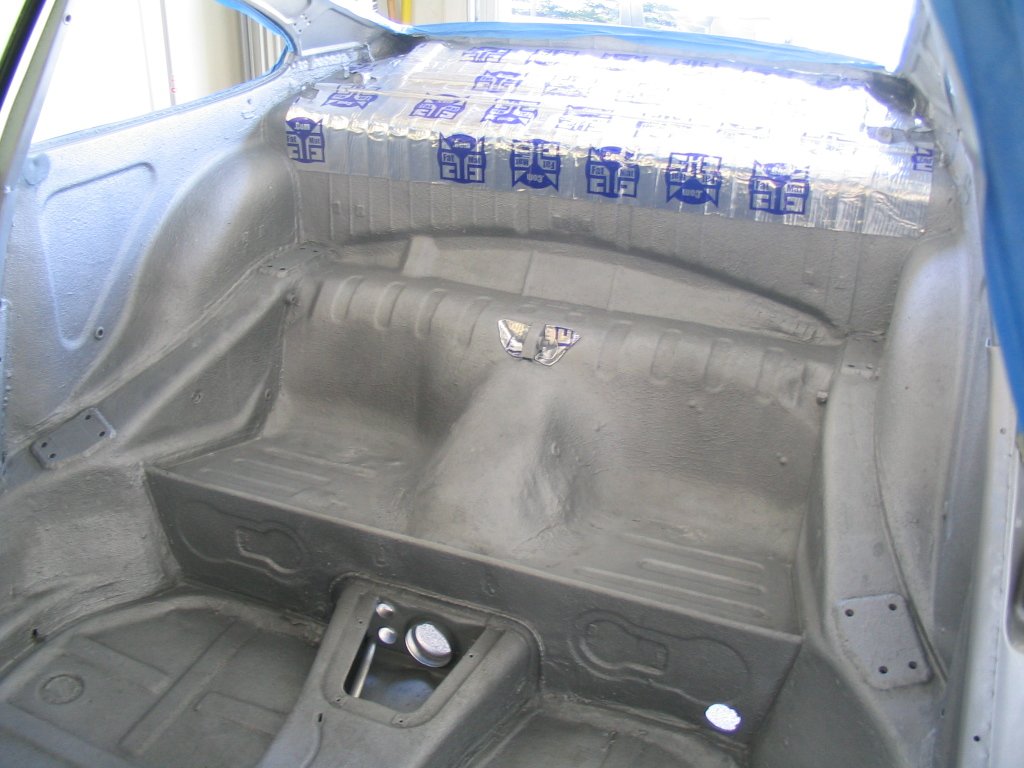
Additional sound deadener. This goes against making the car lighter, but it was worth having a quieter cabin. The muffler will be loud.
Rear was done!! It wasn't easy molding that stuff, anything that wasn't flat was a challenge.
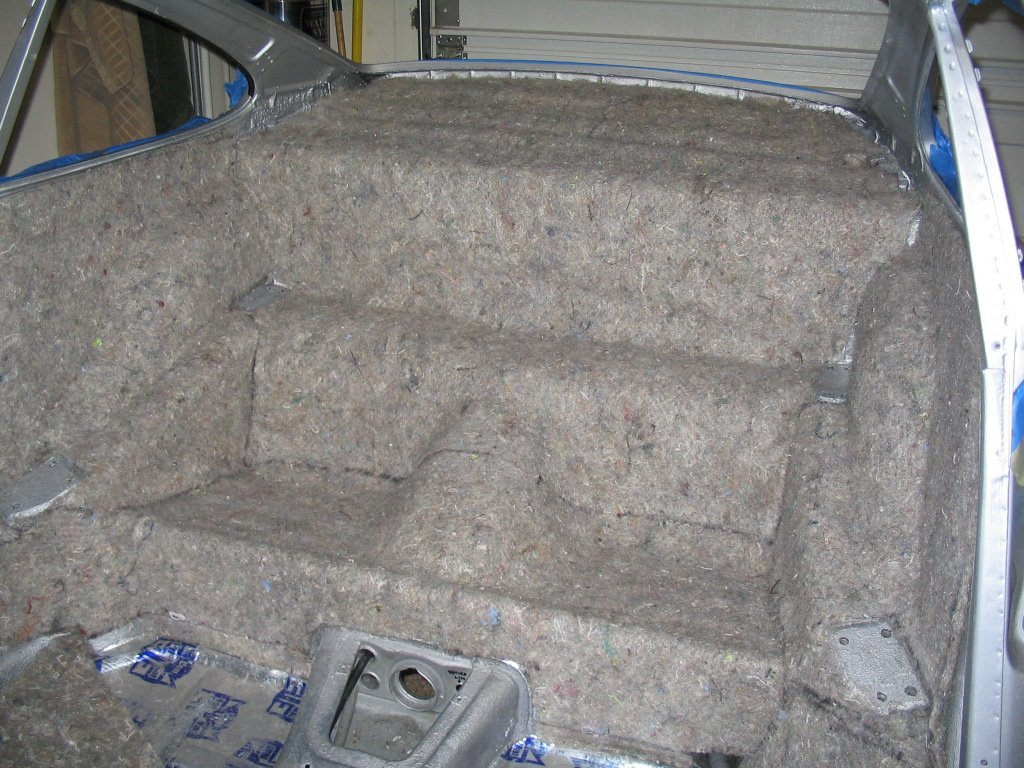
Carpet jute for additional protection and sound deadening.
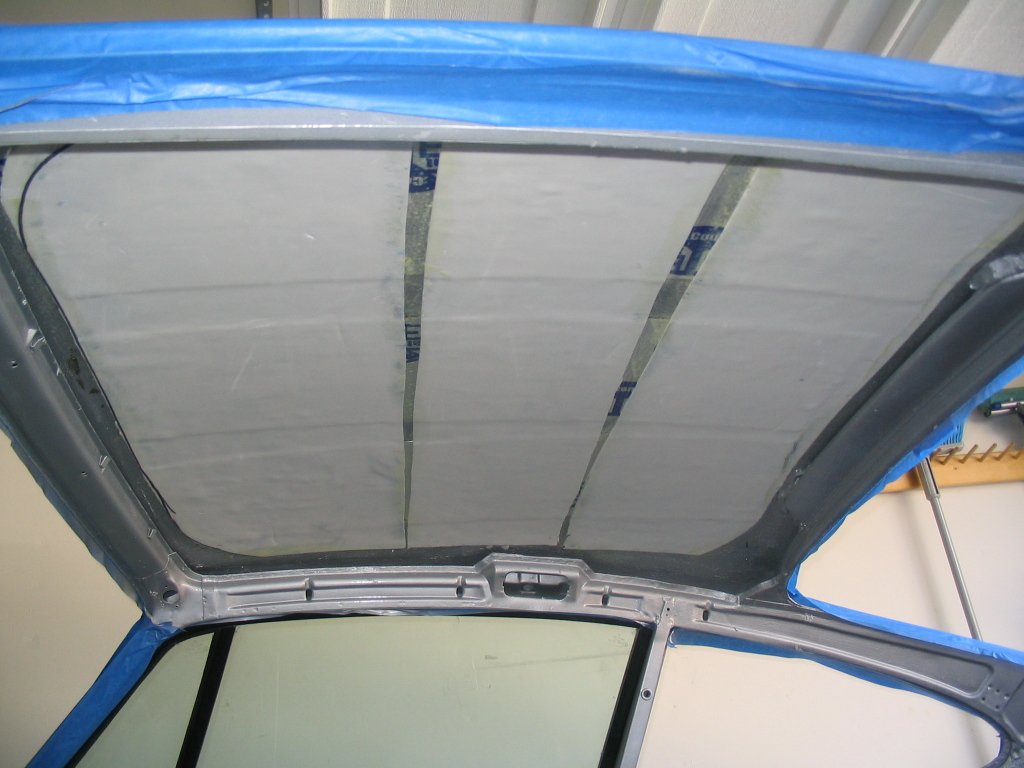
Even the roof got some sound protection.
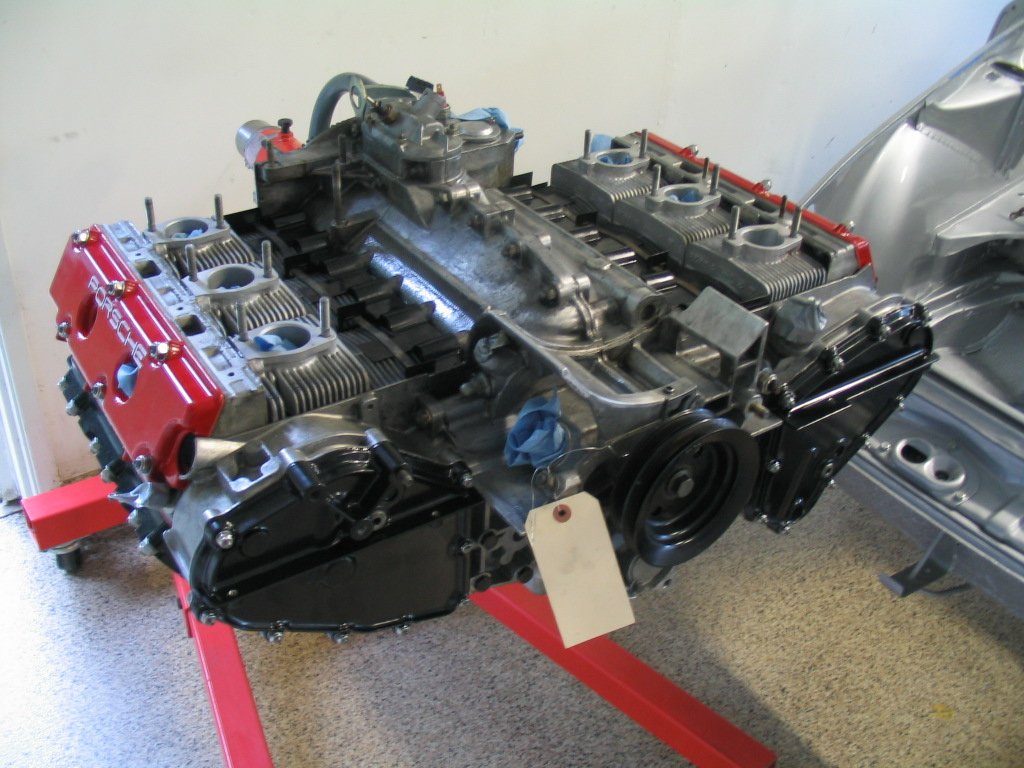
The 3.2 engine back from MotorWorks in National City with a fresh top end, new rings, headstuds, exhaust valves, gaskets, etc.
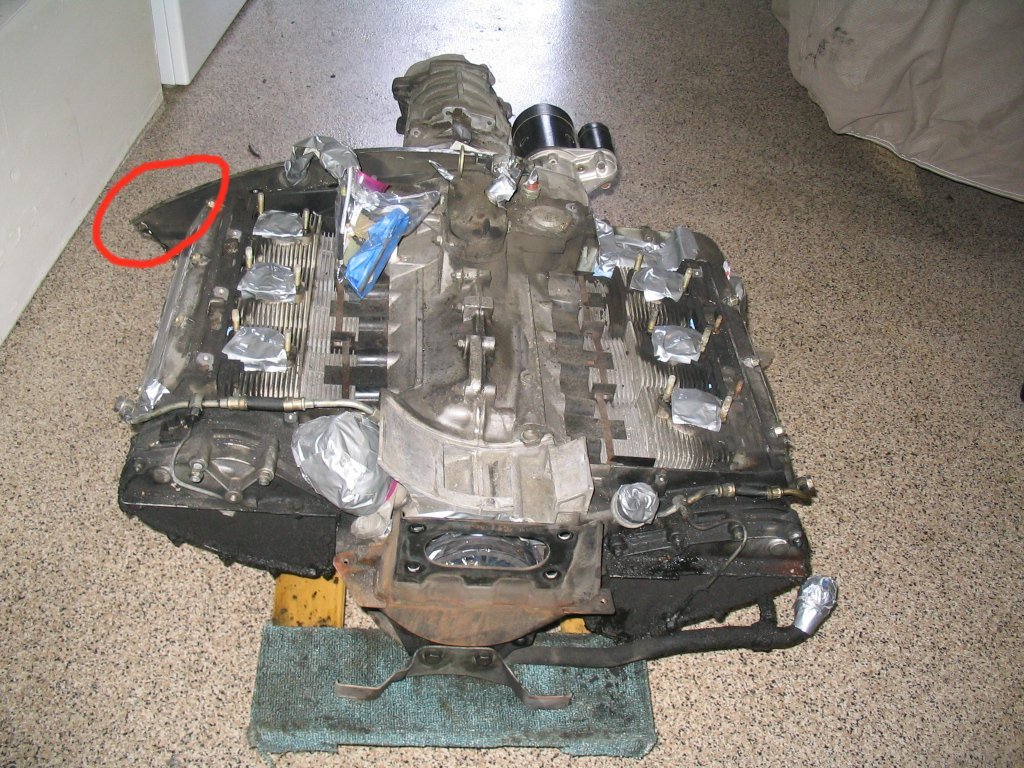
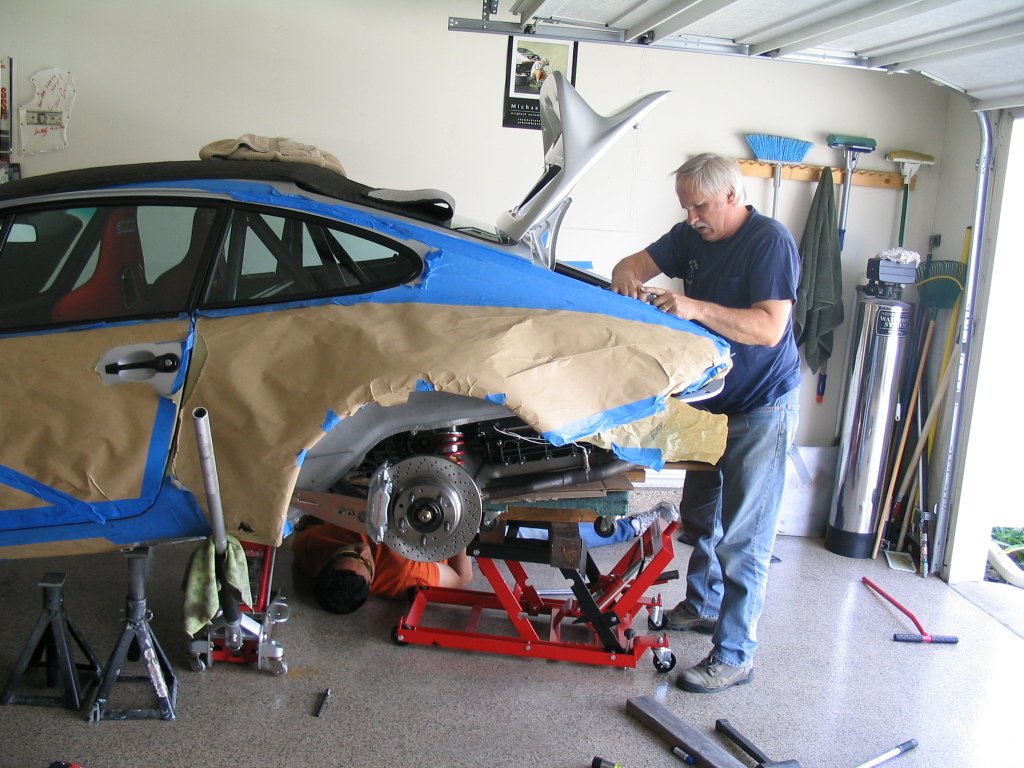
Here is a "before" picture for comparison. (notice the sheetmetal circled in red - now look at the picture below)
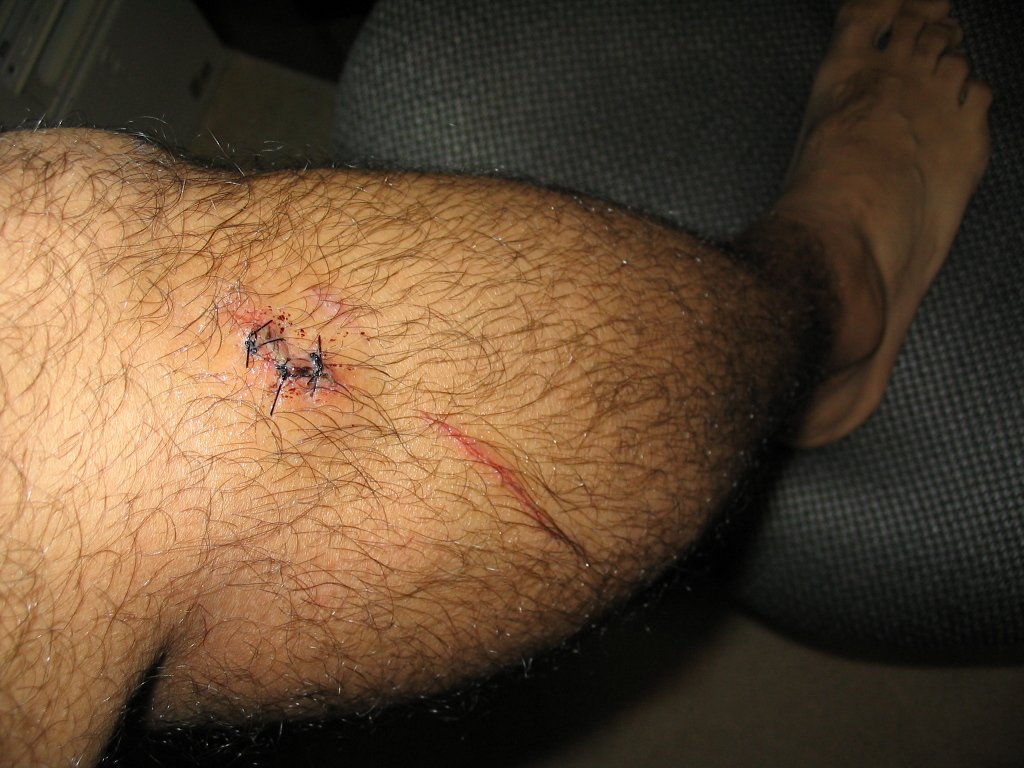
WHAT!?! In a small garage, you'll bump into things, like the engine's sharp sheemetal. OUCH!!!
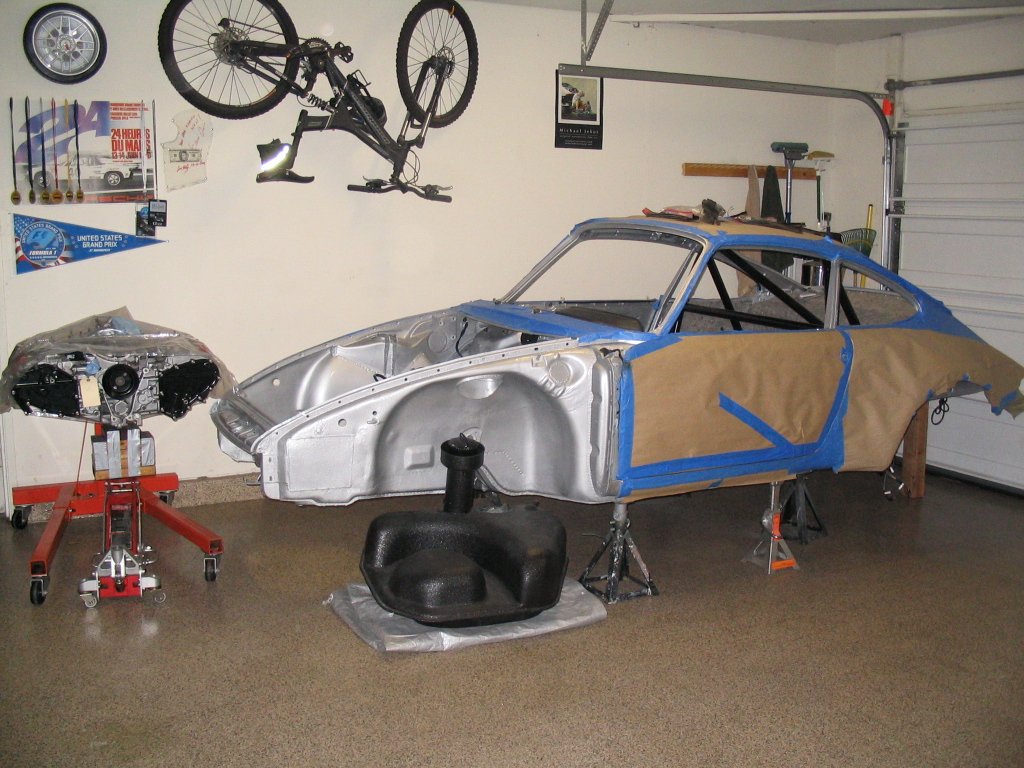
Lots of personal time devoted to the project at this point. The blue tape and paper is to protect the paint from scratches or dings.
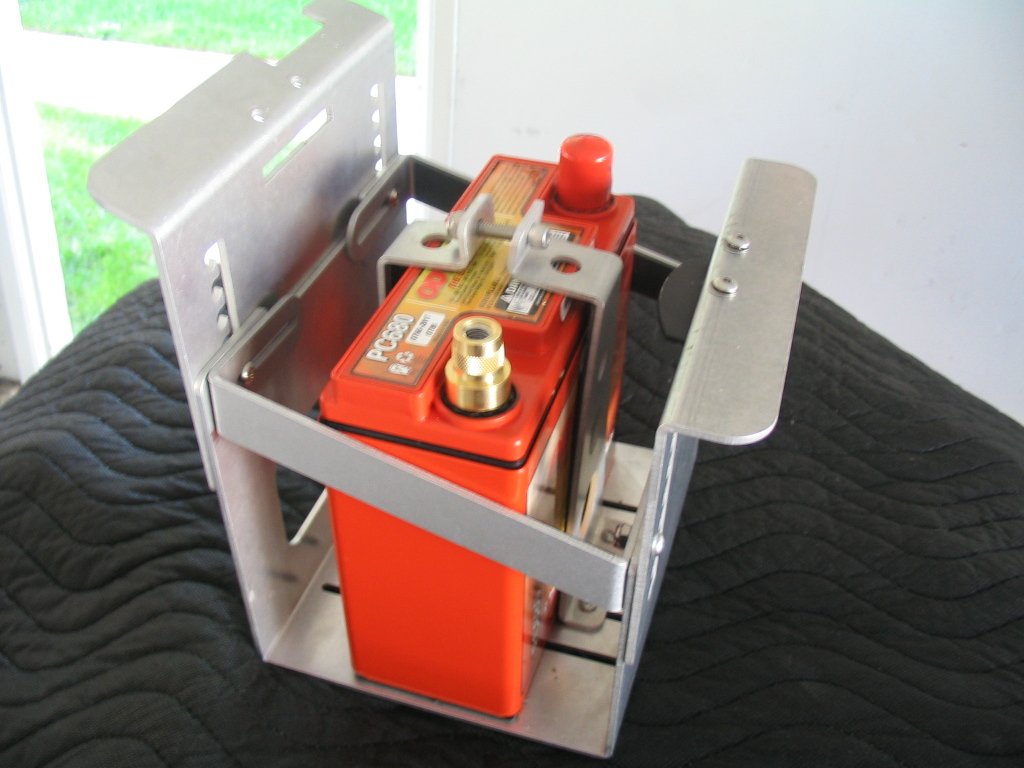
The new battery, it is tiny!! it's sealed and only weighs 16 lbs compare to 45 lbs for the OEM acid base battery.
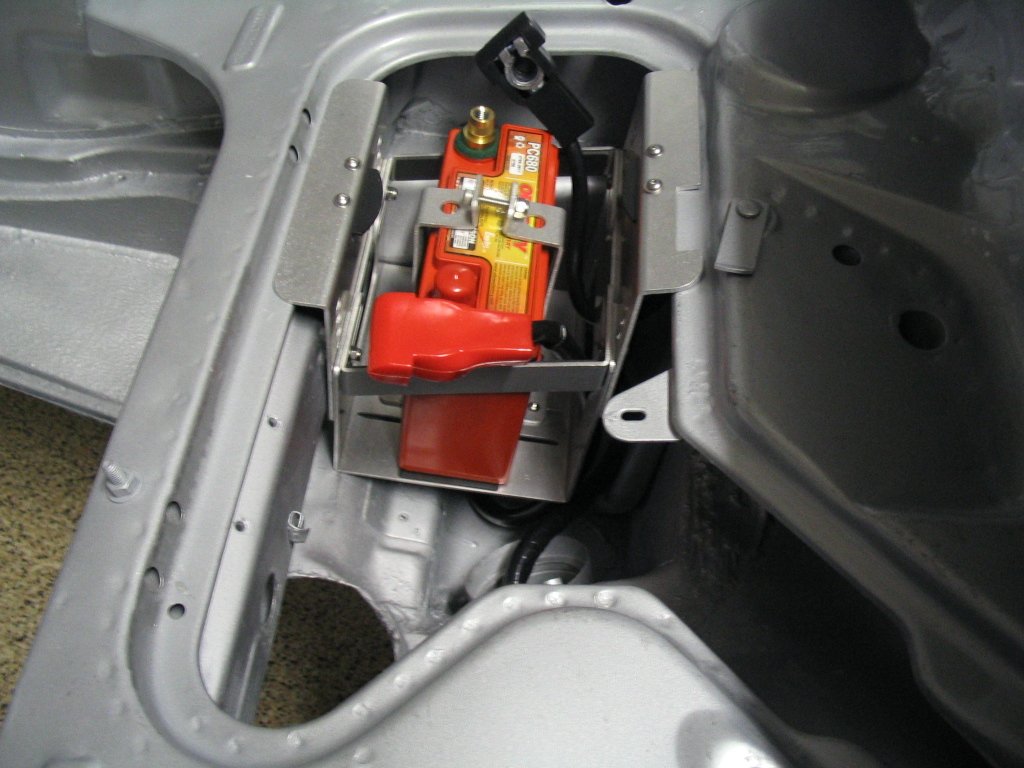
In the smuggler's box with rennline's battery tray.
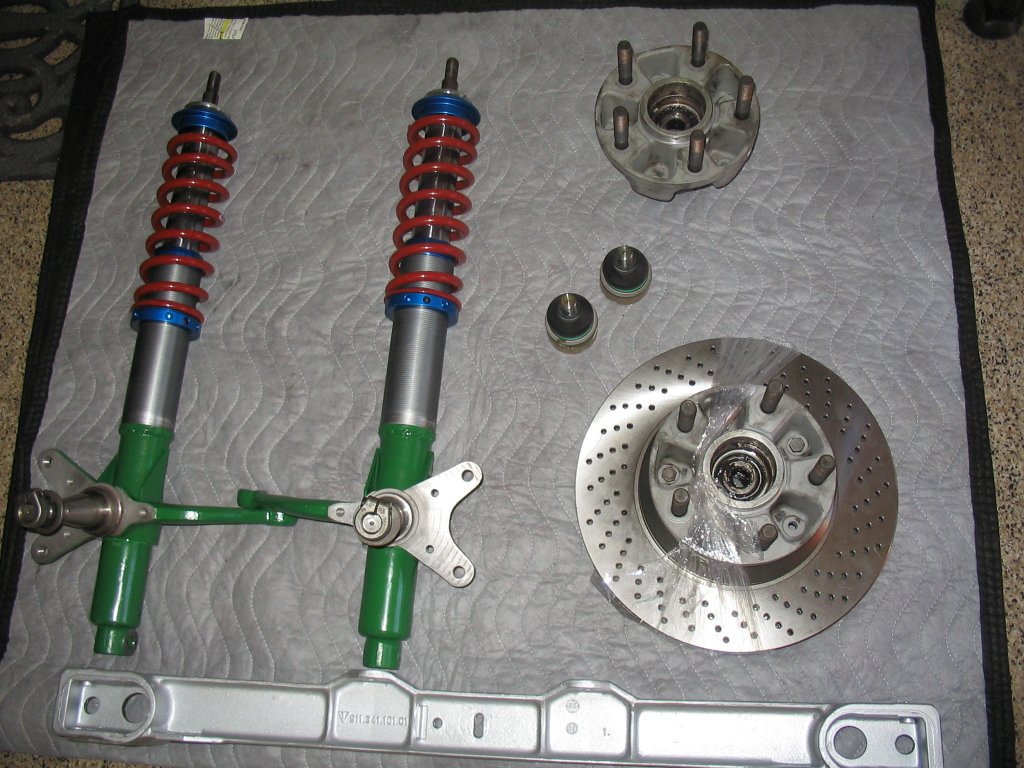
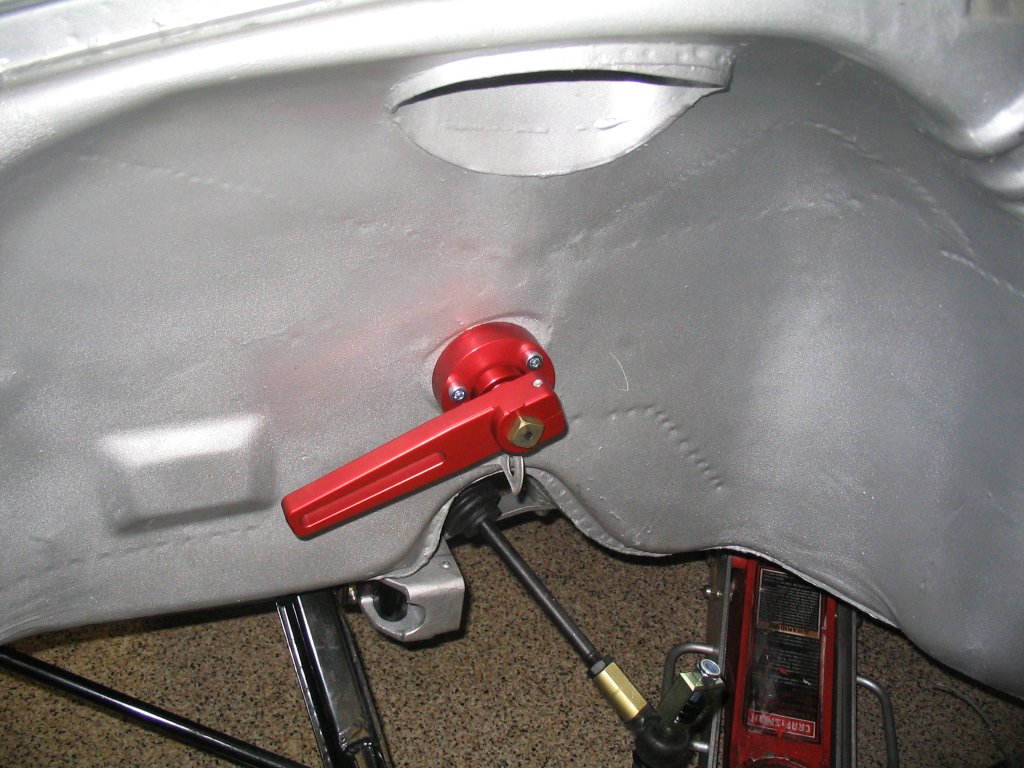
The struts went out to Clint Smith at Rebel Racing to have the spindles raised and to add his coil-over kit. Sweet!!
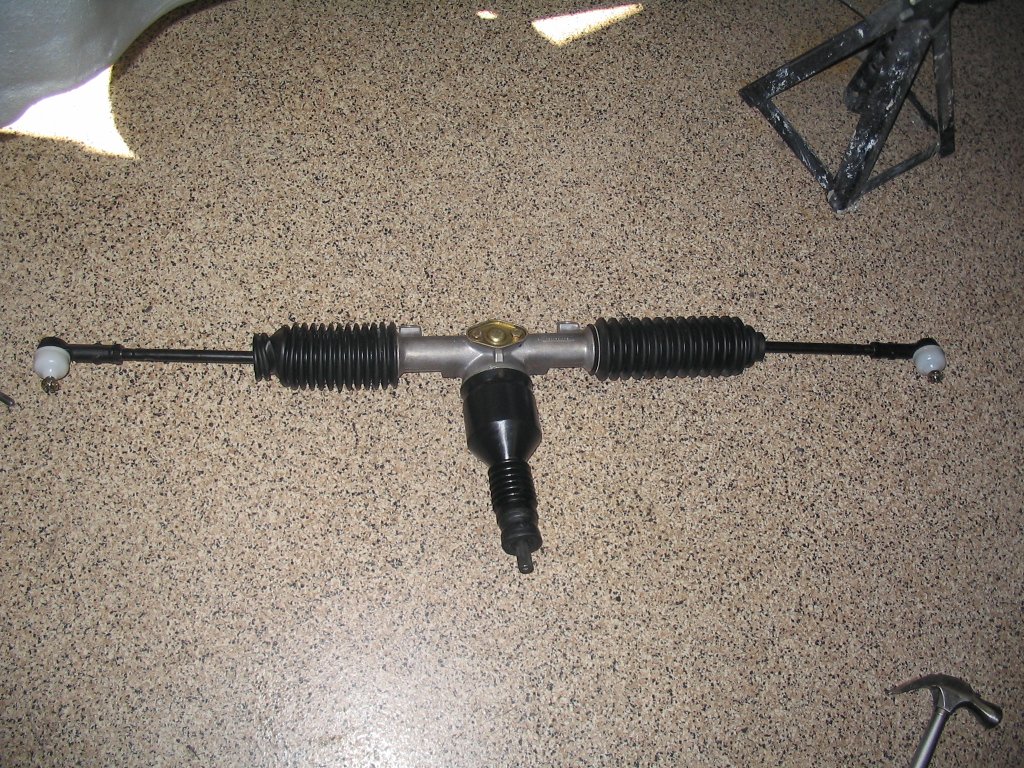
Clean steering rack and new turbo tie-roods.
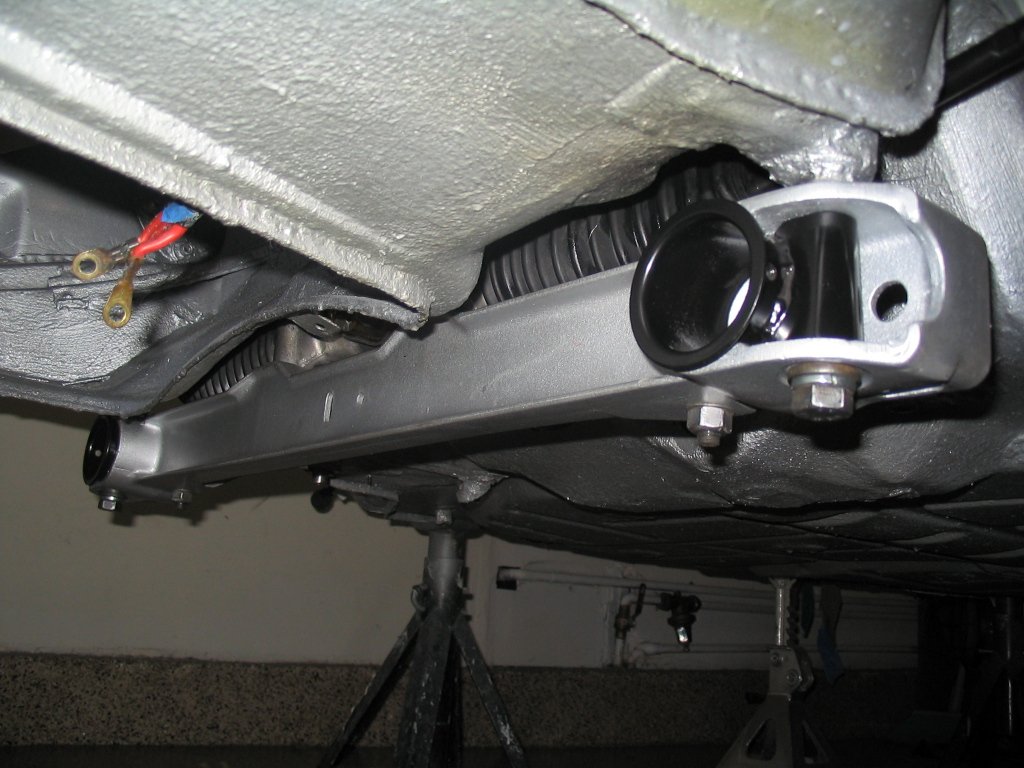
Front crossmember is installed.
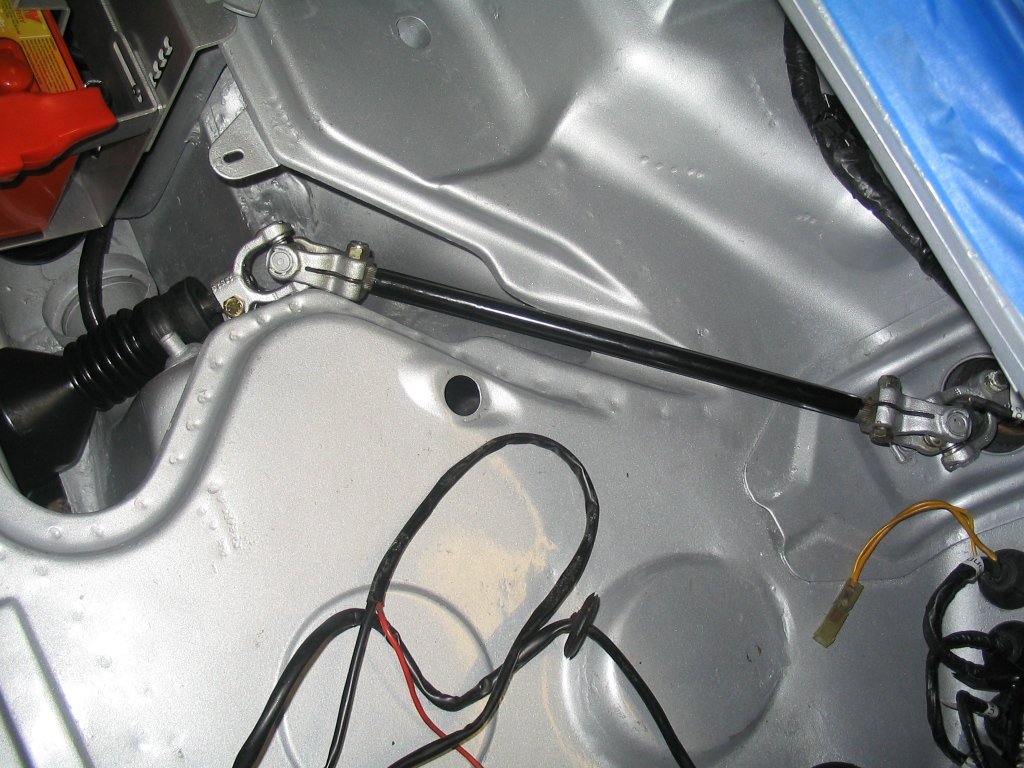
Steering column is finally in one piece!
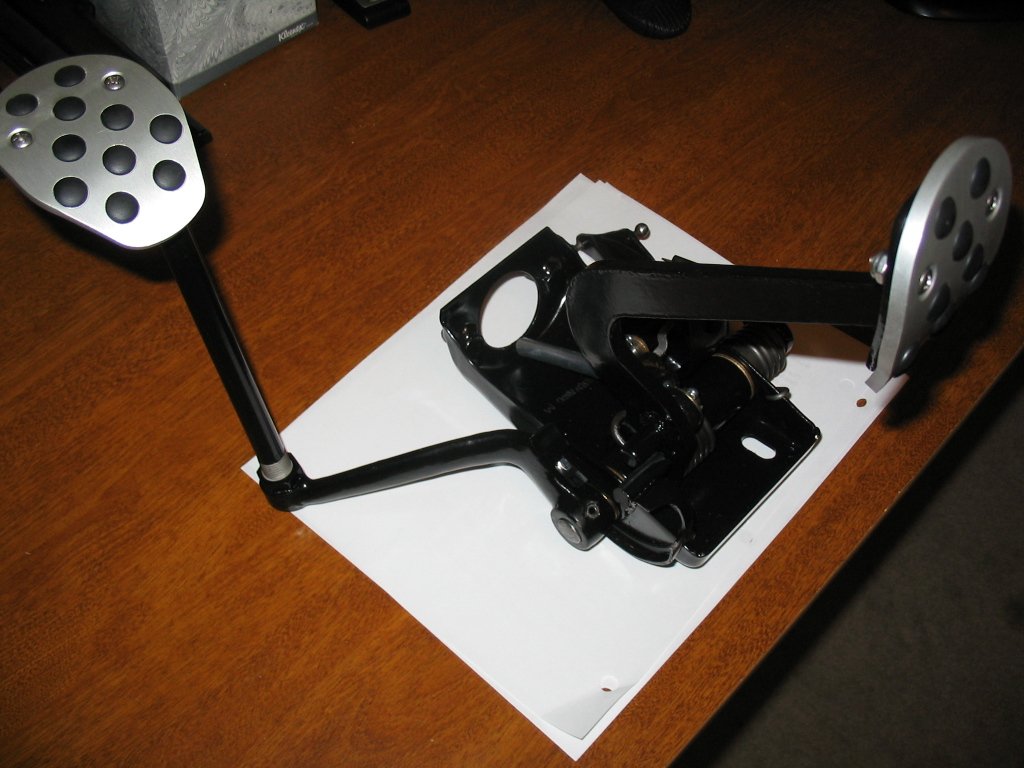
Pedal cluster powdercoated and all bushings and springs replaced. Notice the rennline pedal kit.

Installing the Elephant Racing tricked-out polybronze bearings. Chuck makes some nice stuff!
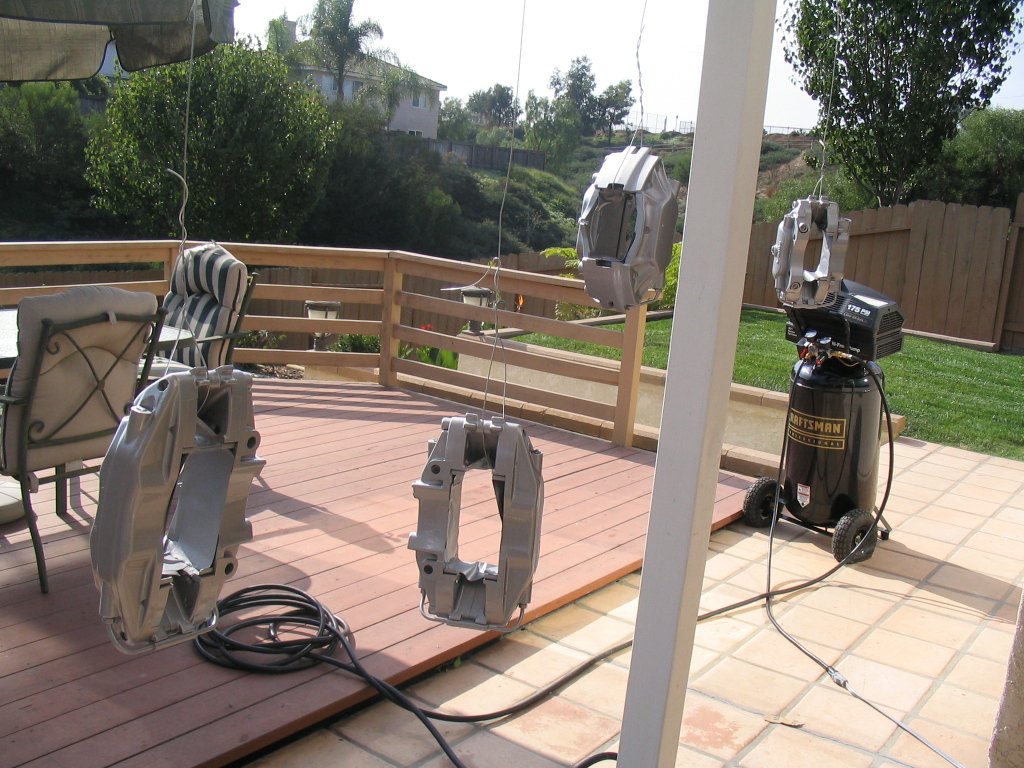
I decided to give the calipers a new coat of paint.
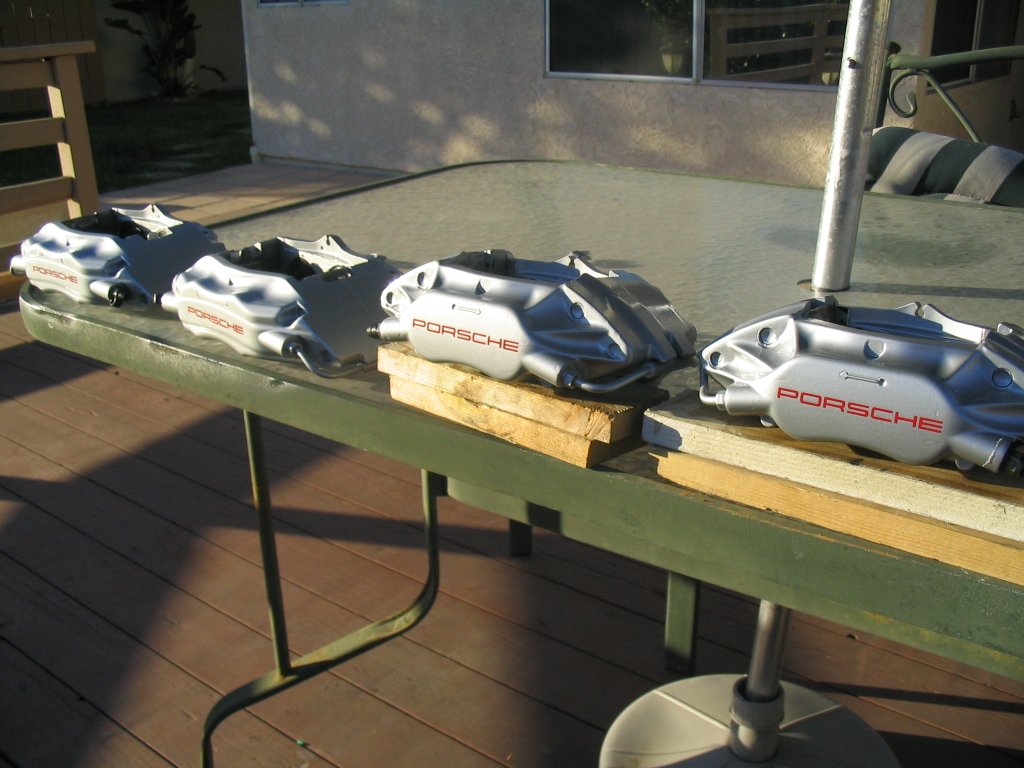
Here they are, painted, with new porsche stickers and clear-coated.
Tarret front sway bar installed.
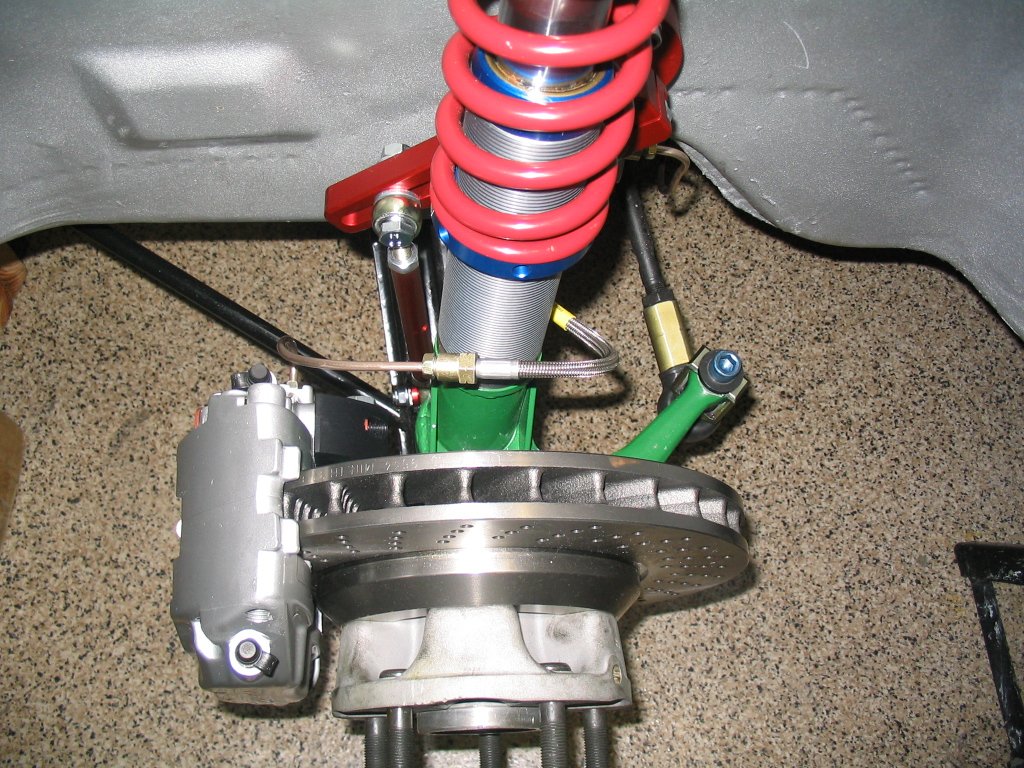
The front suspension begins to take shape.
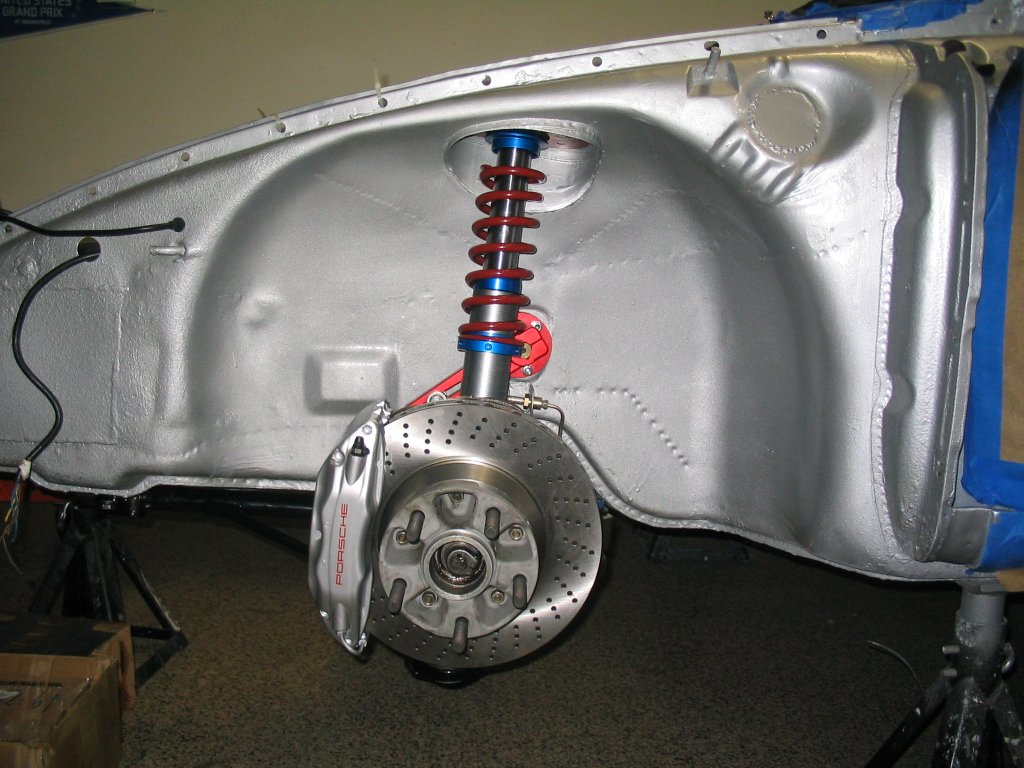
Front calipers installed over 930 hubs and rotors. The front calipers are massive!
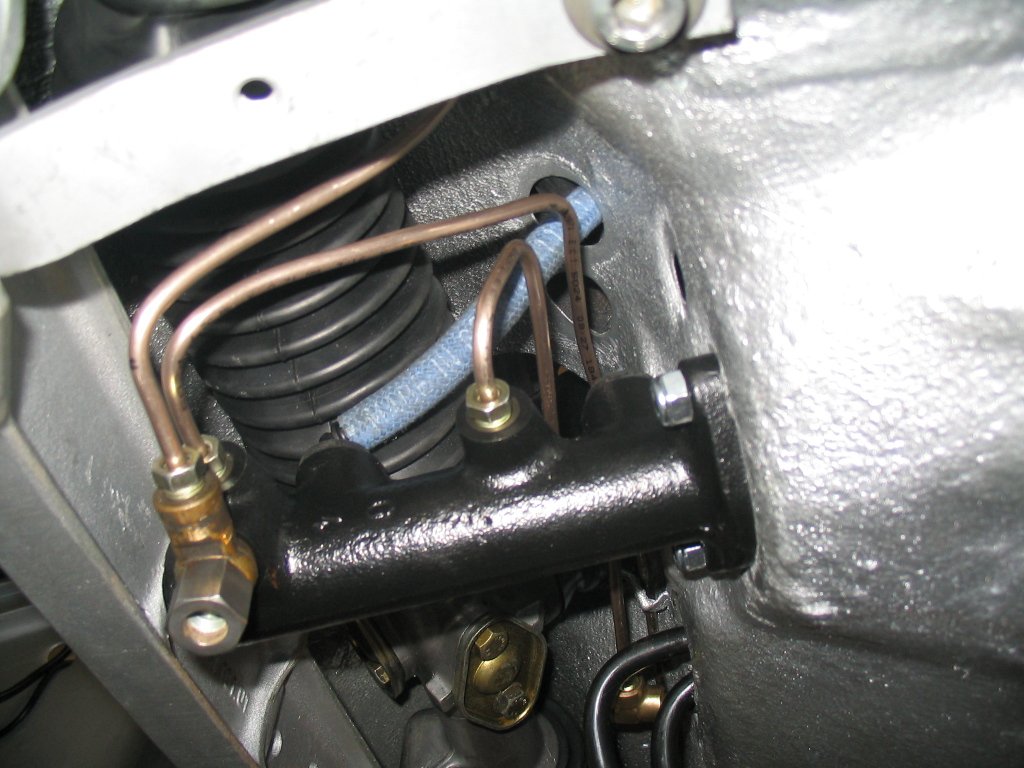
New 23 mm master cylinder and custom made brake lines.
Rear brake lines also installed.
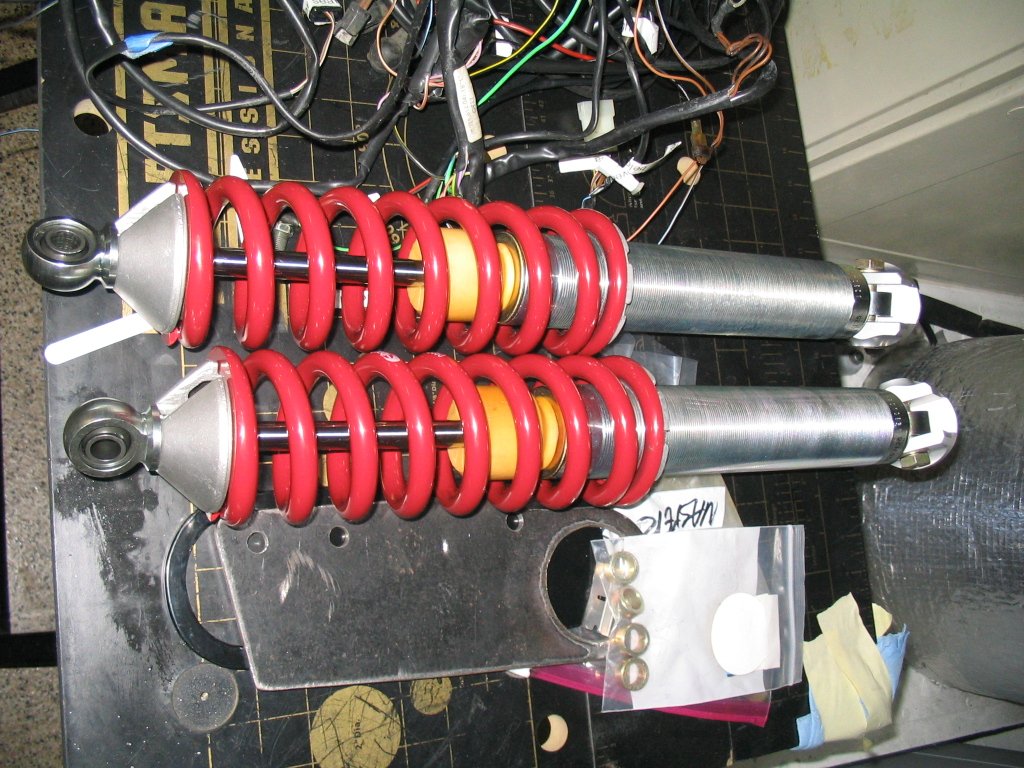
Rear RSR bilstein shocks waiting to be installed.
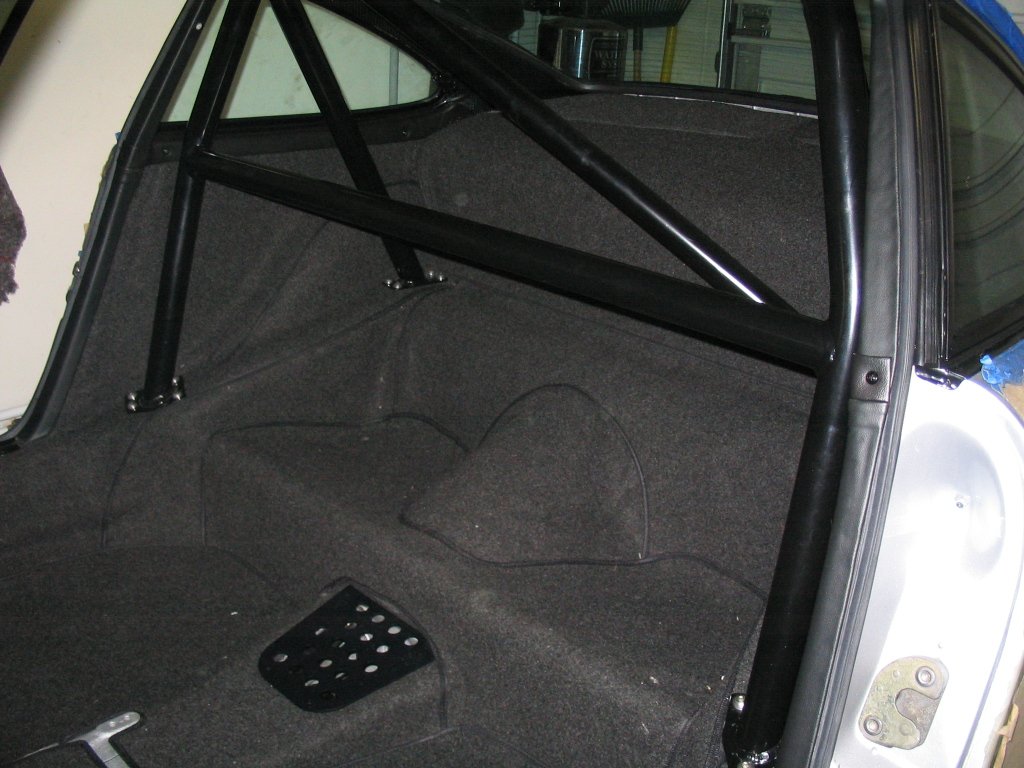
Rear carpet is installed (Appbiz). Notice the rollbar was mounted on top of the carpet with stainless steel allen type fasteners.
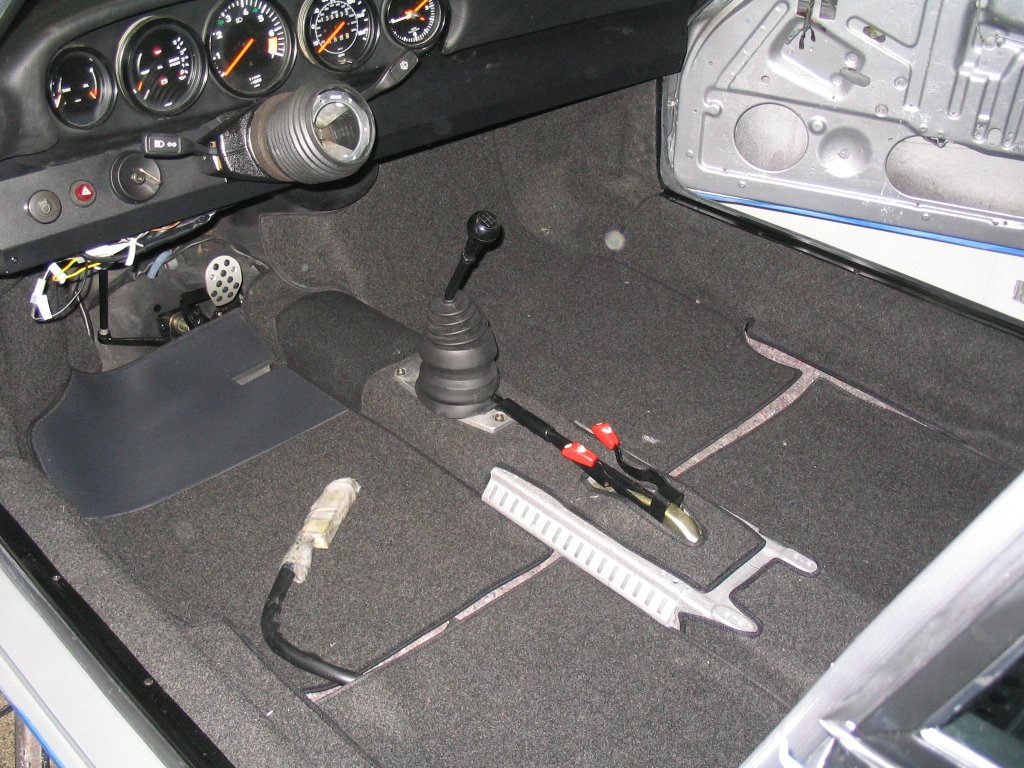
Front view. Mounting the shifter on top of the carpet was a bit tricky as well.
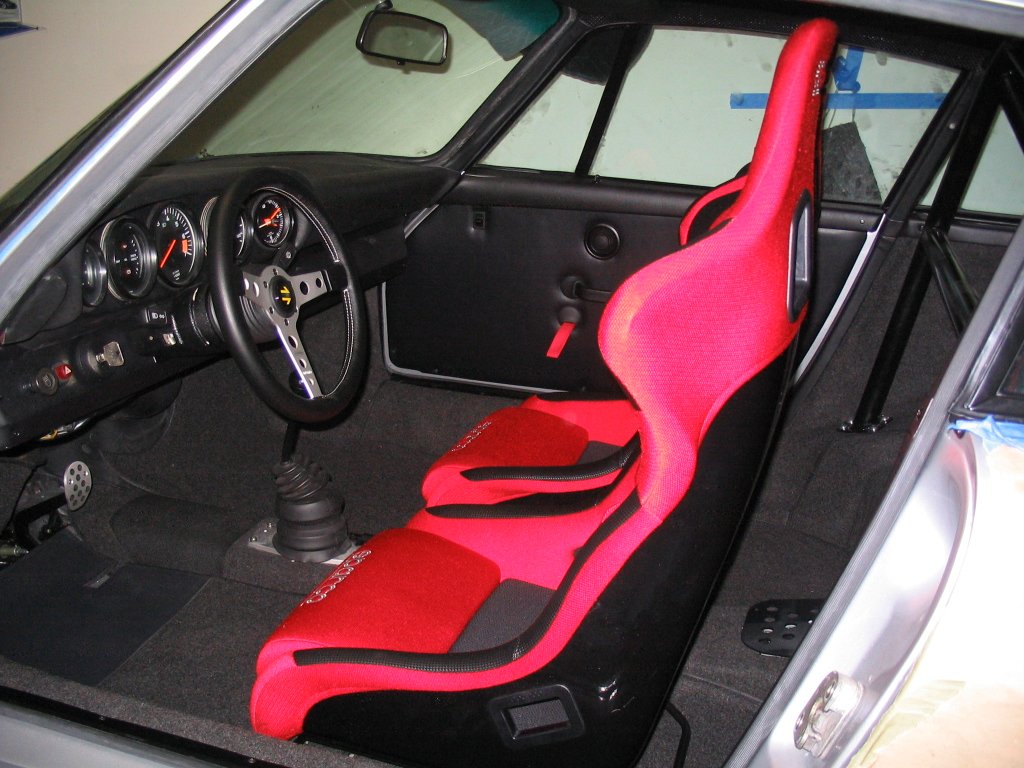
Door panels, prototipo steering wheel and both Sparco seats installed.
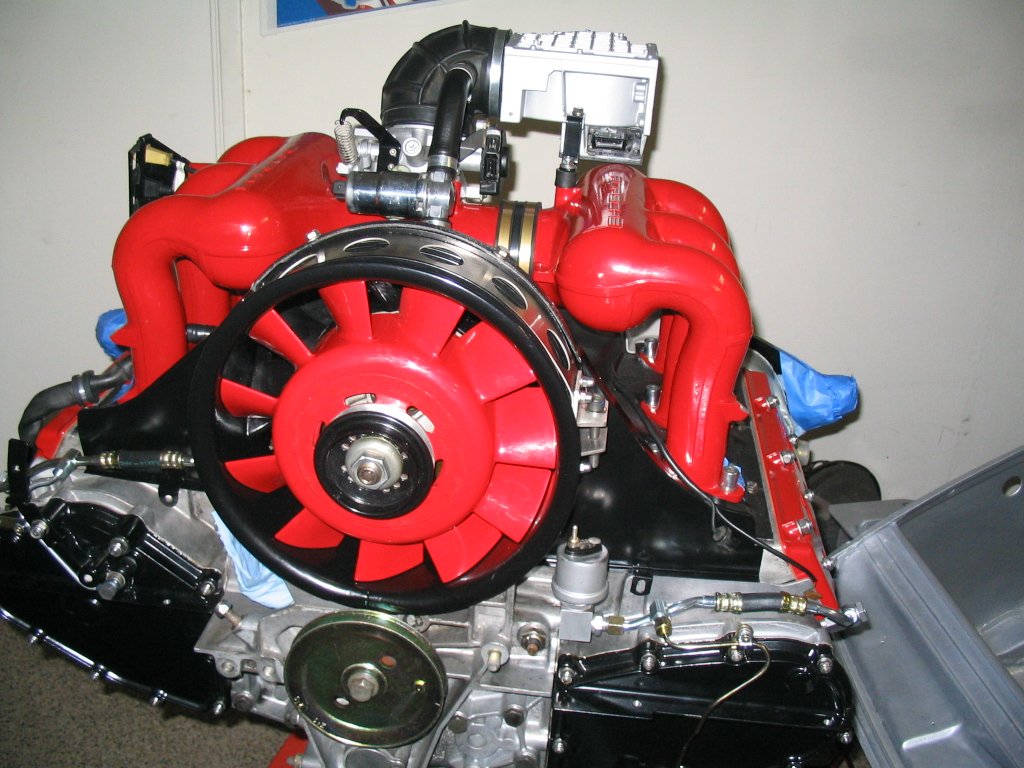
Installing Intake and engine peripherals.
Some more progress on the engine.
Center-fill gas tank is now installed.
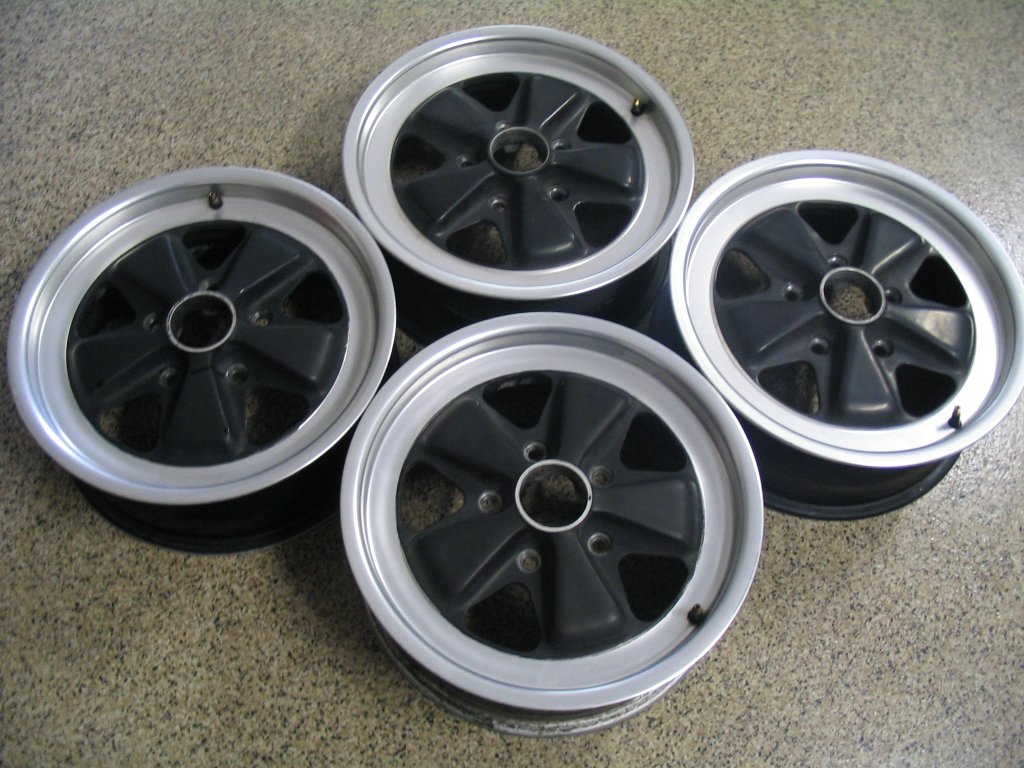
Core 16X6 fuchs for Lindsey's 17X9 and 17X11
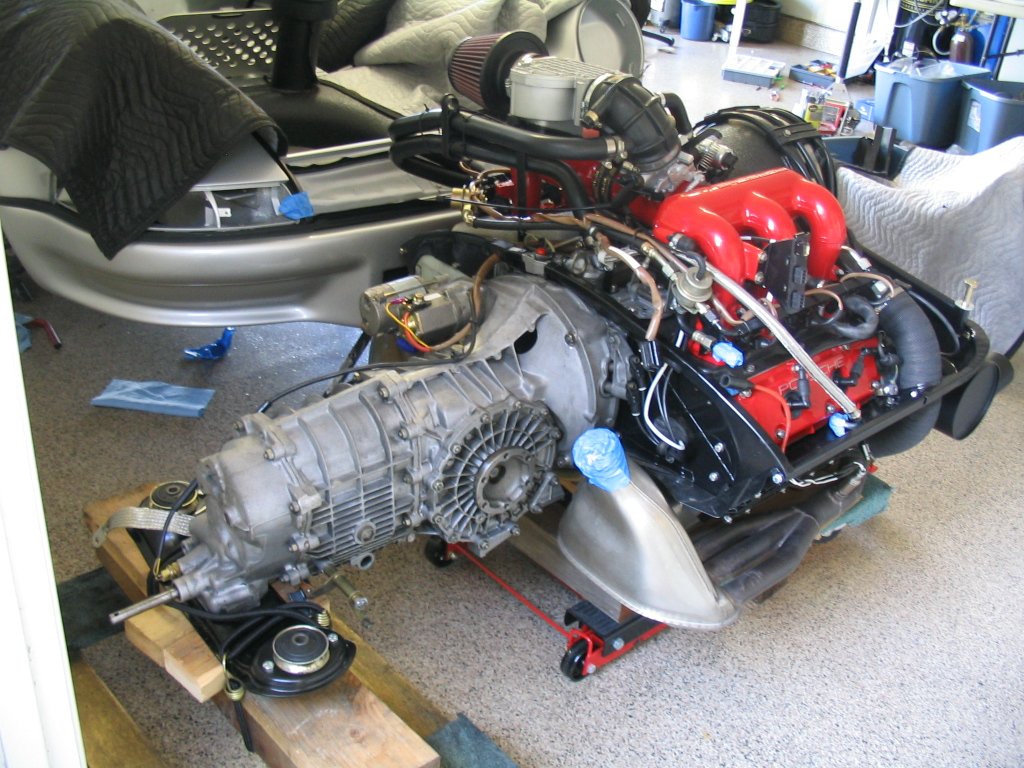
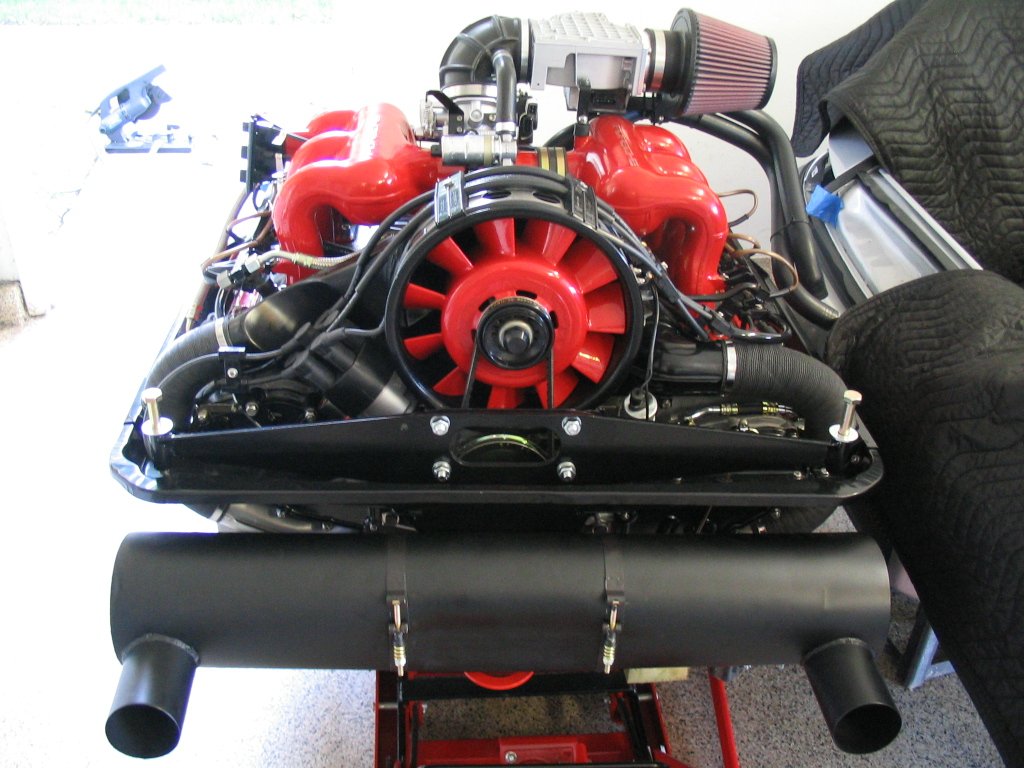
Transmission is now together with the engine (new clutch, pressure plate and T/O bearing)
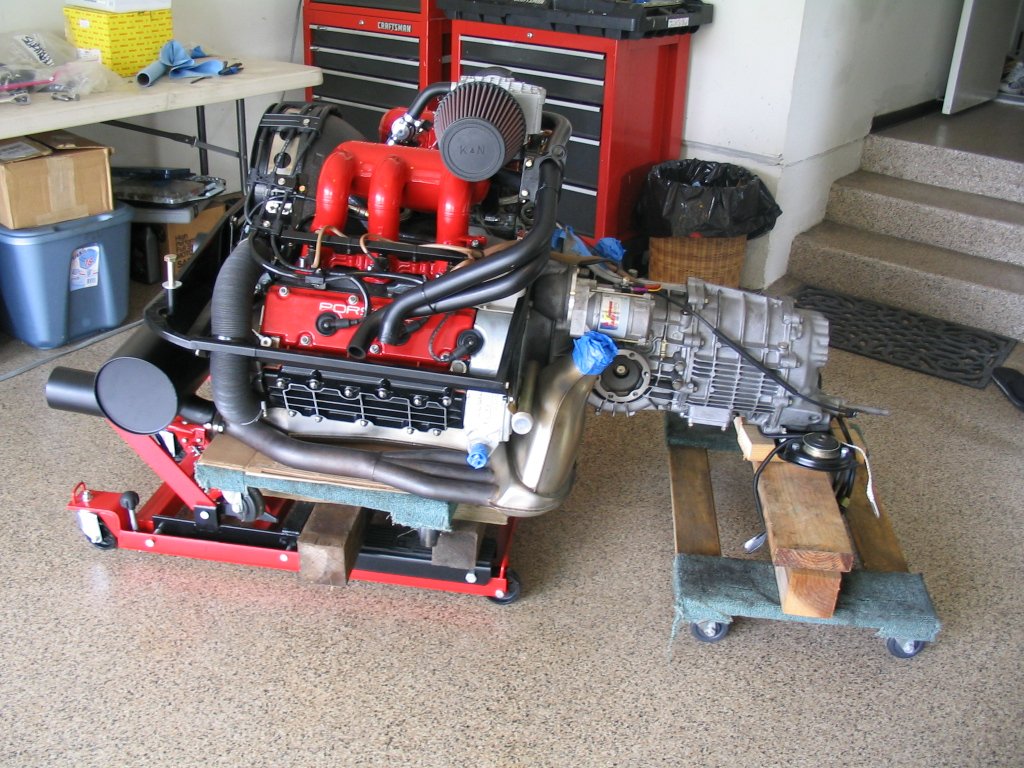
Time to install the engine. The ATV/Motorcycle jack was very handy.
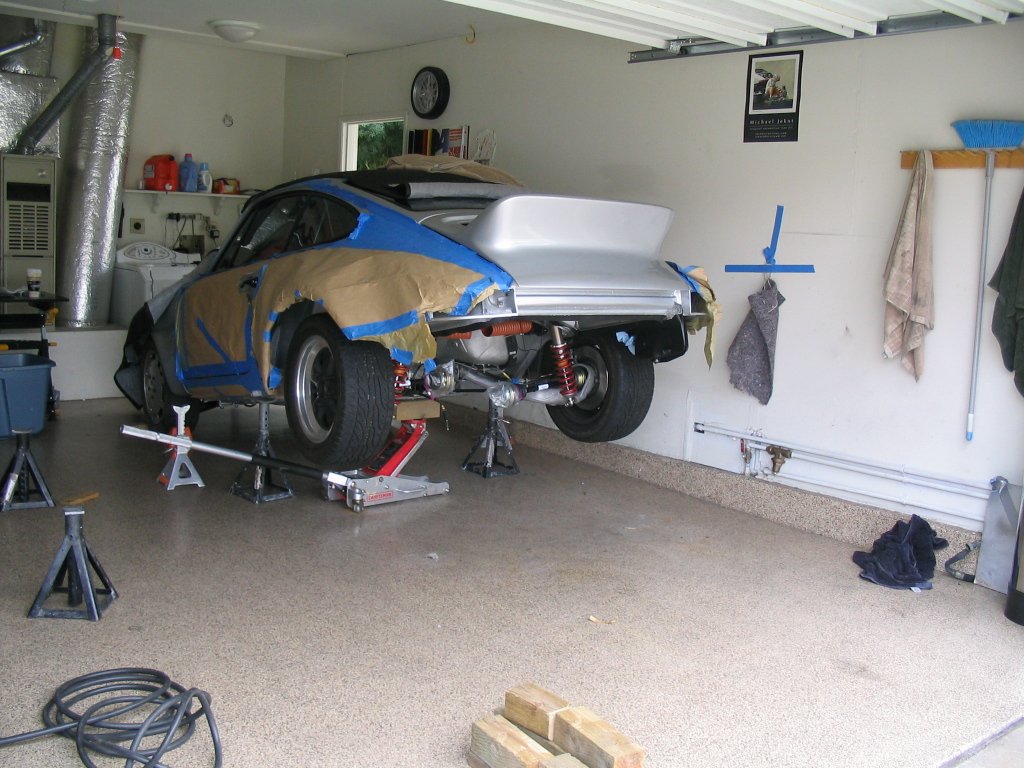
The rear had to be lifted high enough to clear the top of the engine.
I couldn't have done it without help from my friends Alonso and Skip. Thank you both.
Finally... The engine is in its rightful place.
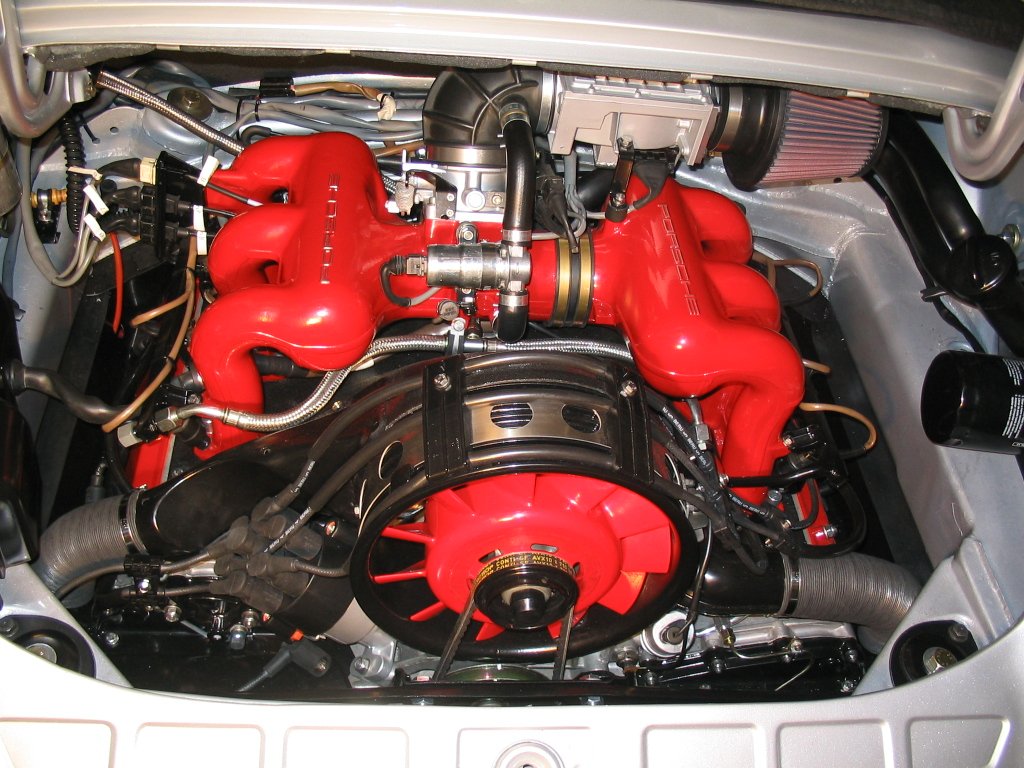
All wiring, air filter and fuel lines attached to the engine.
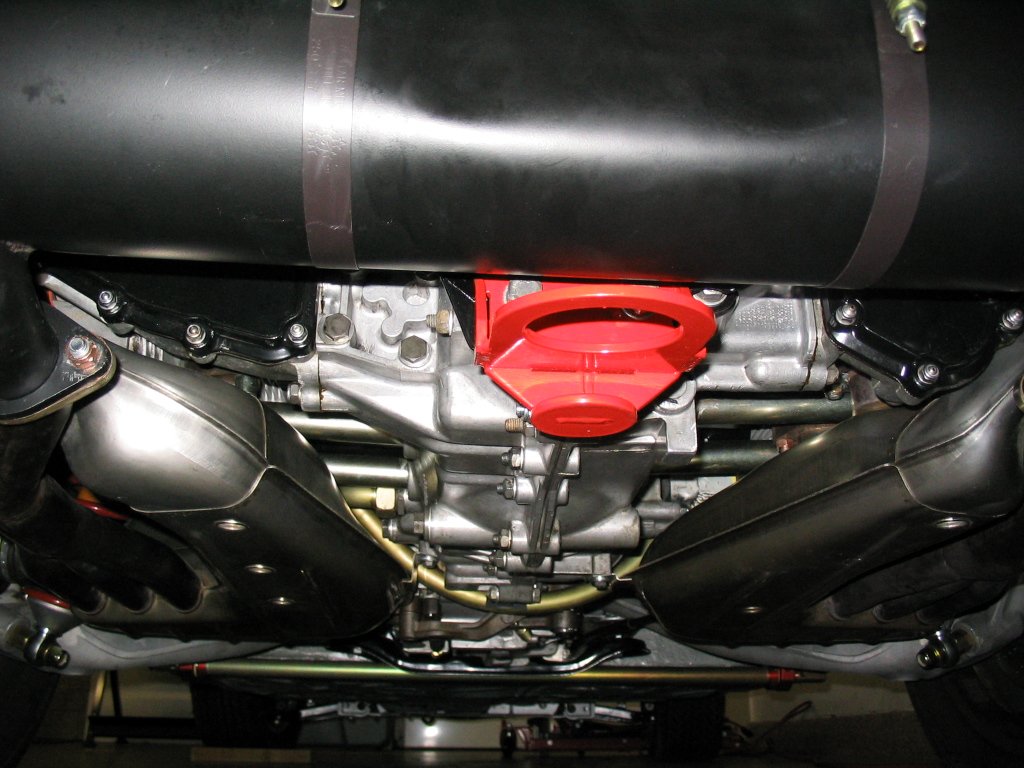
Bottom shot.
Front strut bar installed. Triple coated chrome.
All masking tape is now off the car. Front turn signals are also installed. Temporary wheels and tires.
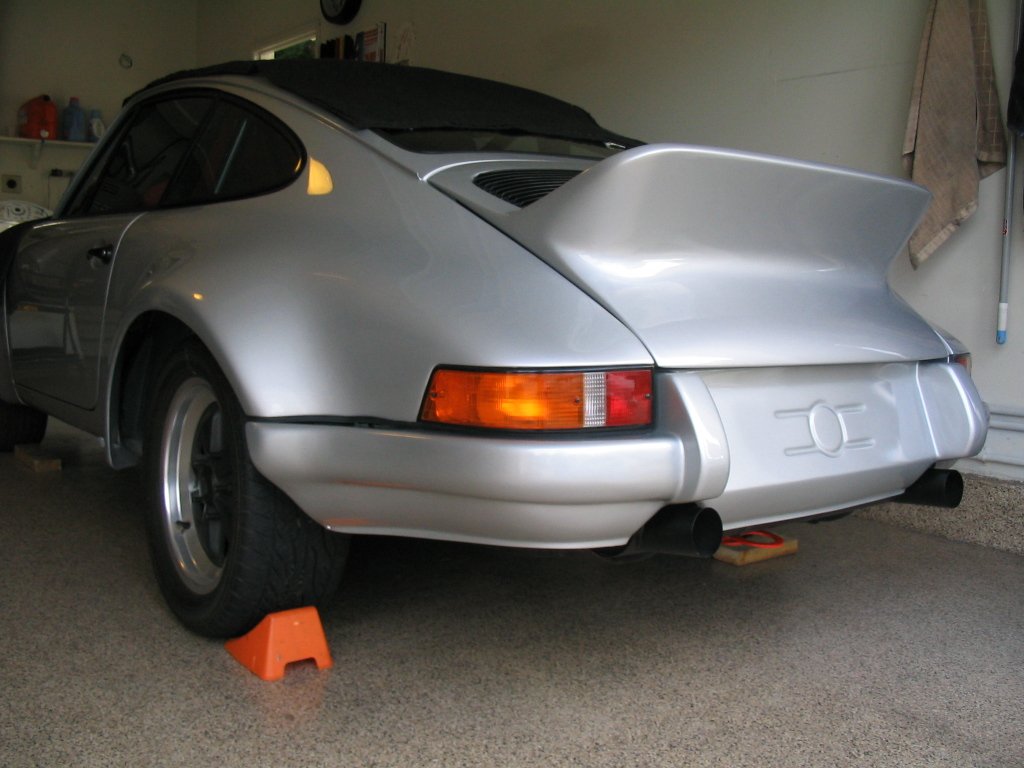
Rear bumper and turn signals installed.
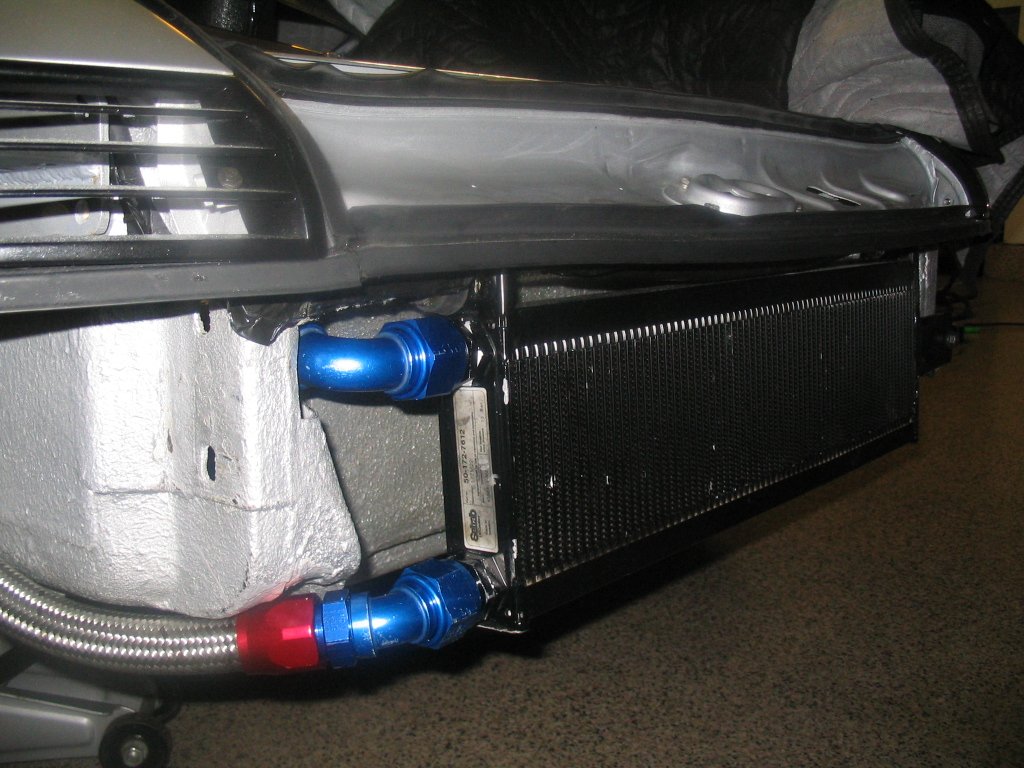
Large Setrab oil cooler with fittings and AN-16 oil lines.

Additional tab to properly secure the cooler on the driver side.

Under passenger front fender.
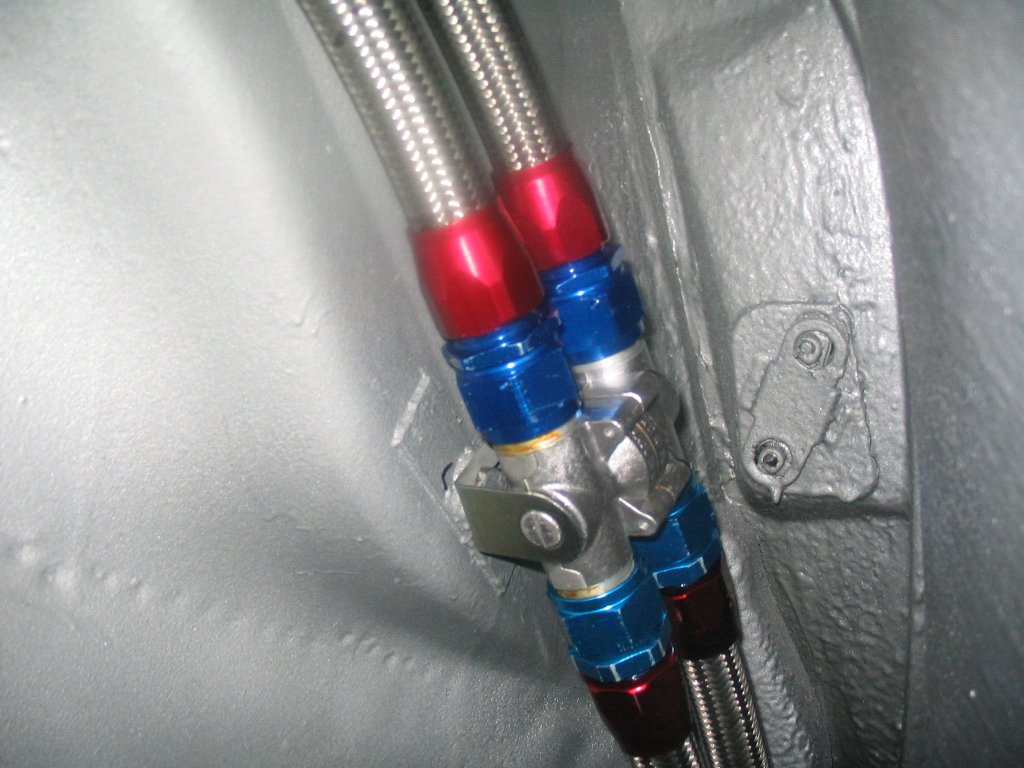
Mocal thermostat with all 4 lines.
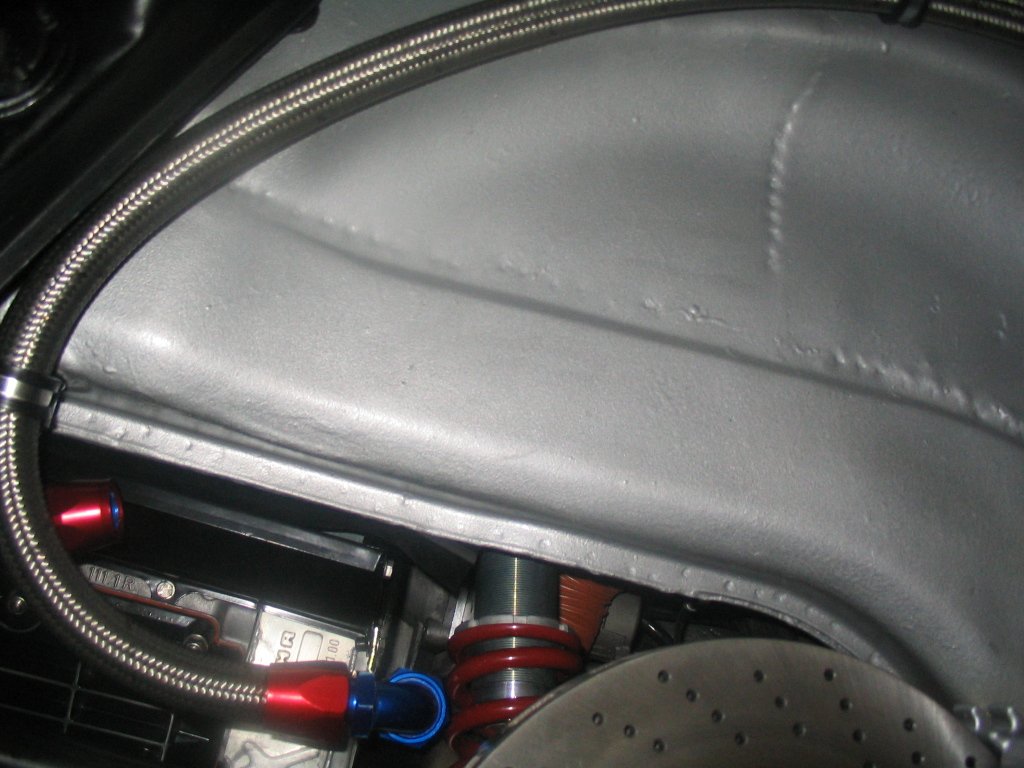
Oil line under passenger side rear fender.
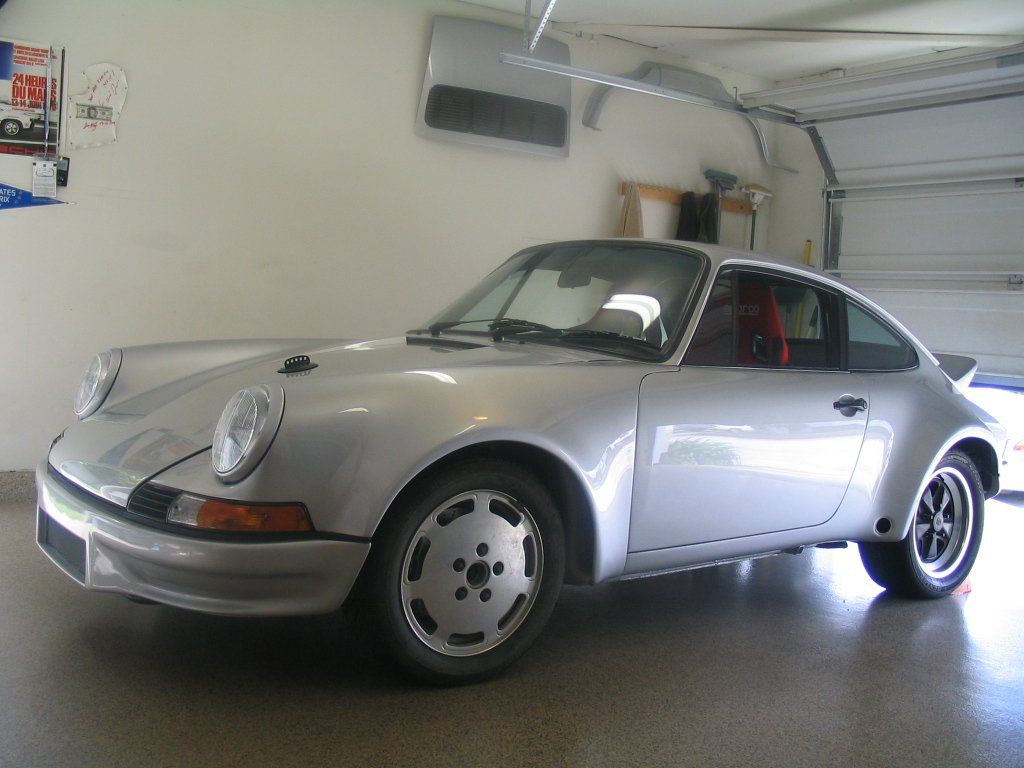
Front bumper and hood installed. Waiting on the lindsey wheels....
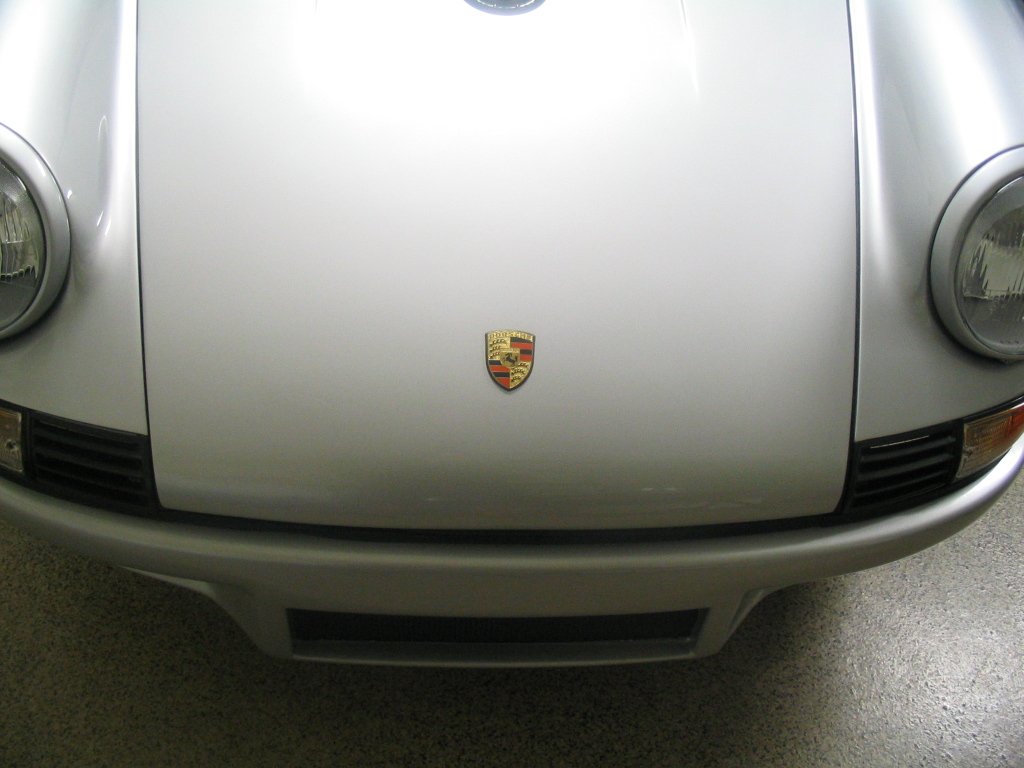
Still waiting on the wheels... In the meantime, here is the latest addition. New orange-bar emblem.
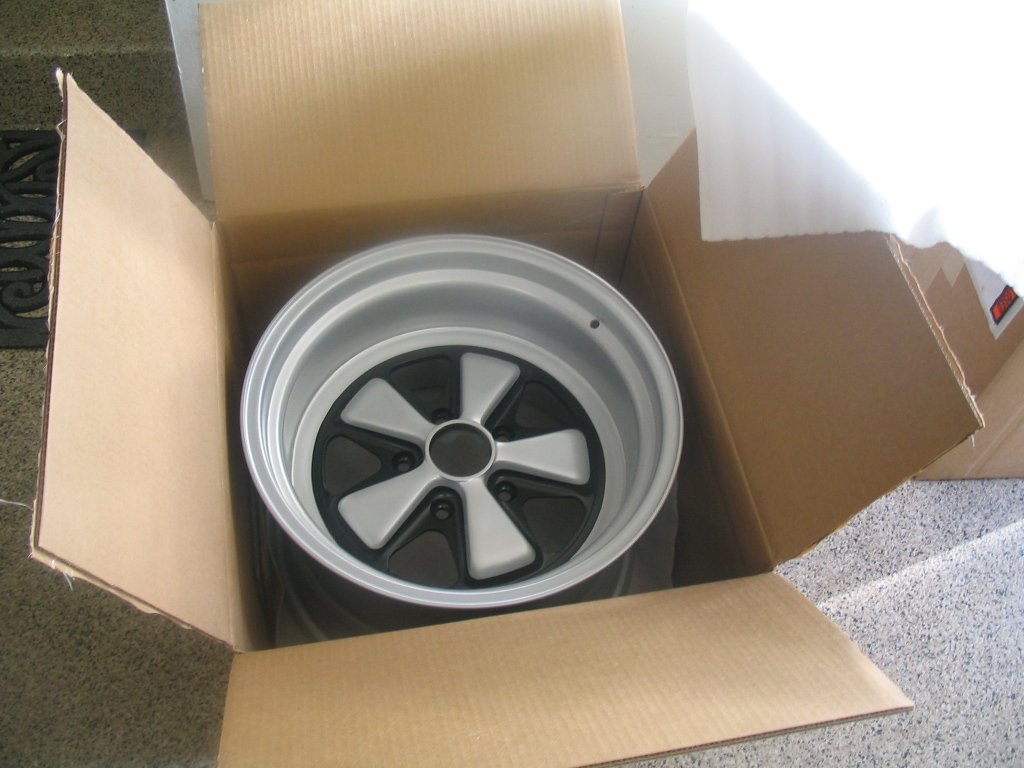
Hot off the UPS truck!!! The 17X11 wheels are here! They're powdercoated and the silver is very close to the color of the car.
The fronts are still on back-order and should be in soon!
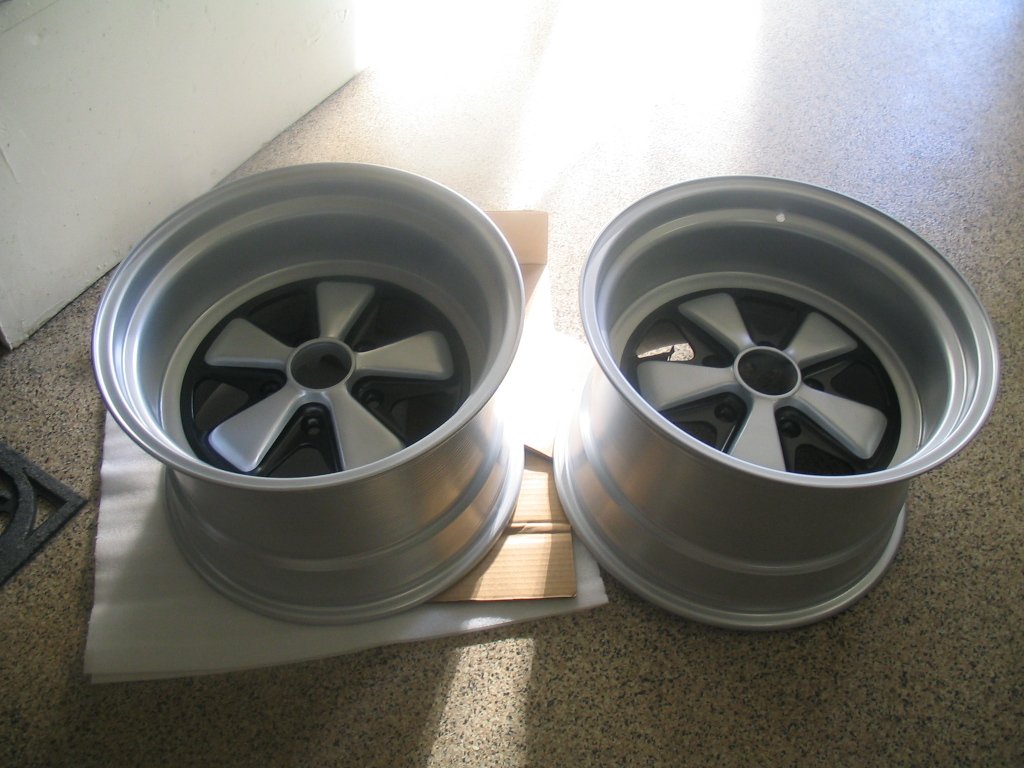
Test fit, just need some rubber. I'm very pleased with the quality and workmaship from Mike Lindsey.
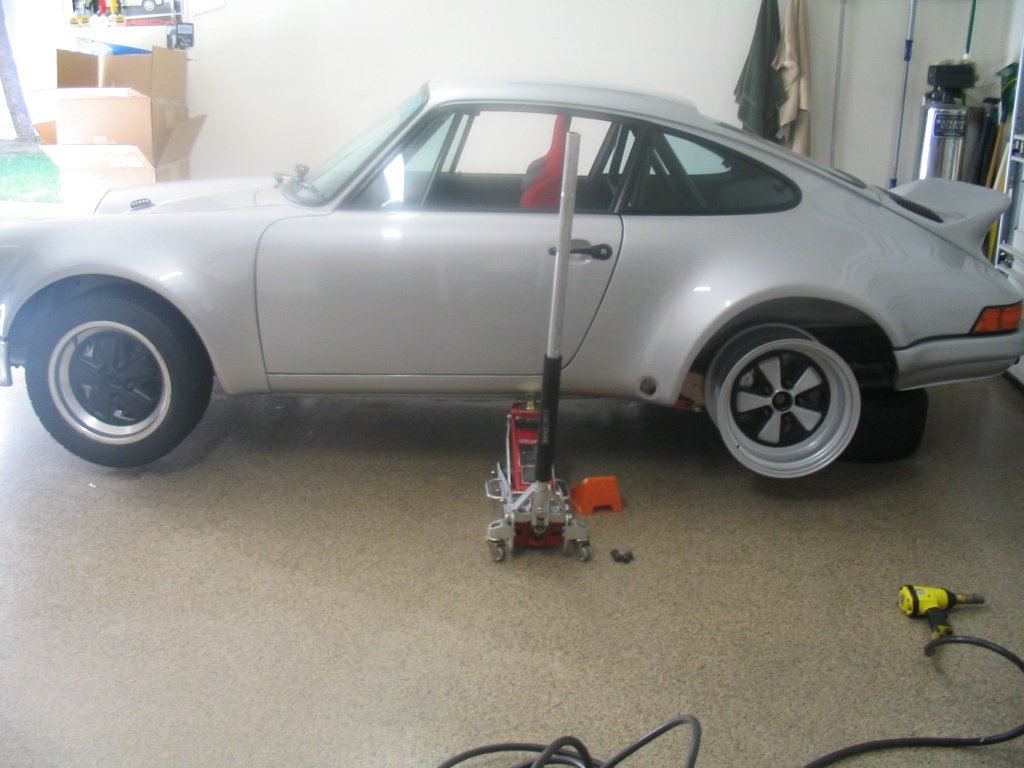
New rubber installed on the rear wheels - Goodyear Eagle F1 285/40/17 tires. The front wheels are due in about one week.
Front wheels are in!! 17X9 Lindseys with offset for turbo hubs and to clear shock springs - Goodyear Eagle F1 245/40/17 tires.
Back from Jae's at Mirage, aligned, lowered and corner balanced. Driver's door mirror also installed.
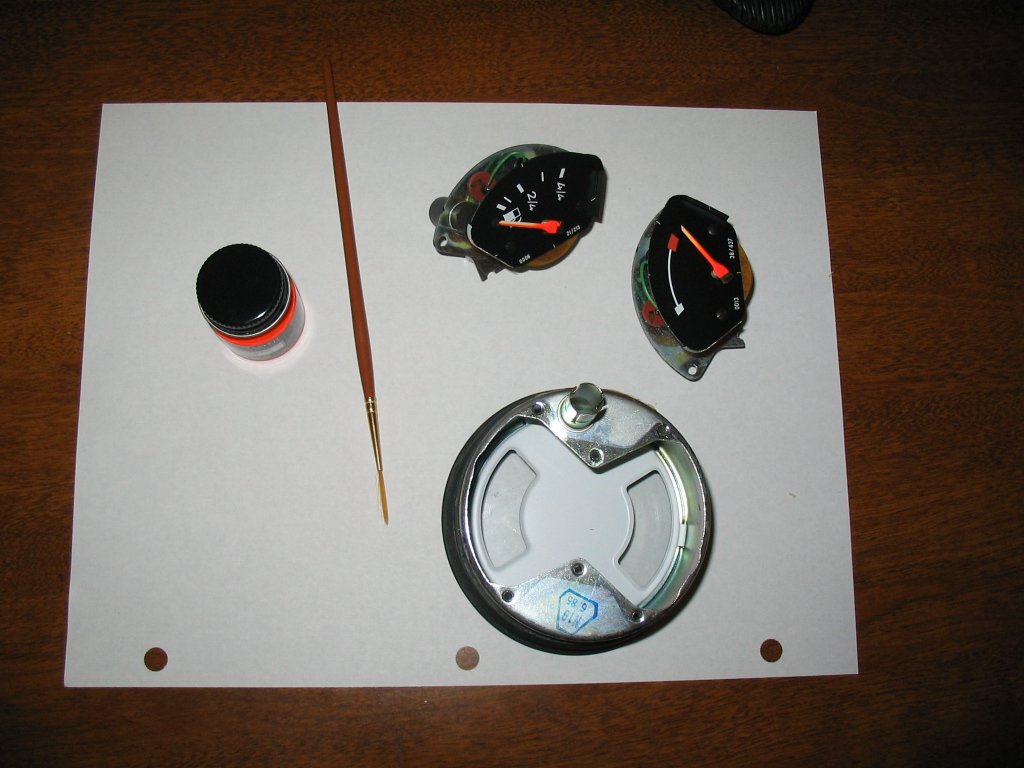
Small detail - touch up paint on sun faded gauge needles. Because of its location on the dash, the fuel gauge gets quite a bit of sun.
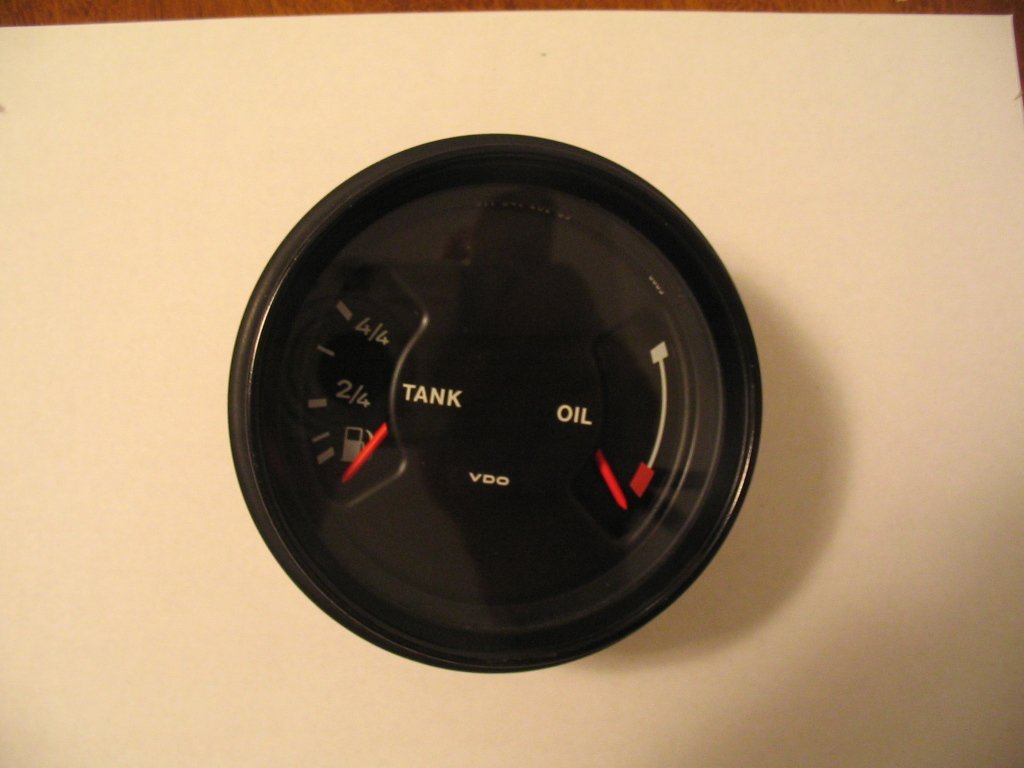
Back together and looking much better. The paint used is "Model Master Flourescent Red", about $5 at a hobby store.
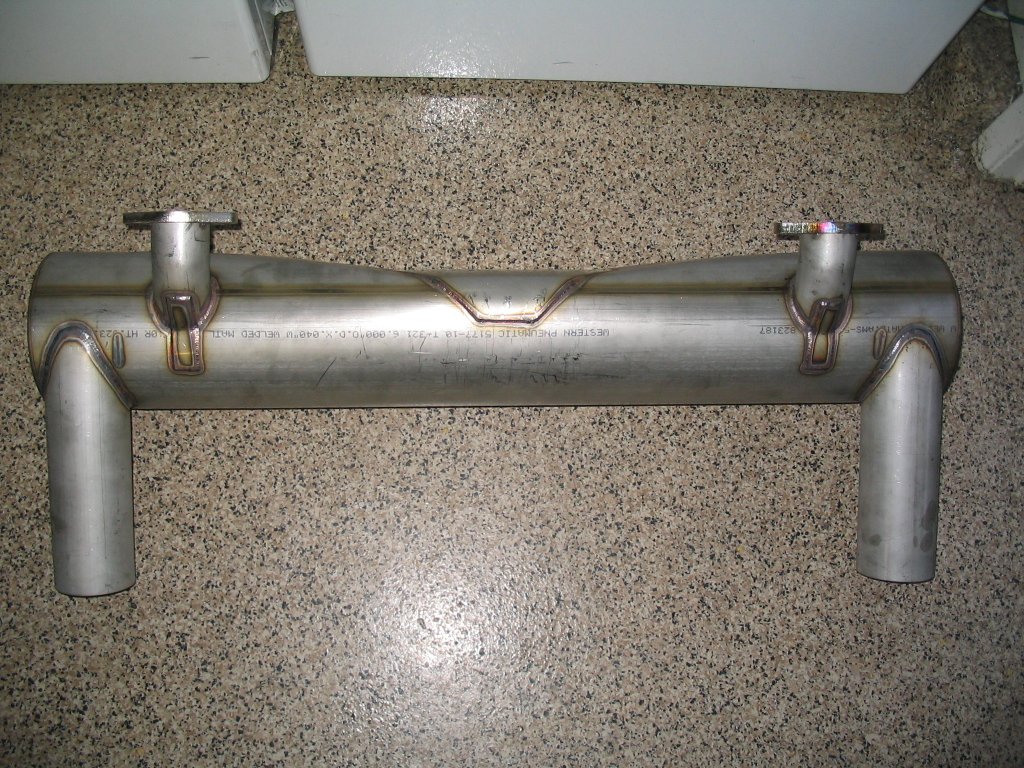
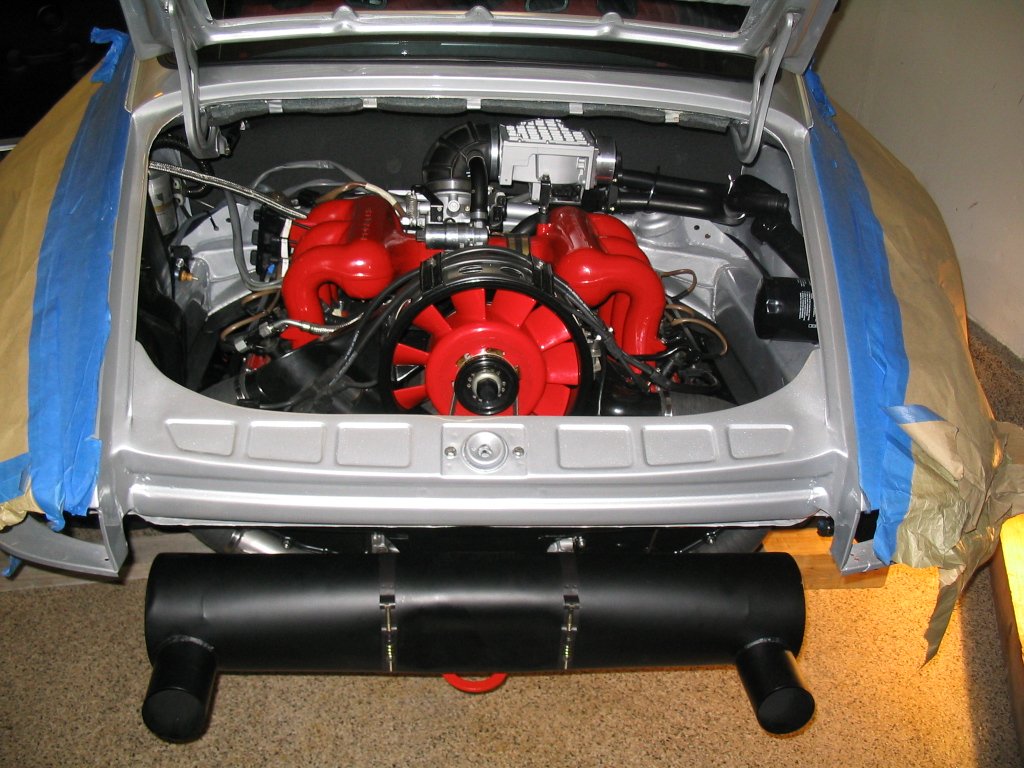
New GEN 4 muffler from M&K. Quieter than the original non-baffle muffler but not lacking any of the "good sound"
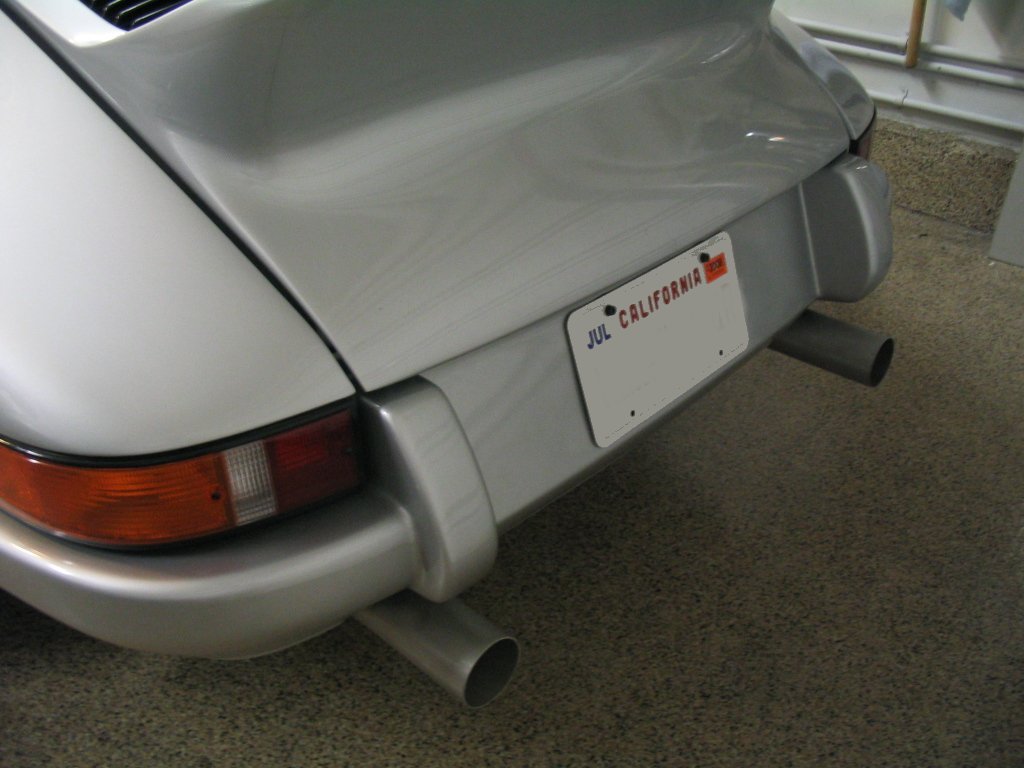
The new muffler installed. Great overall improvement and I'm sure the neighbors appreciate it!
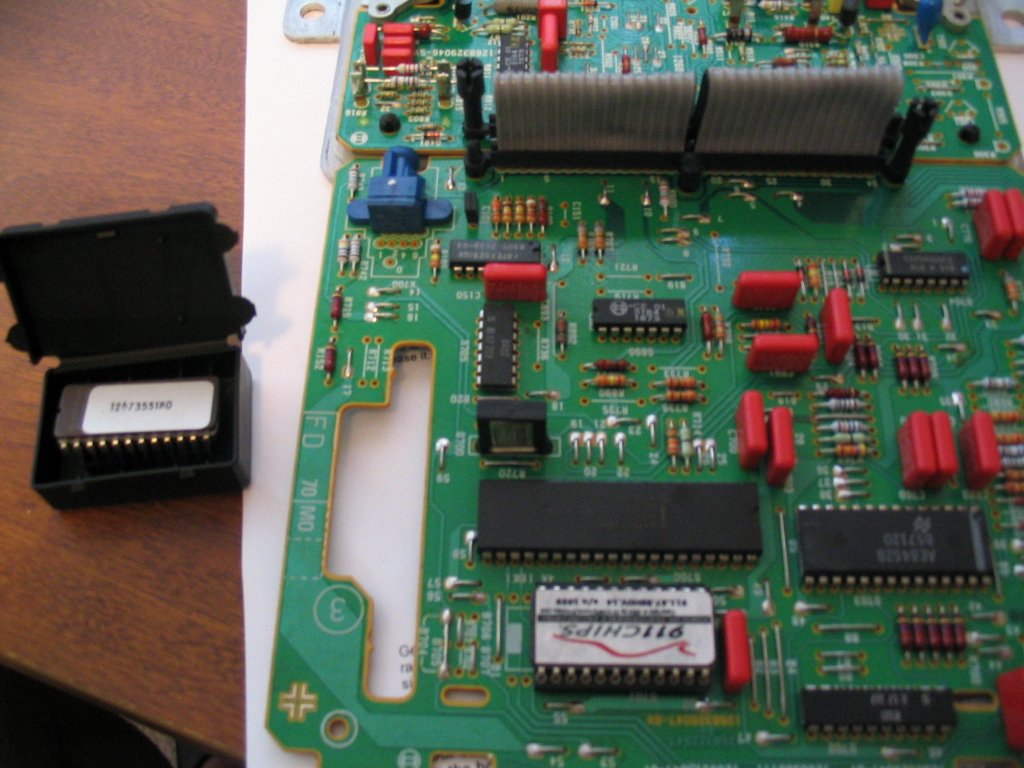
Performance chip installed to take advantage of the SSIs and the sport muffler.
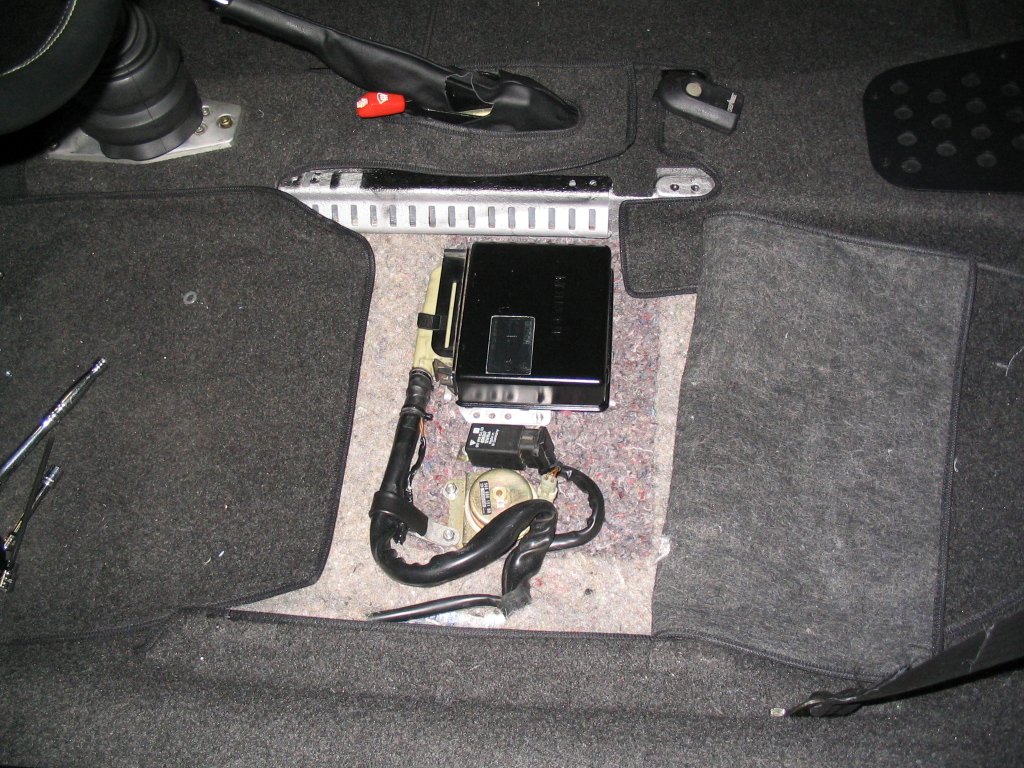
DME back together. It's a lot easier to work on it by removing the seat.
I took the car to a local porsche shop to investigate a chain tensioner noise and check the air/fuel mixture.
It took a few days, but the engine is running better than ever! A big thanks to Steve Grosekemper from Dieter's.
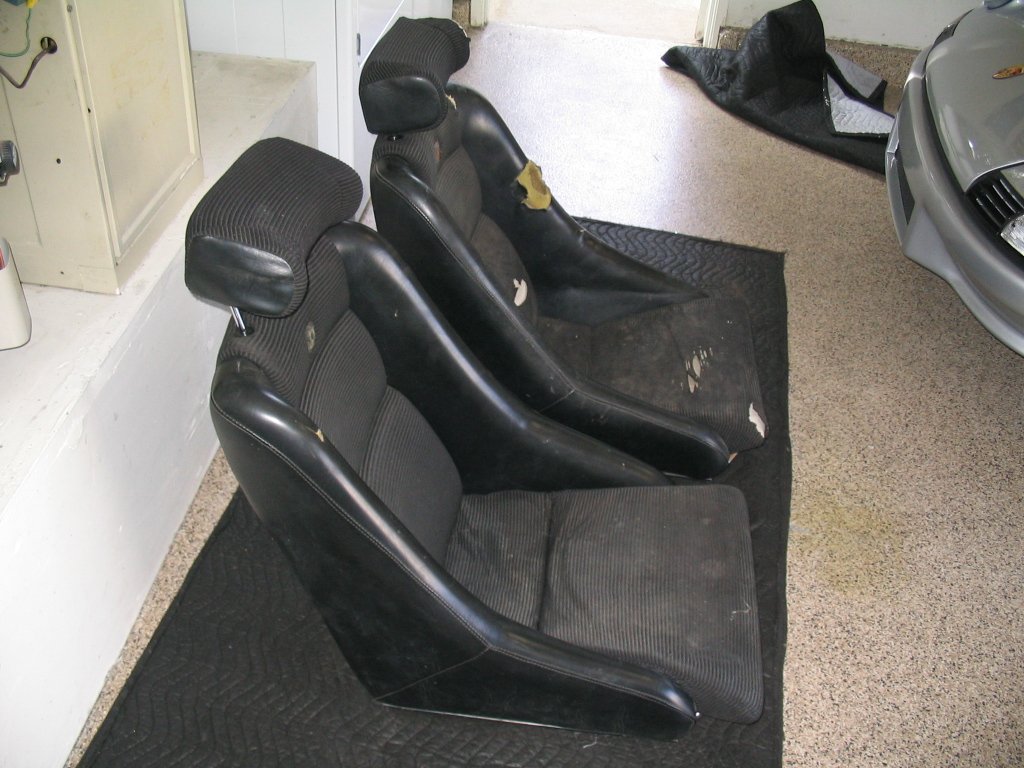
I decided to change the sparco seats for something more period correct. A pair of real scheel seats. Thanks Mark!

Here is all the hardware required to mount the seats. Ready for sandblasting and powdercoating.
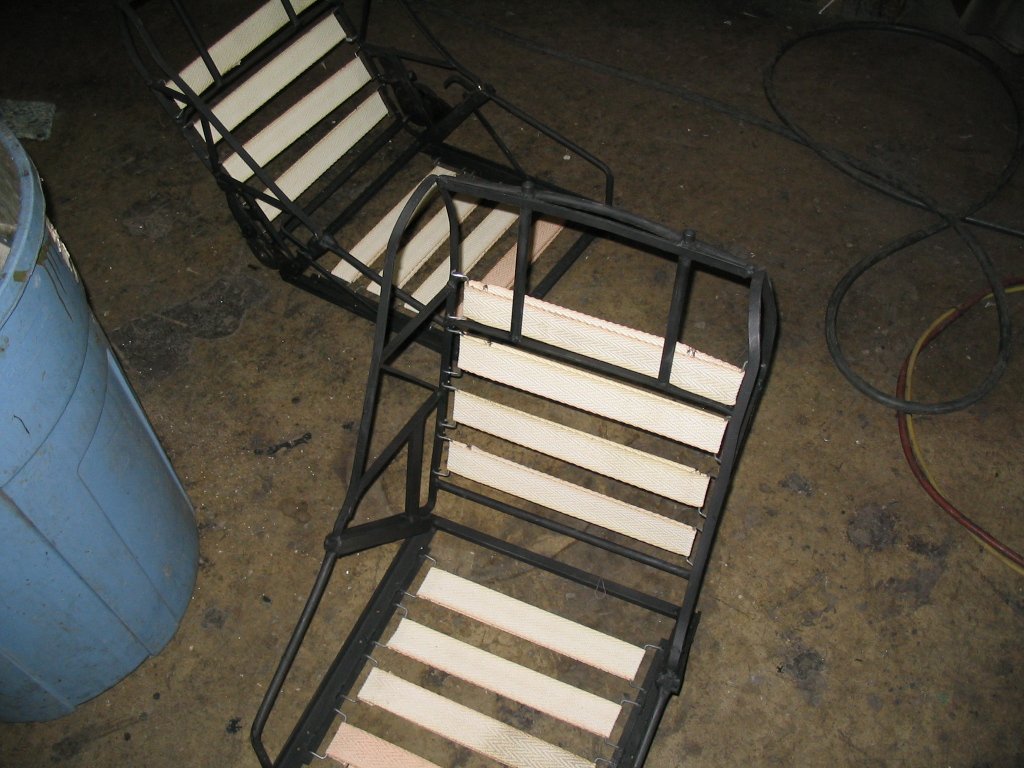
The seats at the upholstery shop. If you notice, the driver side frame has a built-in tilting mechanism.

It took a couple of weeks but the seats look great. We decided to use a 6-wale corduroy for the centers and headrest.
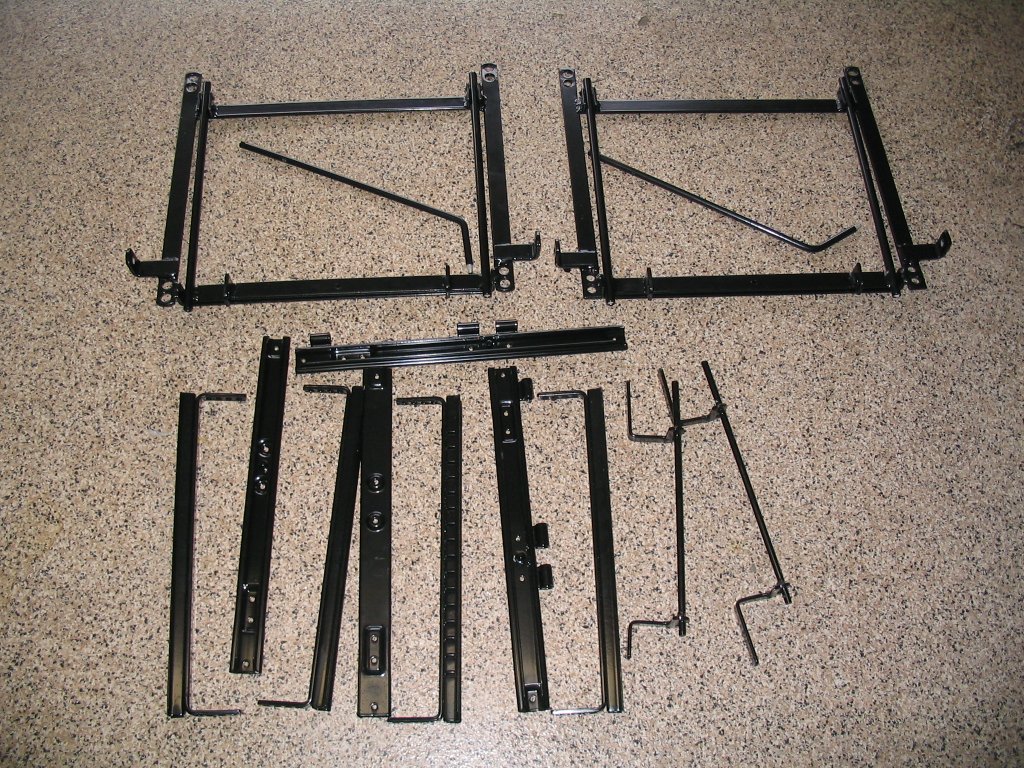
Here is all the hardware back from the powdercoaters.
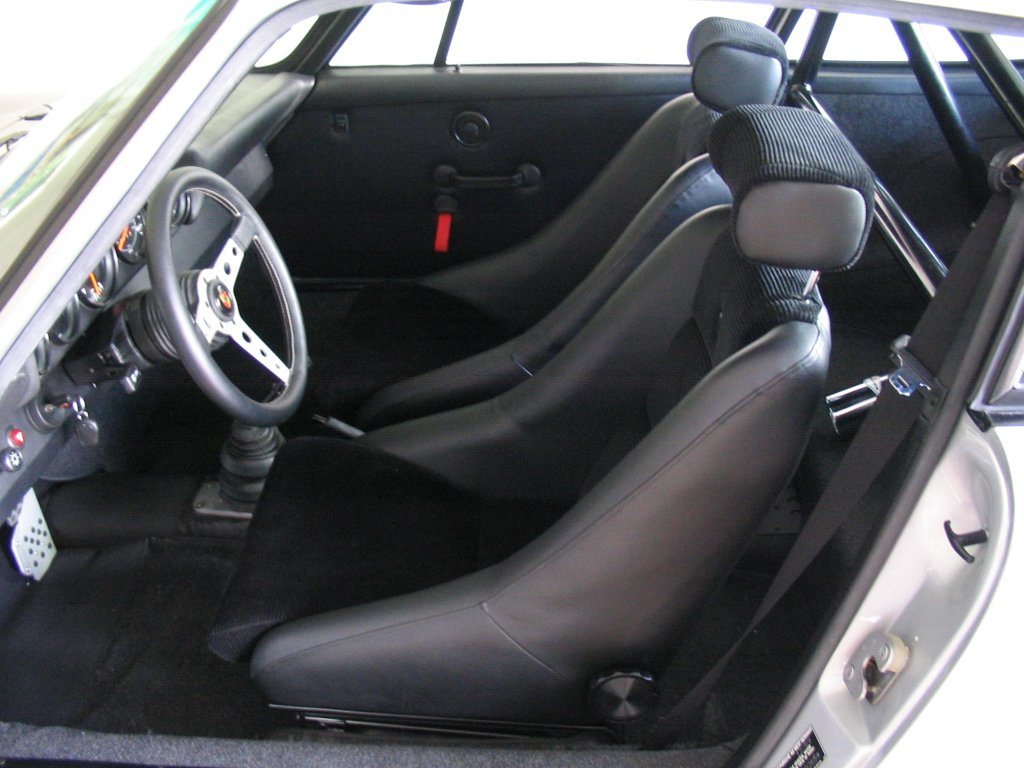
Here they are! They're extremely confortable - not bad for 30 year old seats!
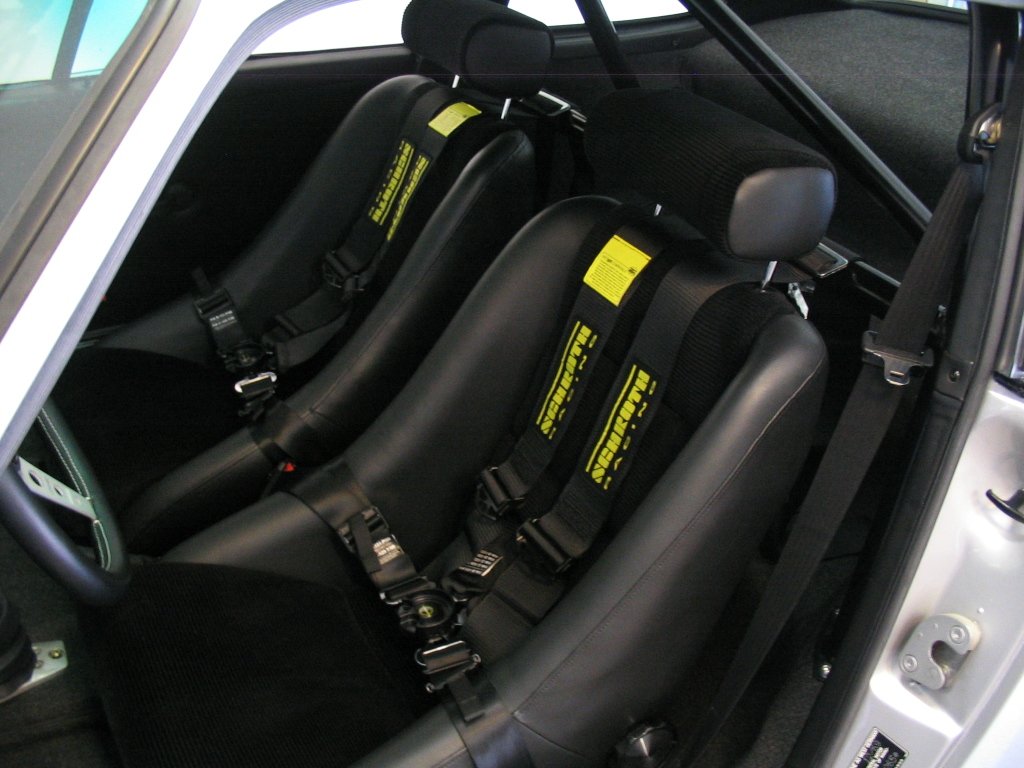
Both restraint systems installed, 3 point OEM and 4 point schroth belts.
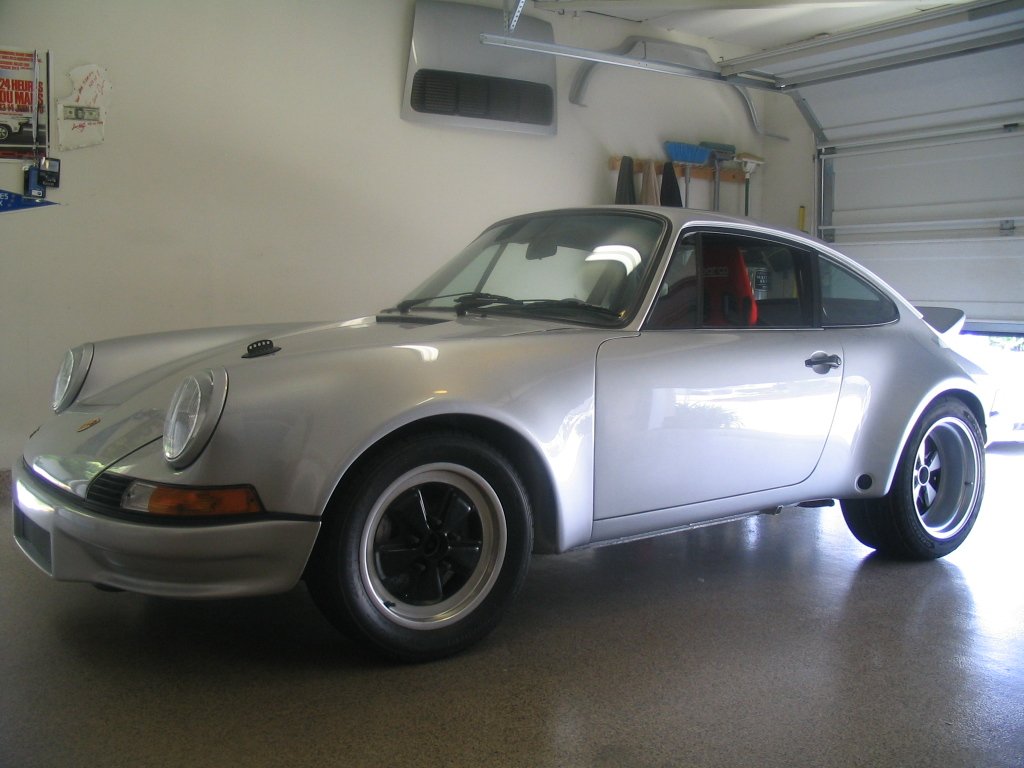
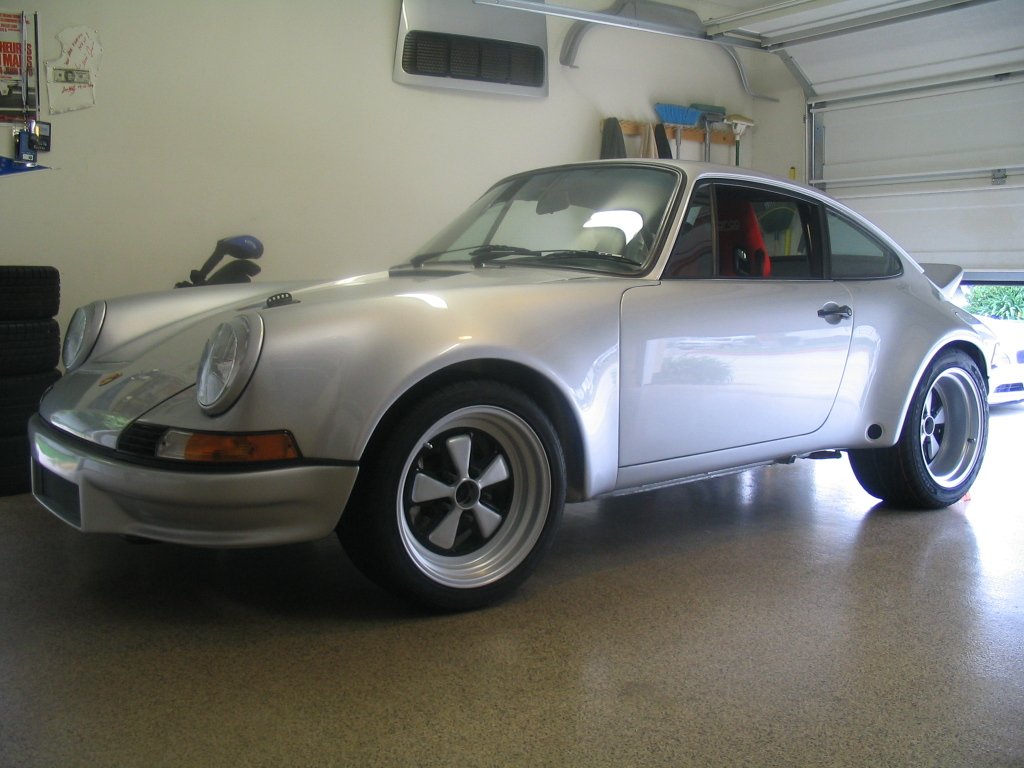
Here is the latest pic with the scheel seats installed.
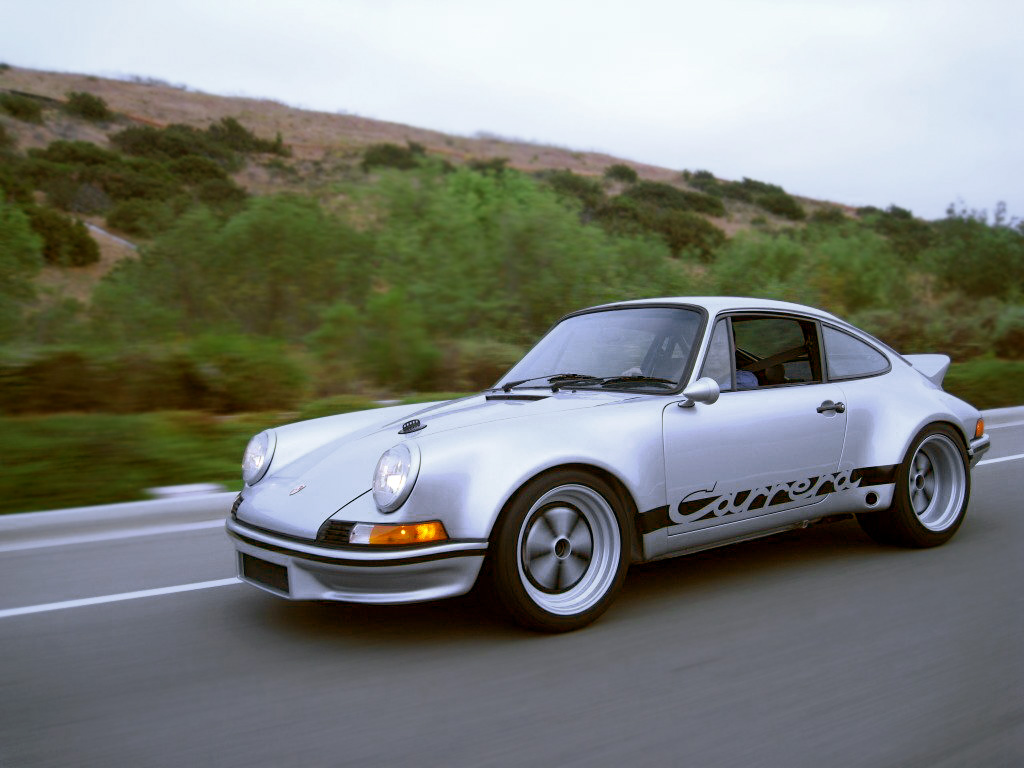
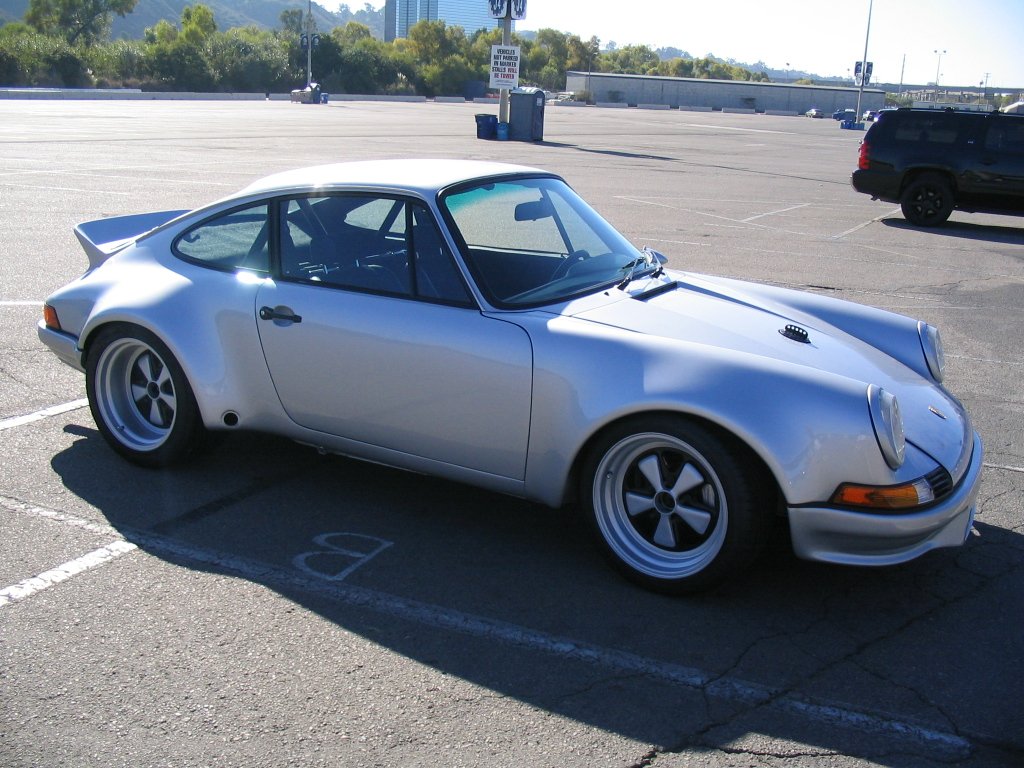
I think it's safe to say... I AM DONE!!!
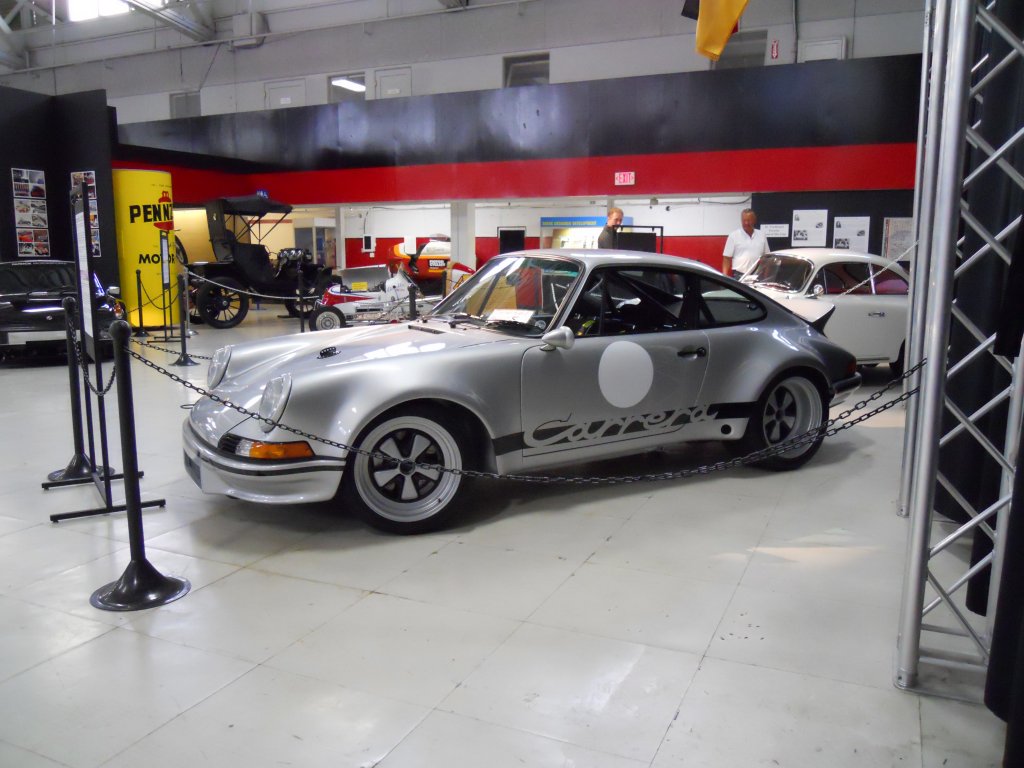
At the San Diego Automotive Museum for their 2 month long porsche display.
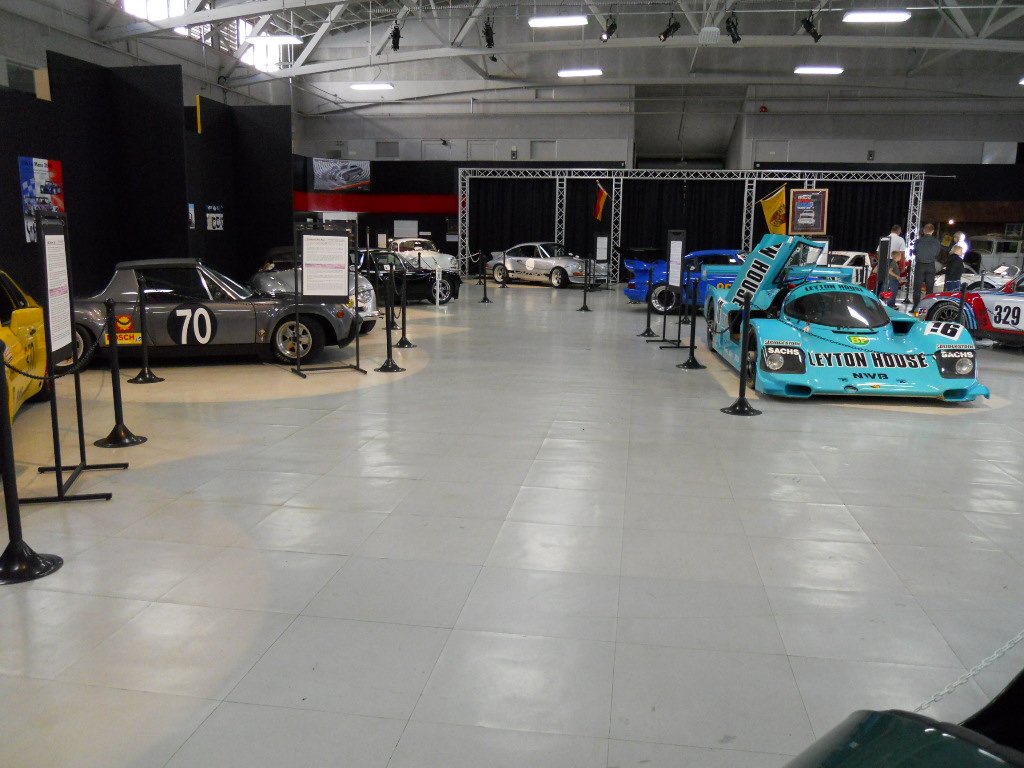
In great company.